Send Posts to Another Site
Select posts and send them directly to another WordPress site in your project
RightPlace can send posts from one WordPress site to another without exporting files. Select the posts you want, pick the target site, map the fields, and send. Custom fields (ACF, Meta Box) are included.
Before you start
- A WordPress site connected and fully paired
- At least two WordPress sites in your project
- Posts on the source site you want to transfer
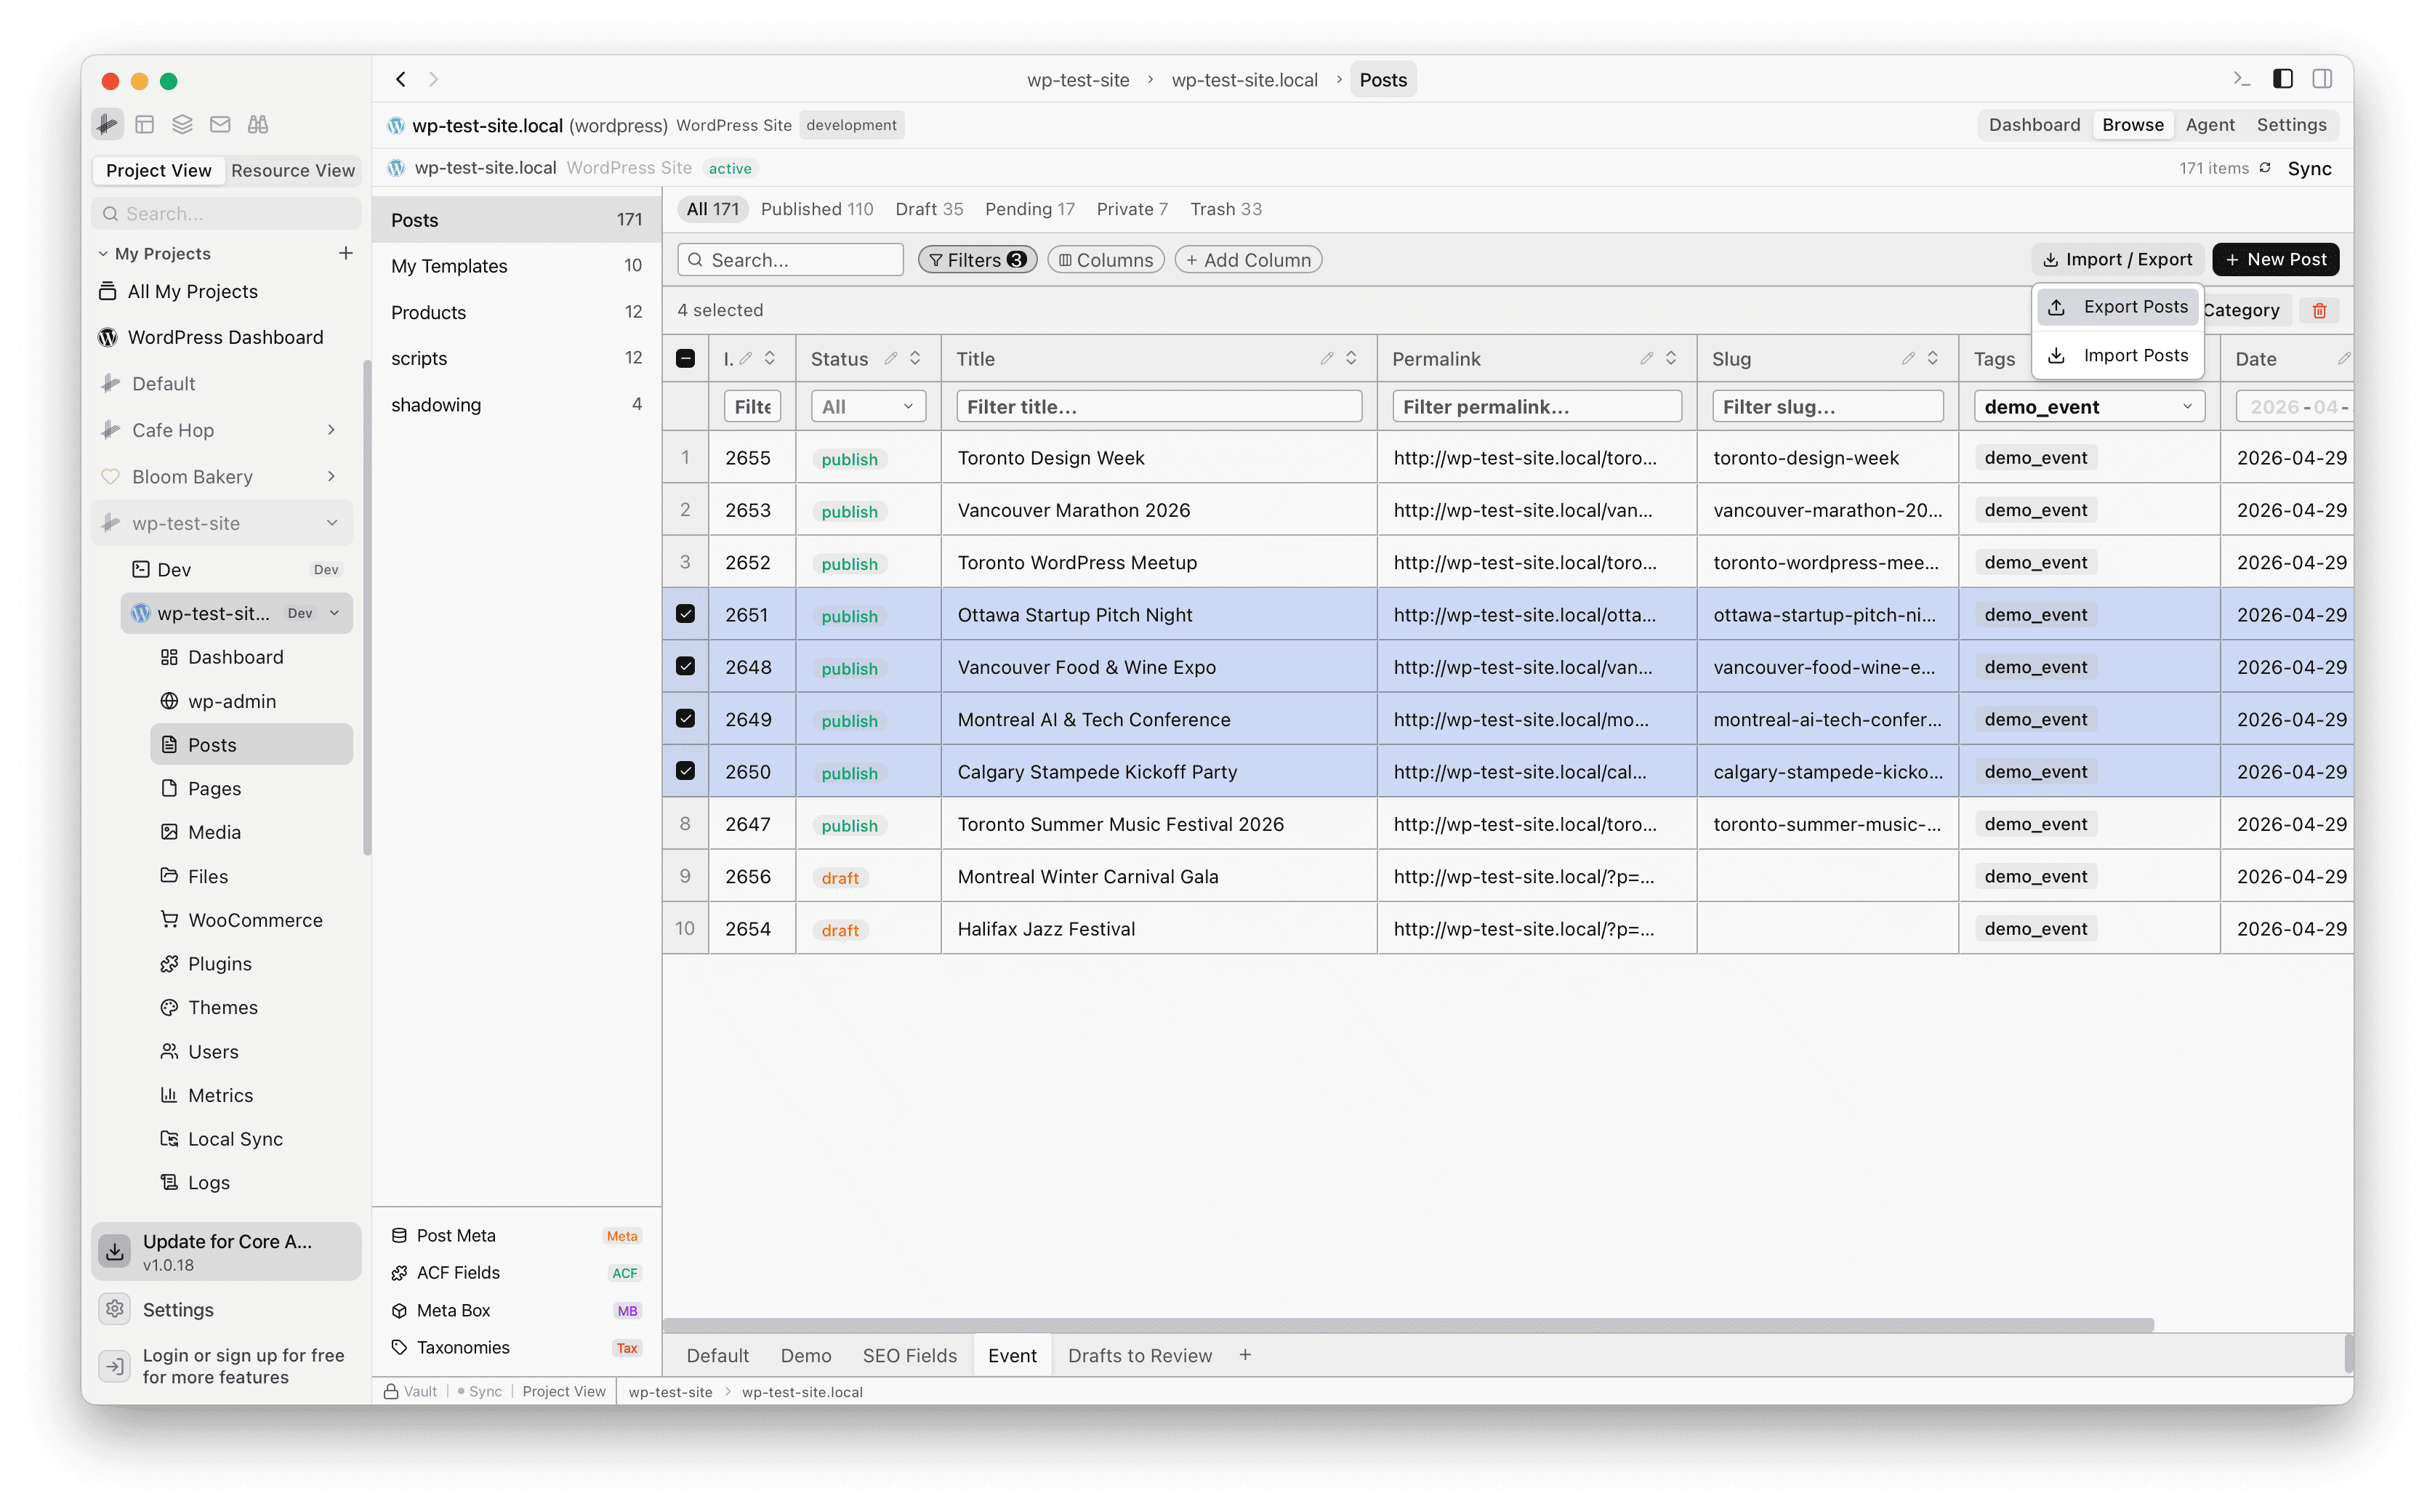
Step 1: Select posts and open Export
In the Posts tab, select the posts you want to send. Click Import / Export in the toolbar, then choose Export Posts.
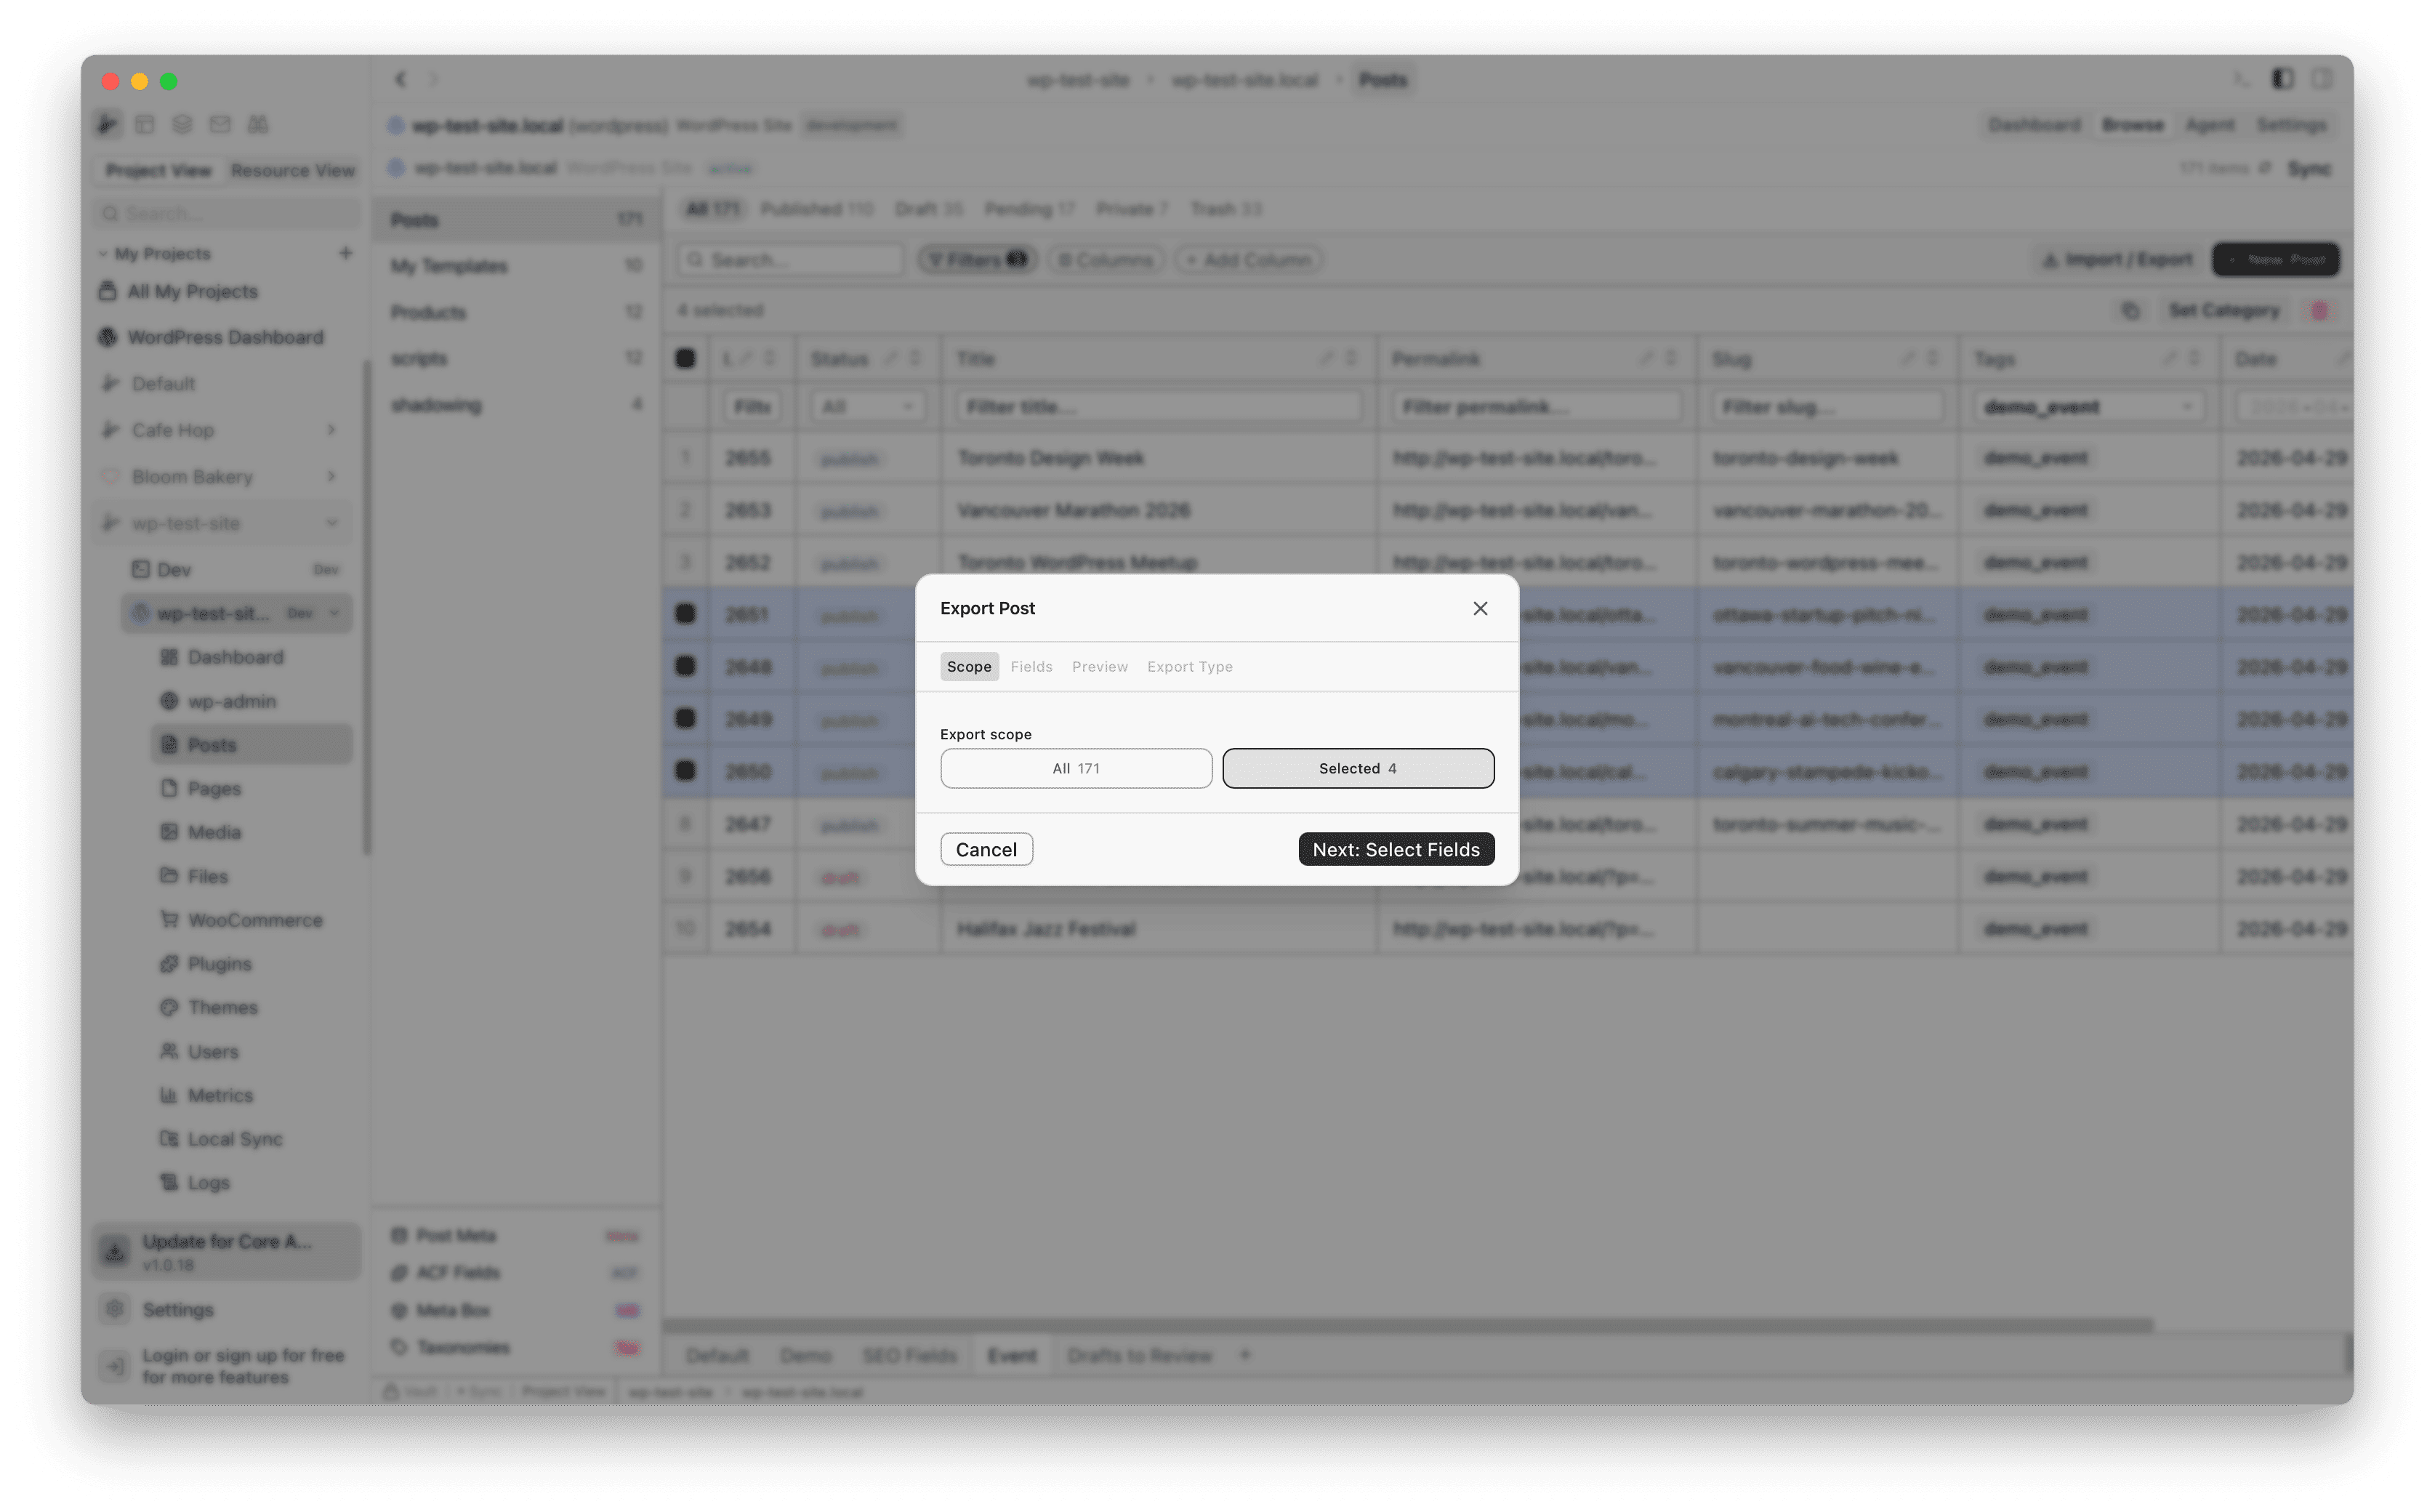
Step 2: Choose export scope
The Scope tab lets you choose between exporting all posts or only the ones you selected. Pick Selected to send just the posts you checked.
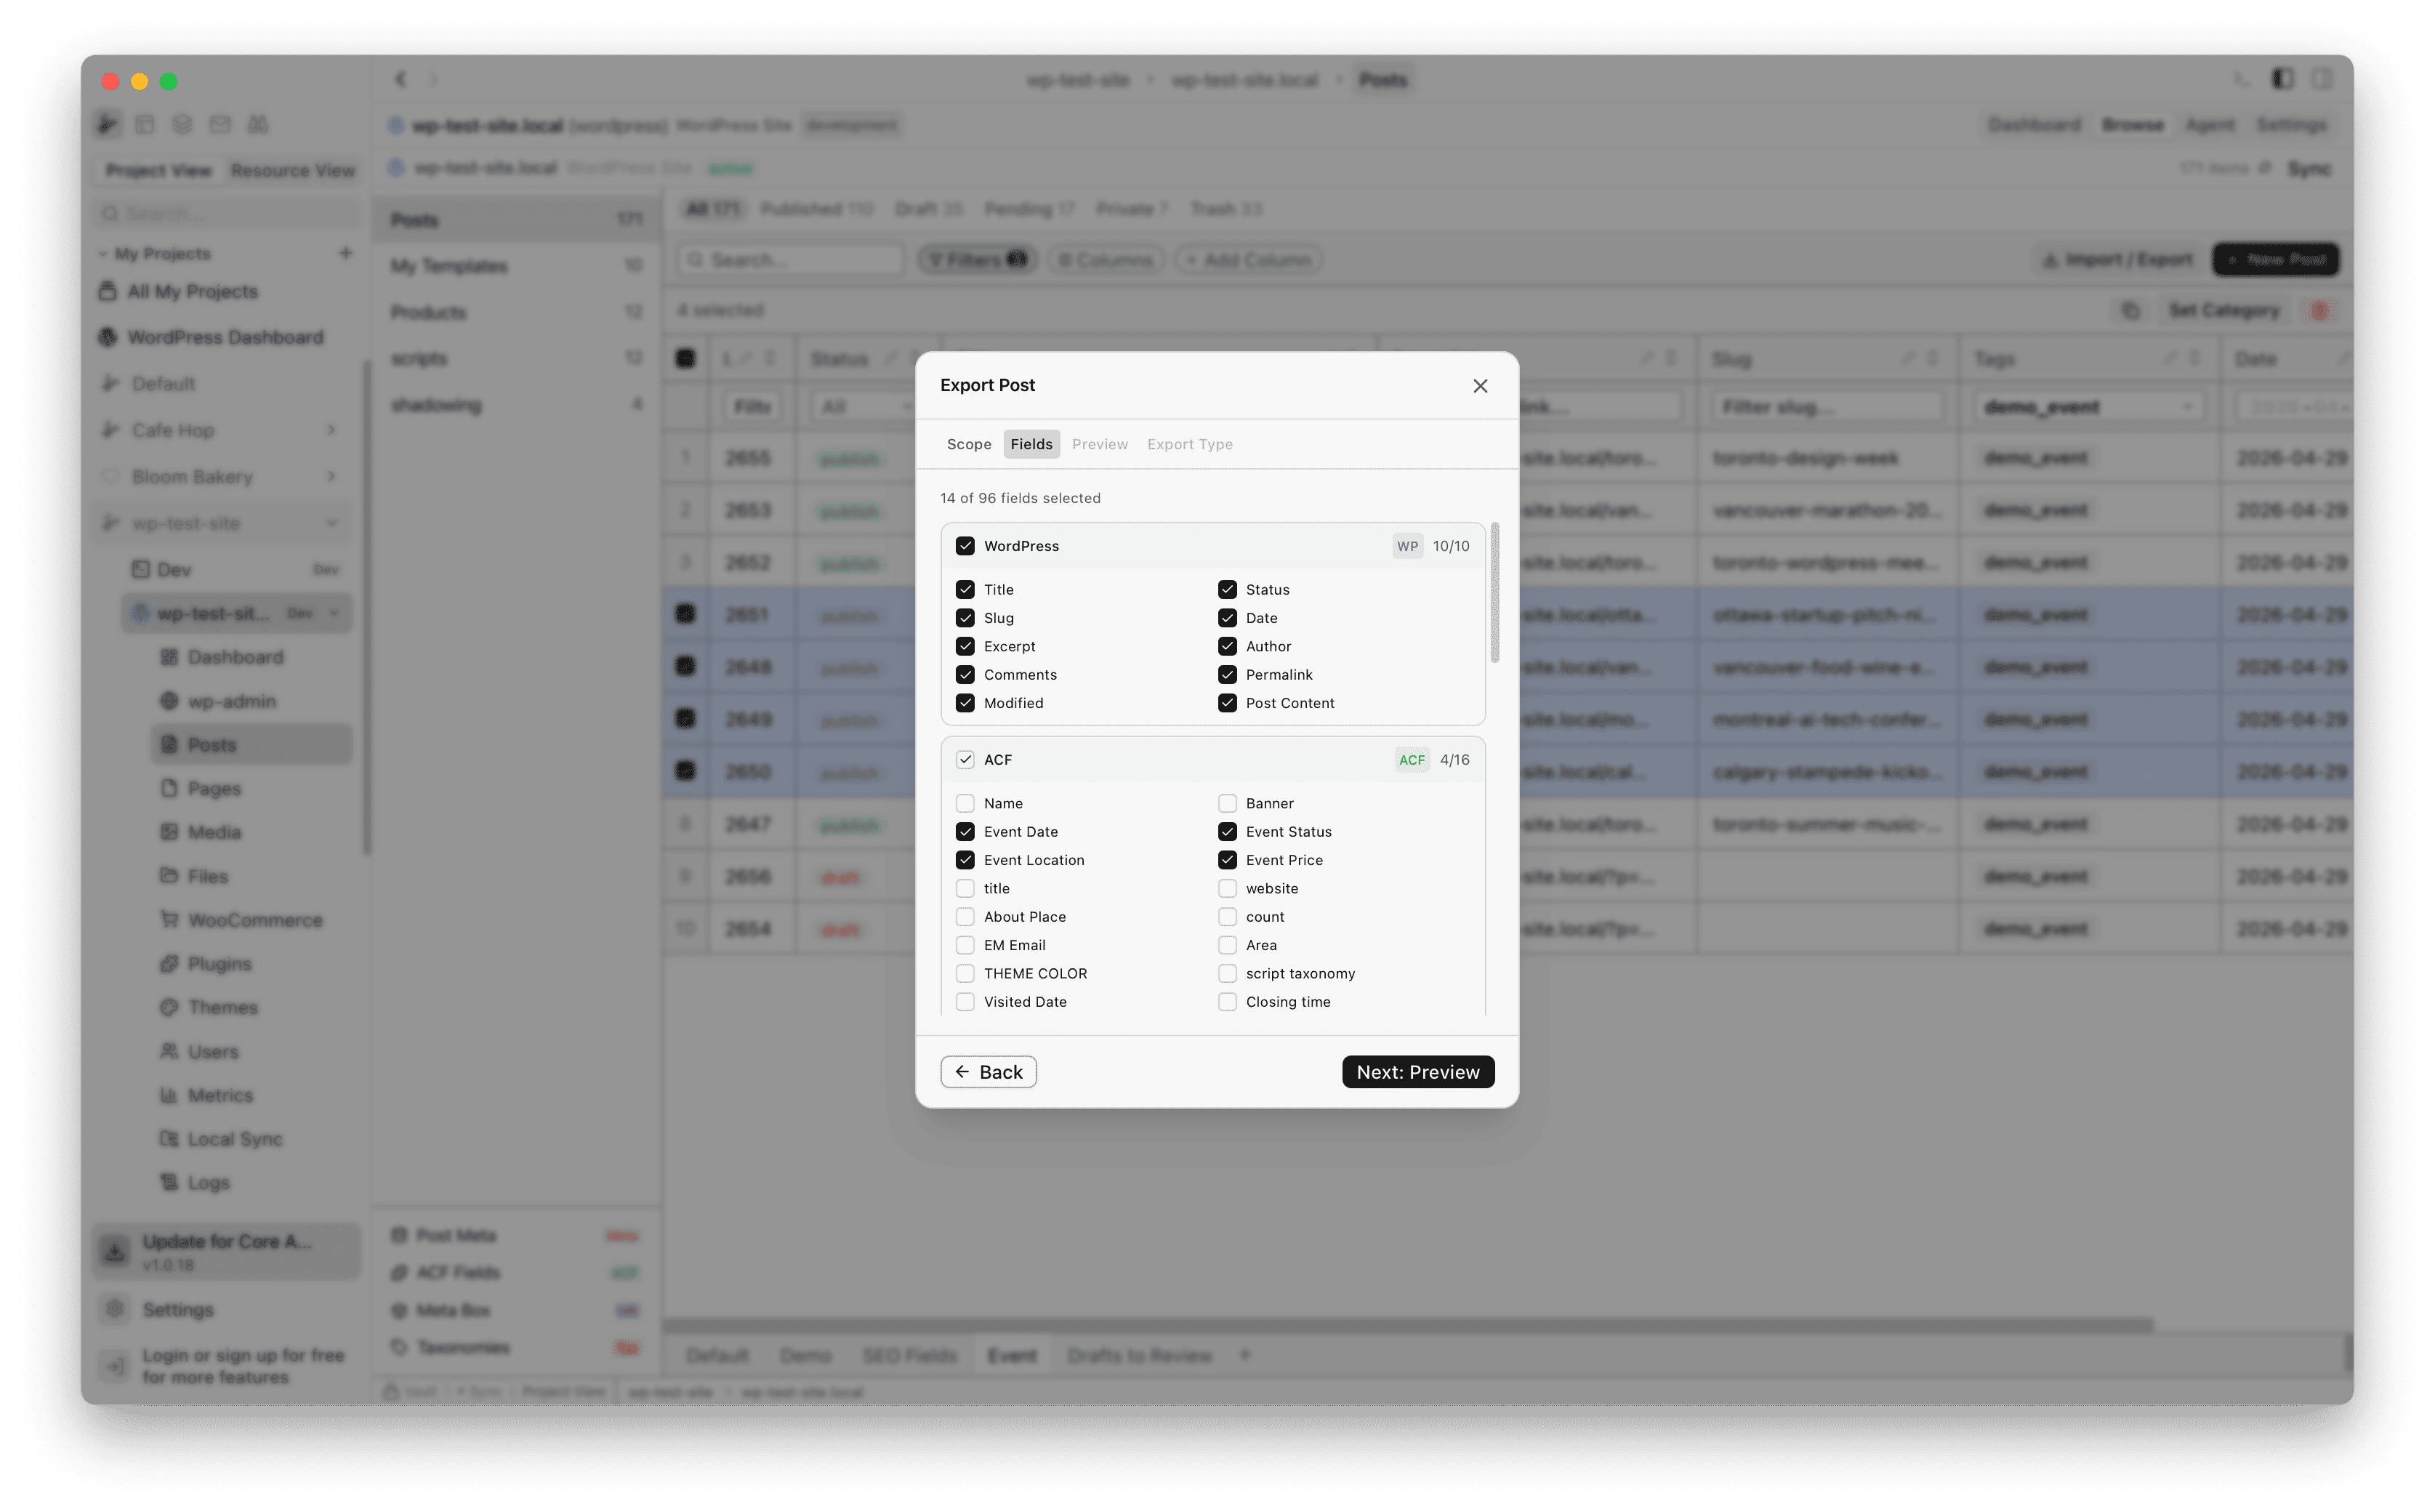
Step 3: Pick the fields to include
On the Fields tab, check the fields you want to transfer. WordPress core fields (Title, Status, Slug, Date, etc.) are selected by default. Expand the ACF or Meta Box sections to include custom fields.
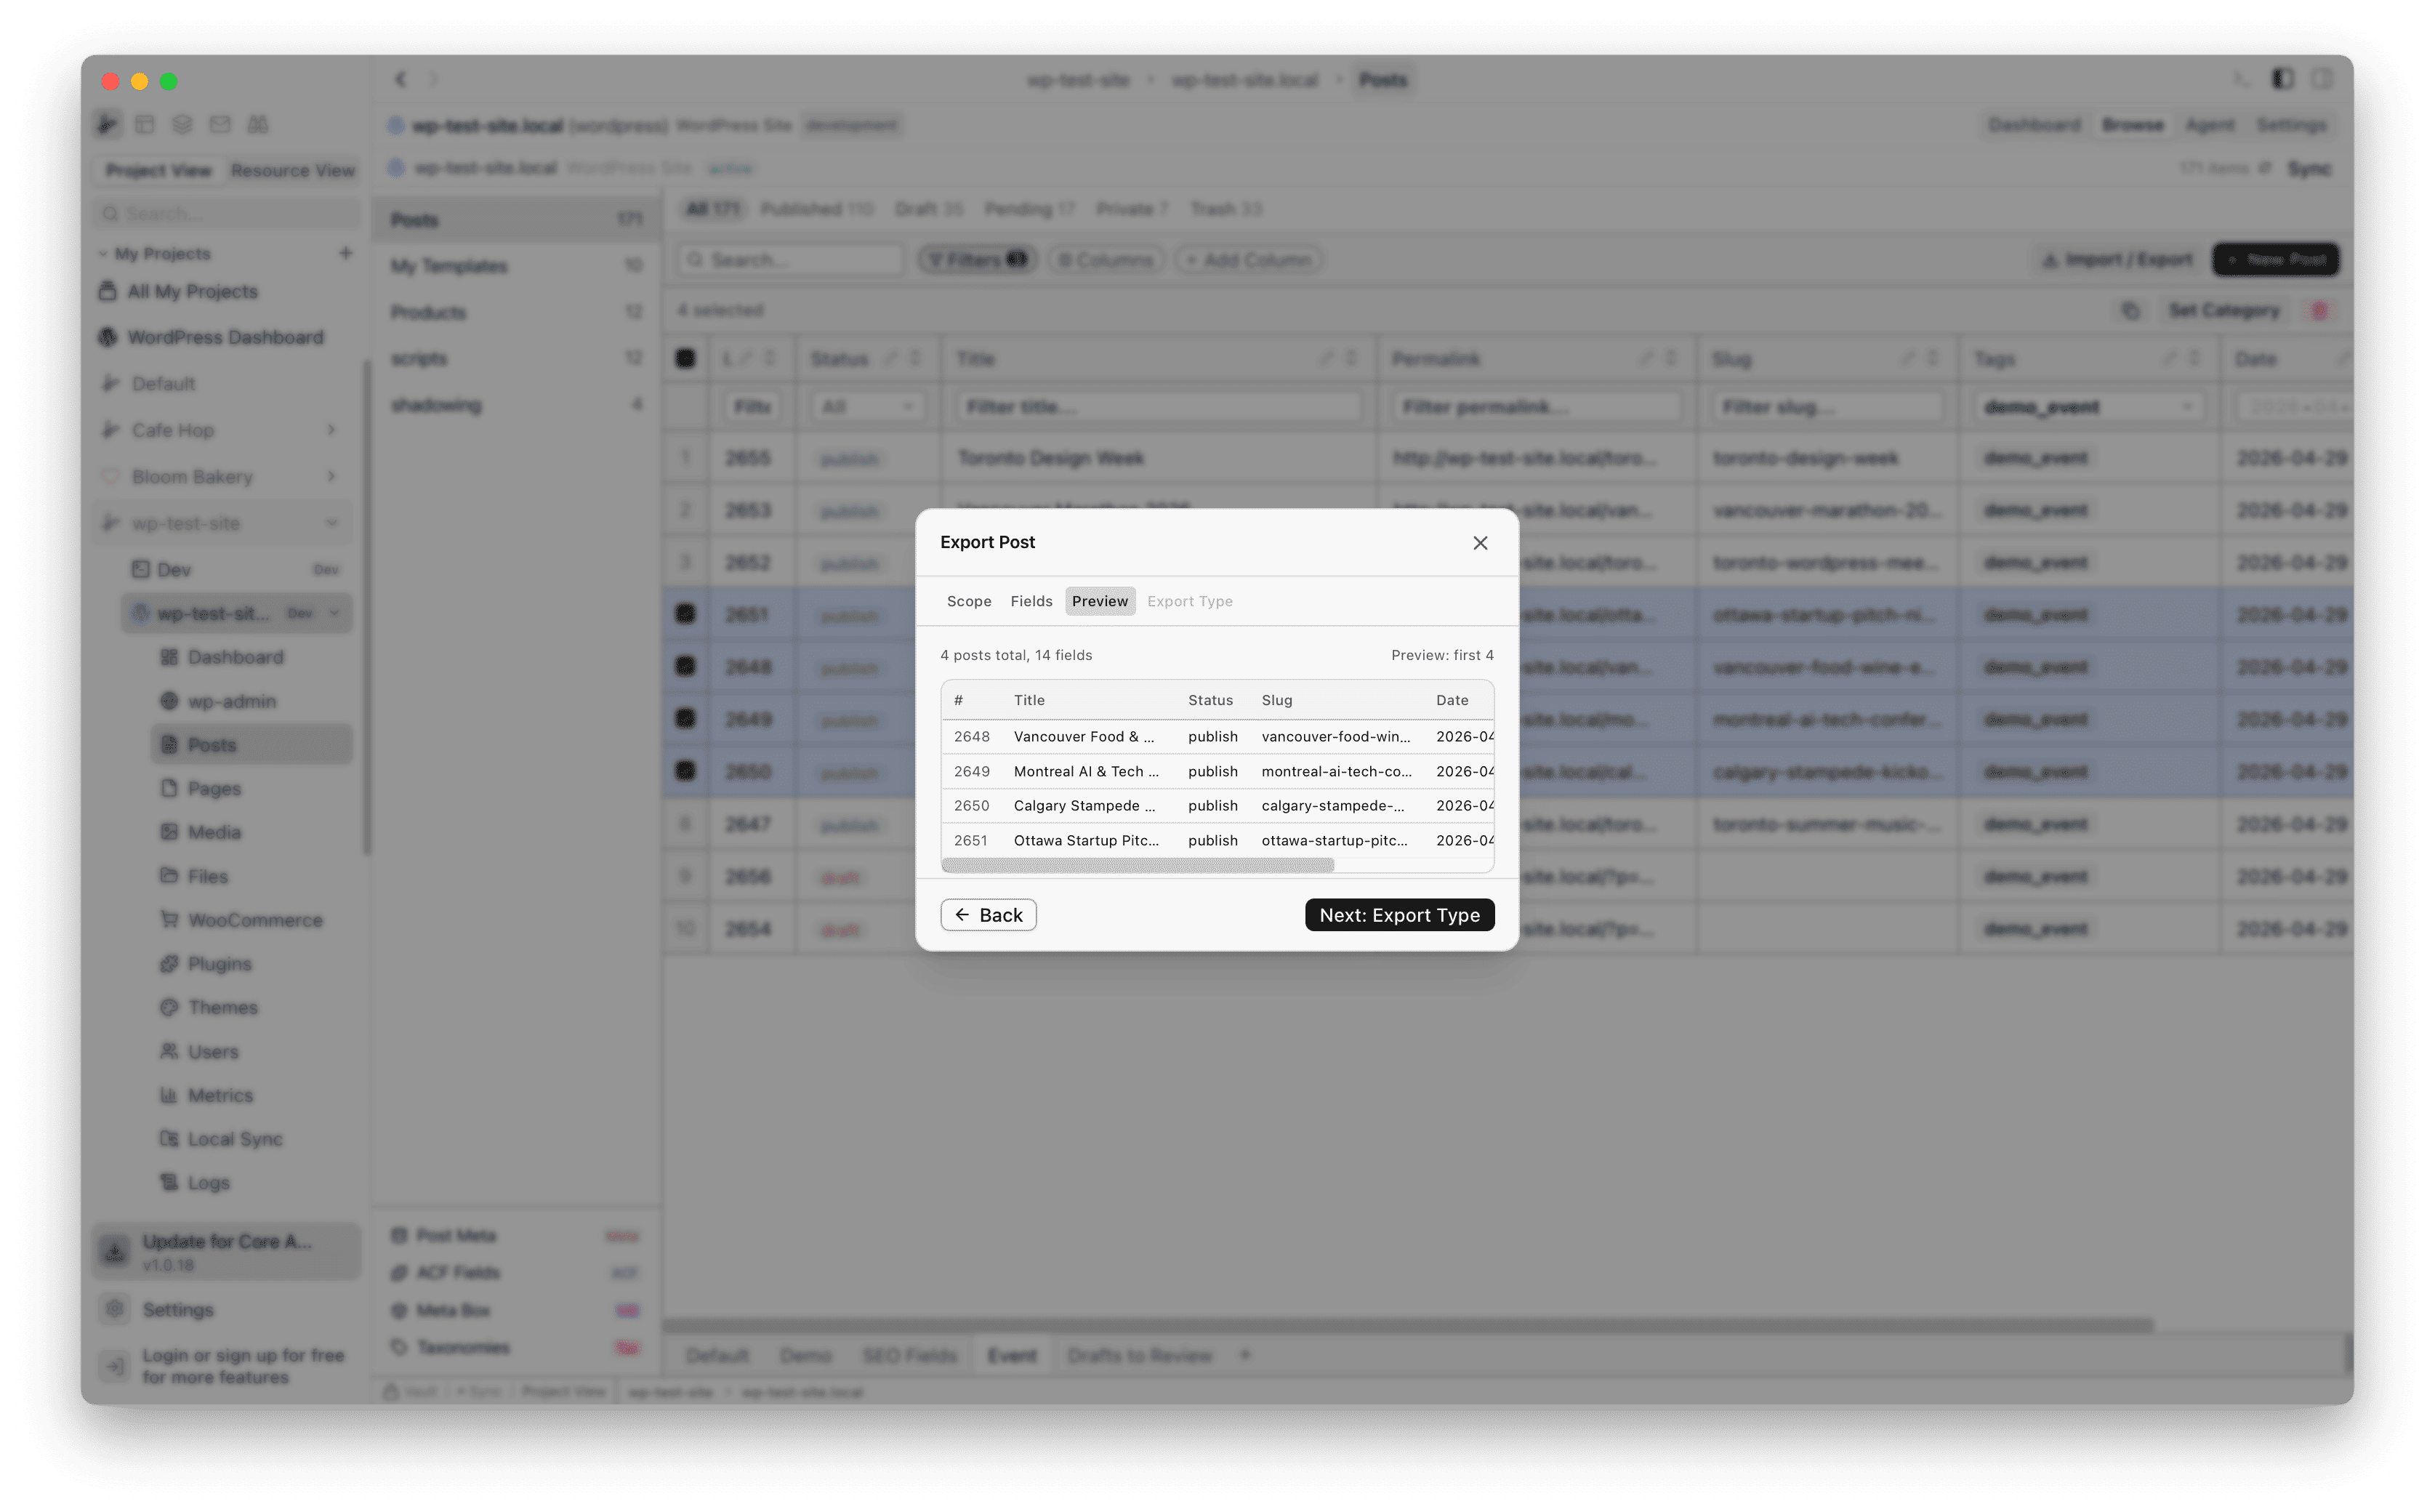
Step 4: Preview before sending
The Preview tab shows a summary of what will be sent: post count, field count, and a table preview of the selected posts.
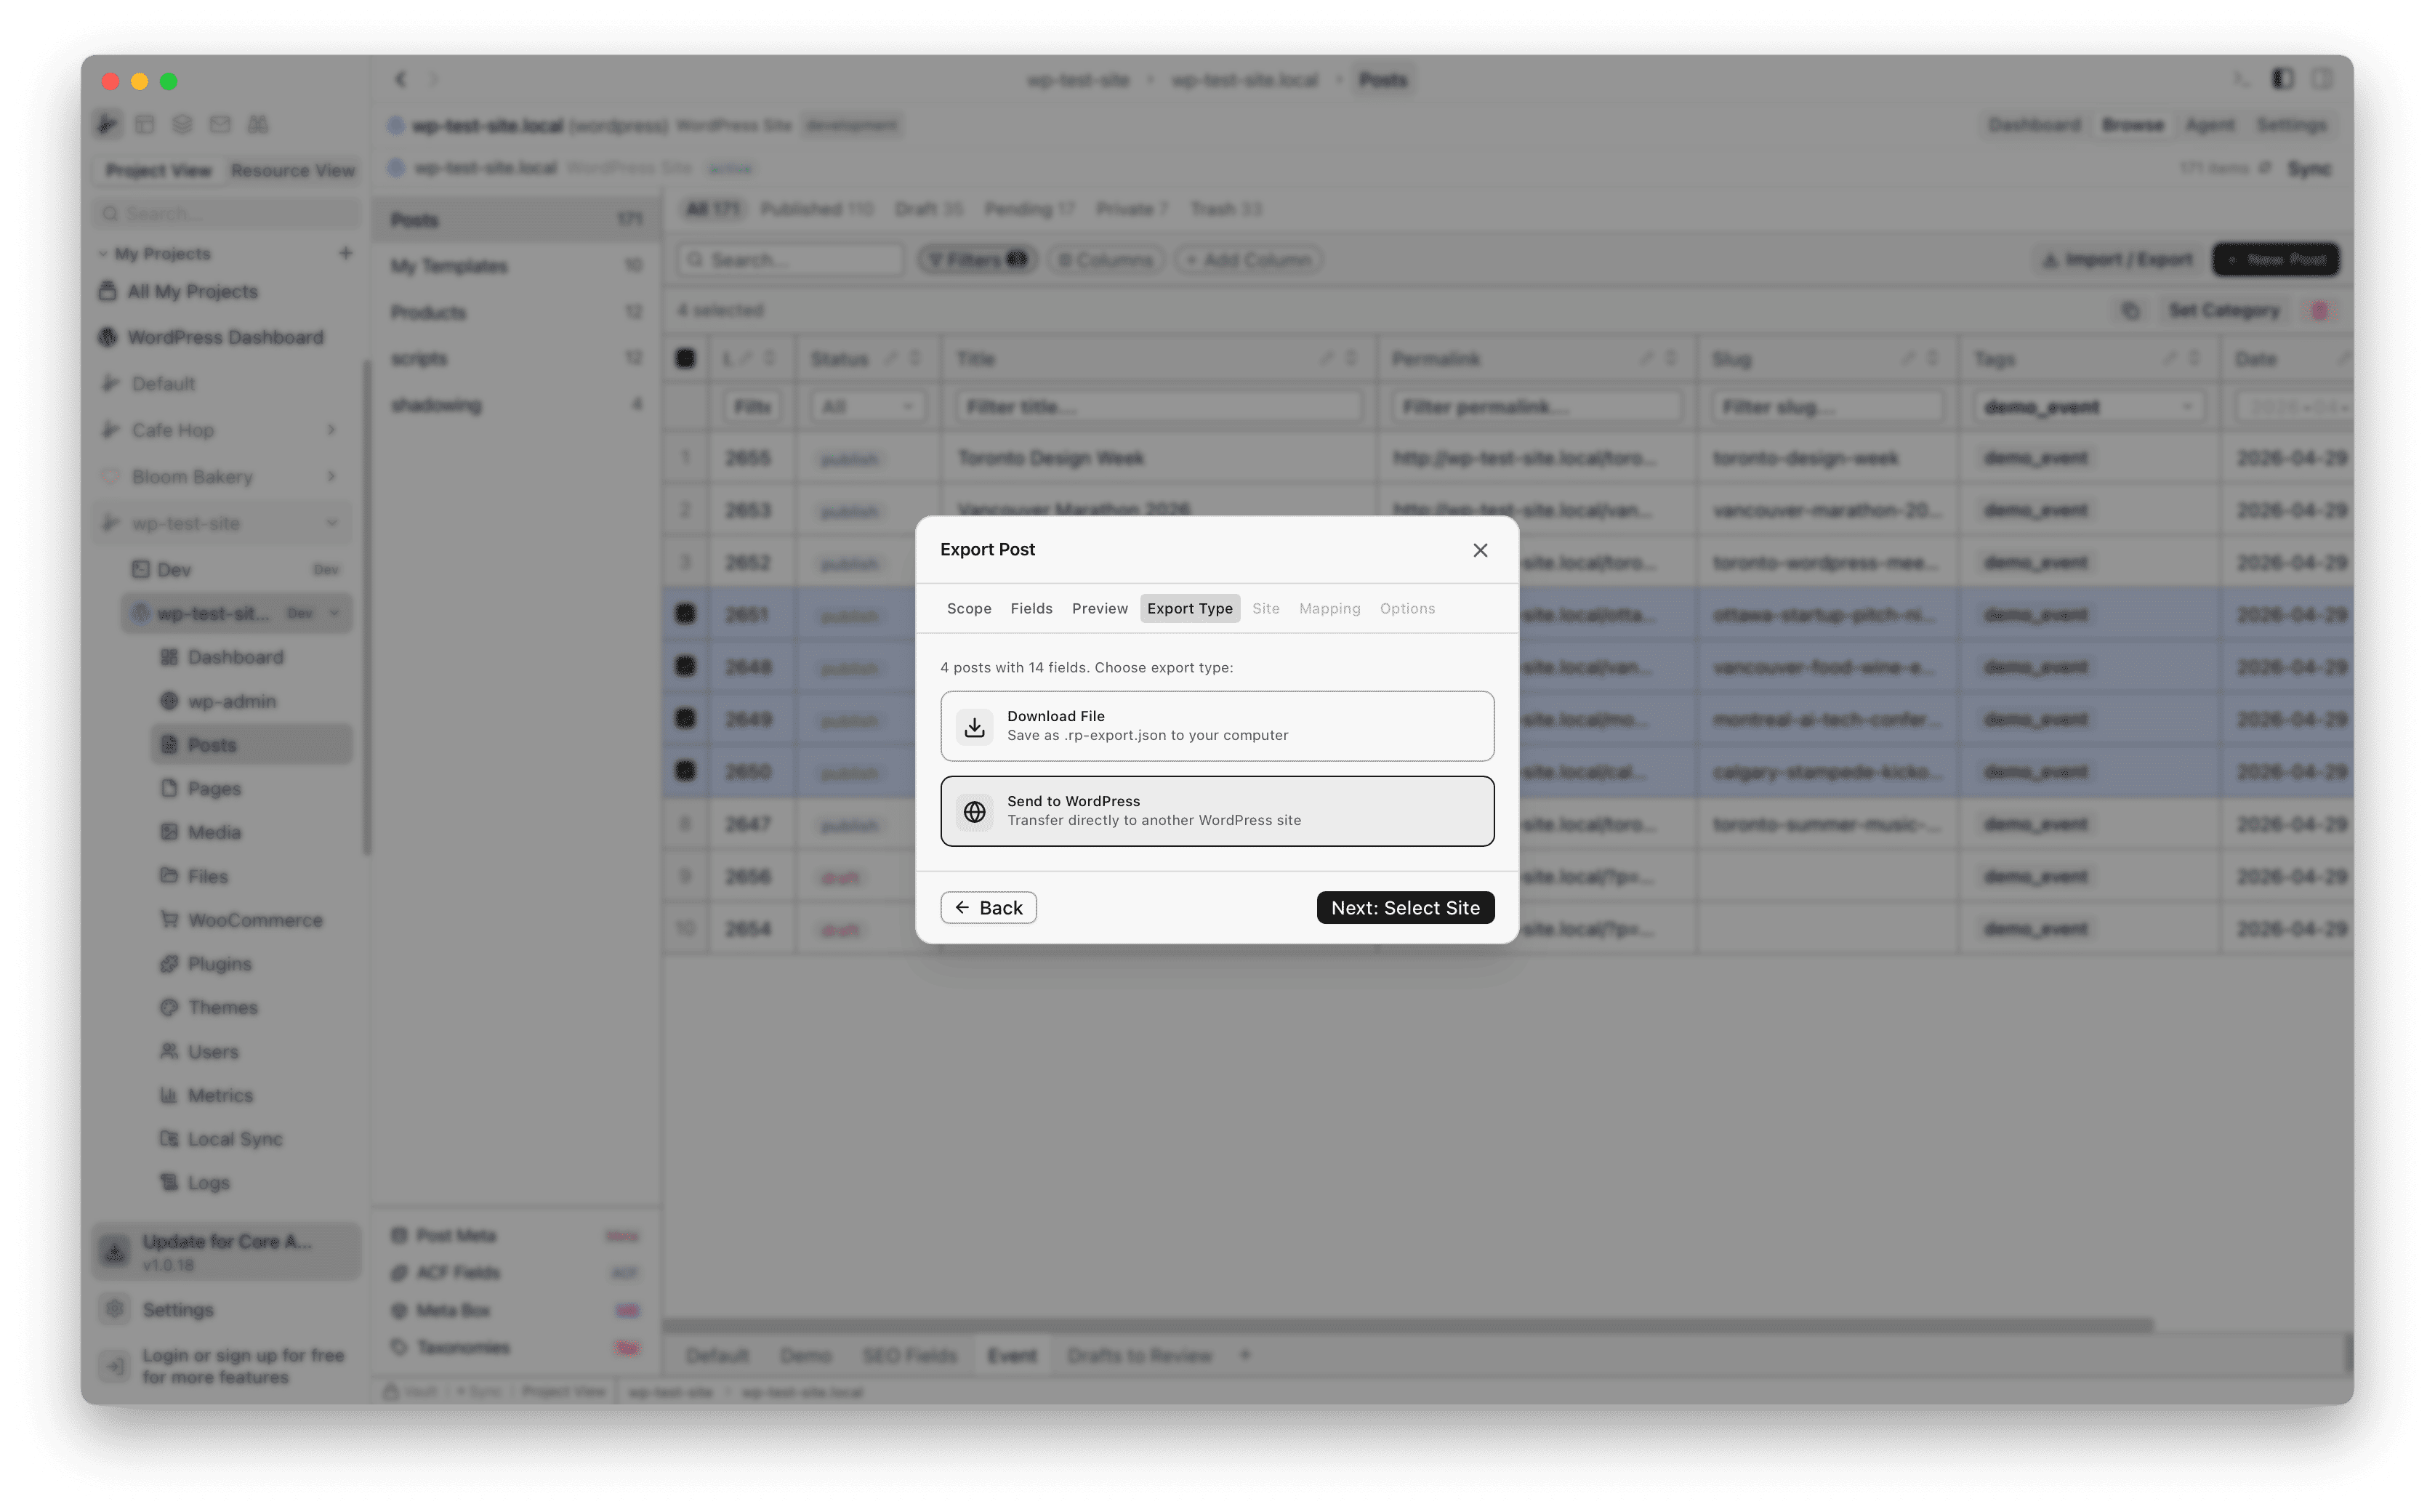
Step 5: Choose Send to WordPress
On the Export Type tab, select Send to WordPress to transfer posts directly to another site. The other option, Download File, saves a .rp-export.json file to your computer instead.
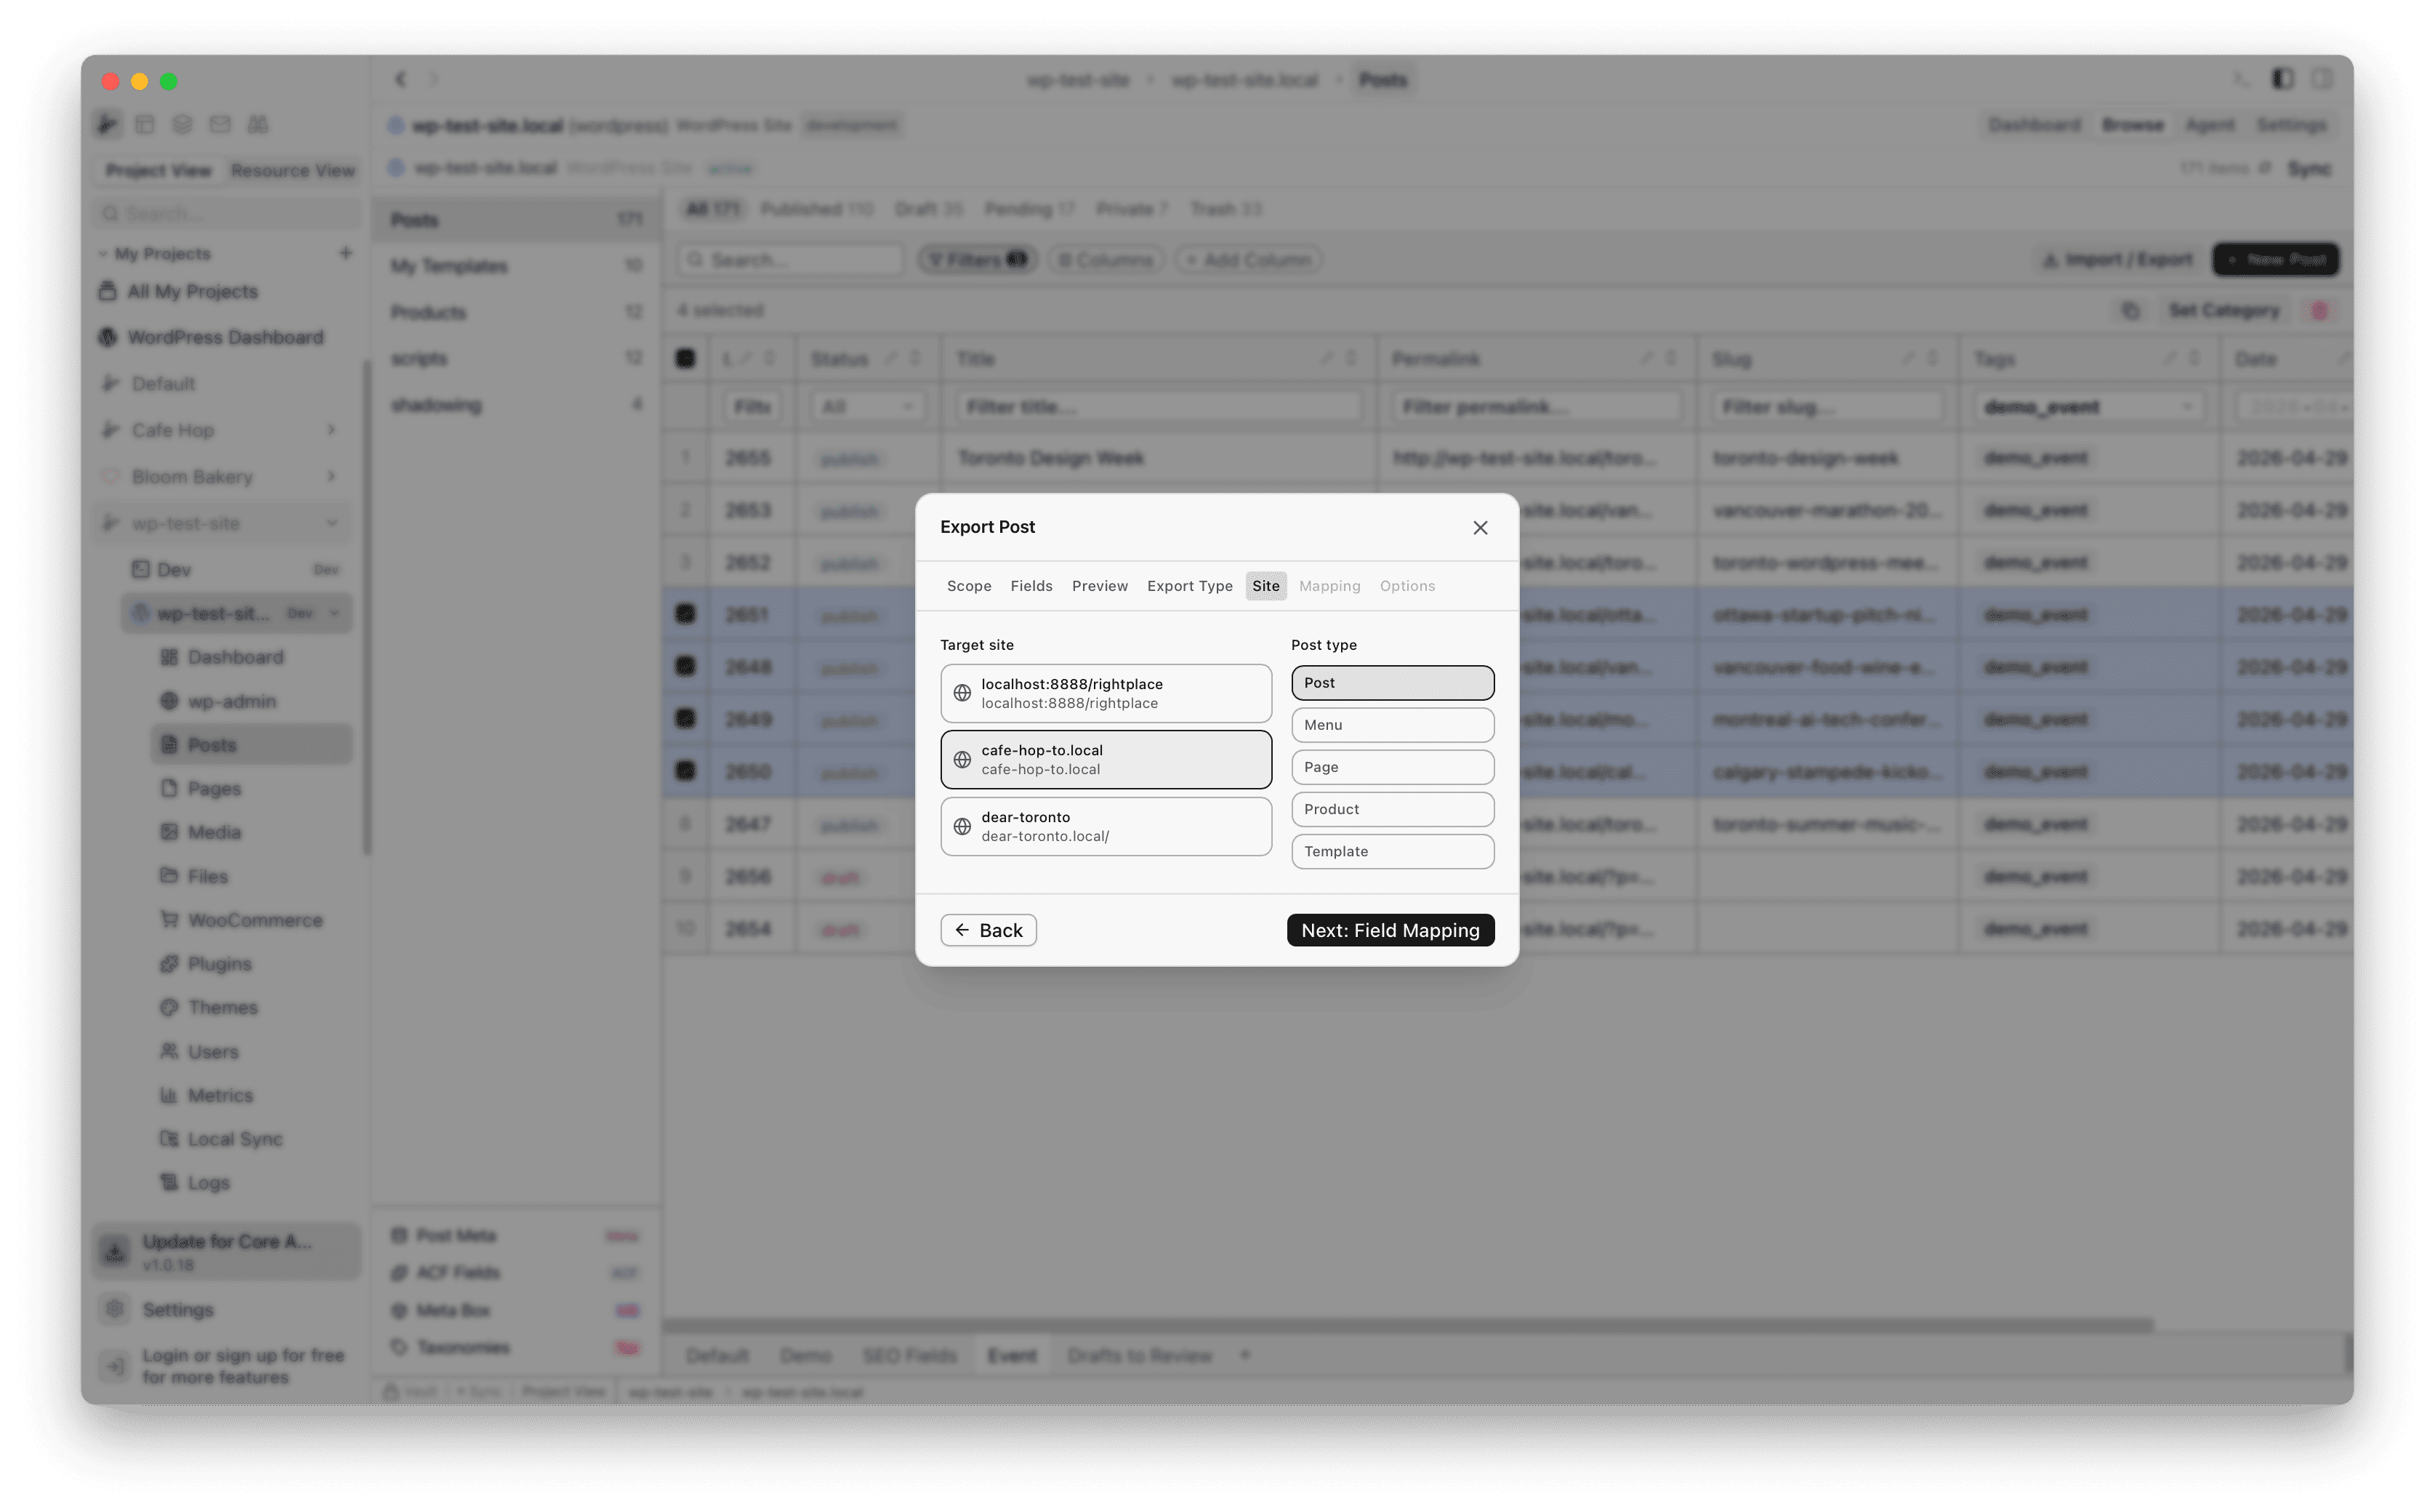
Step 6: Select the target site and post type
Pick the destination site from your project and choose the target post type (Post, Page, Product, etc.). The site list shows all WordPress sites connected to your project.
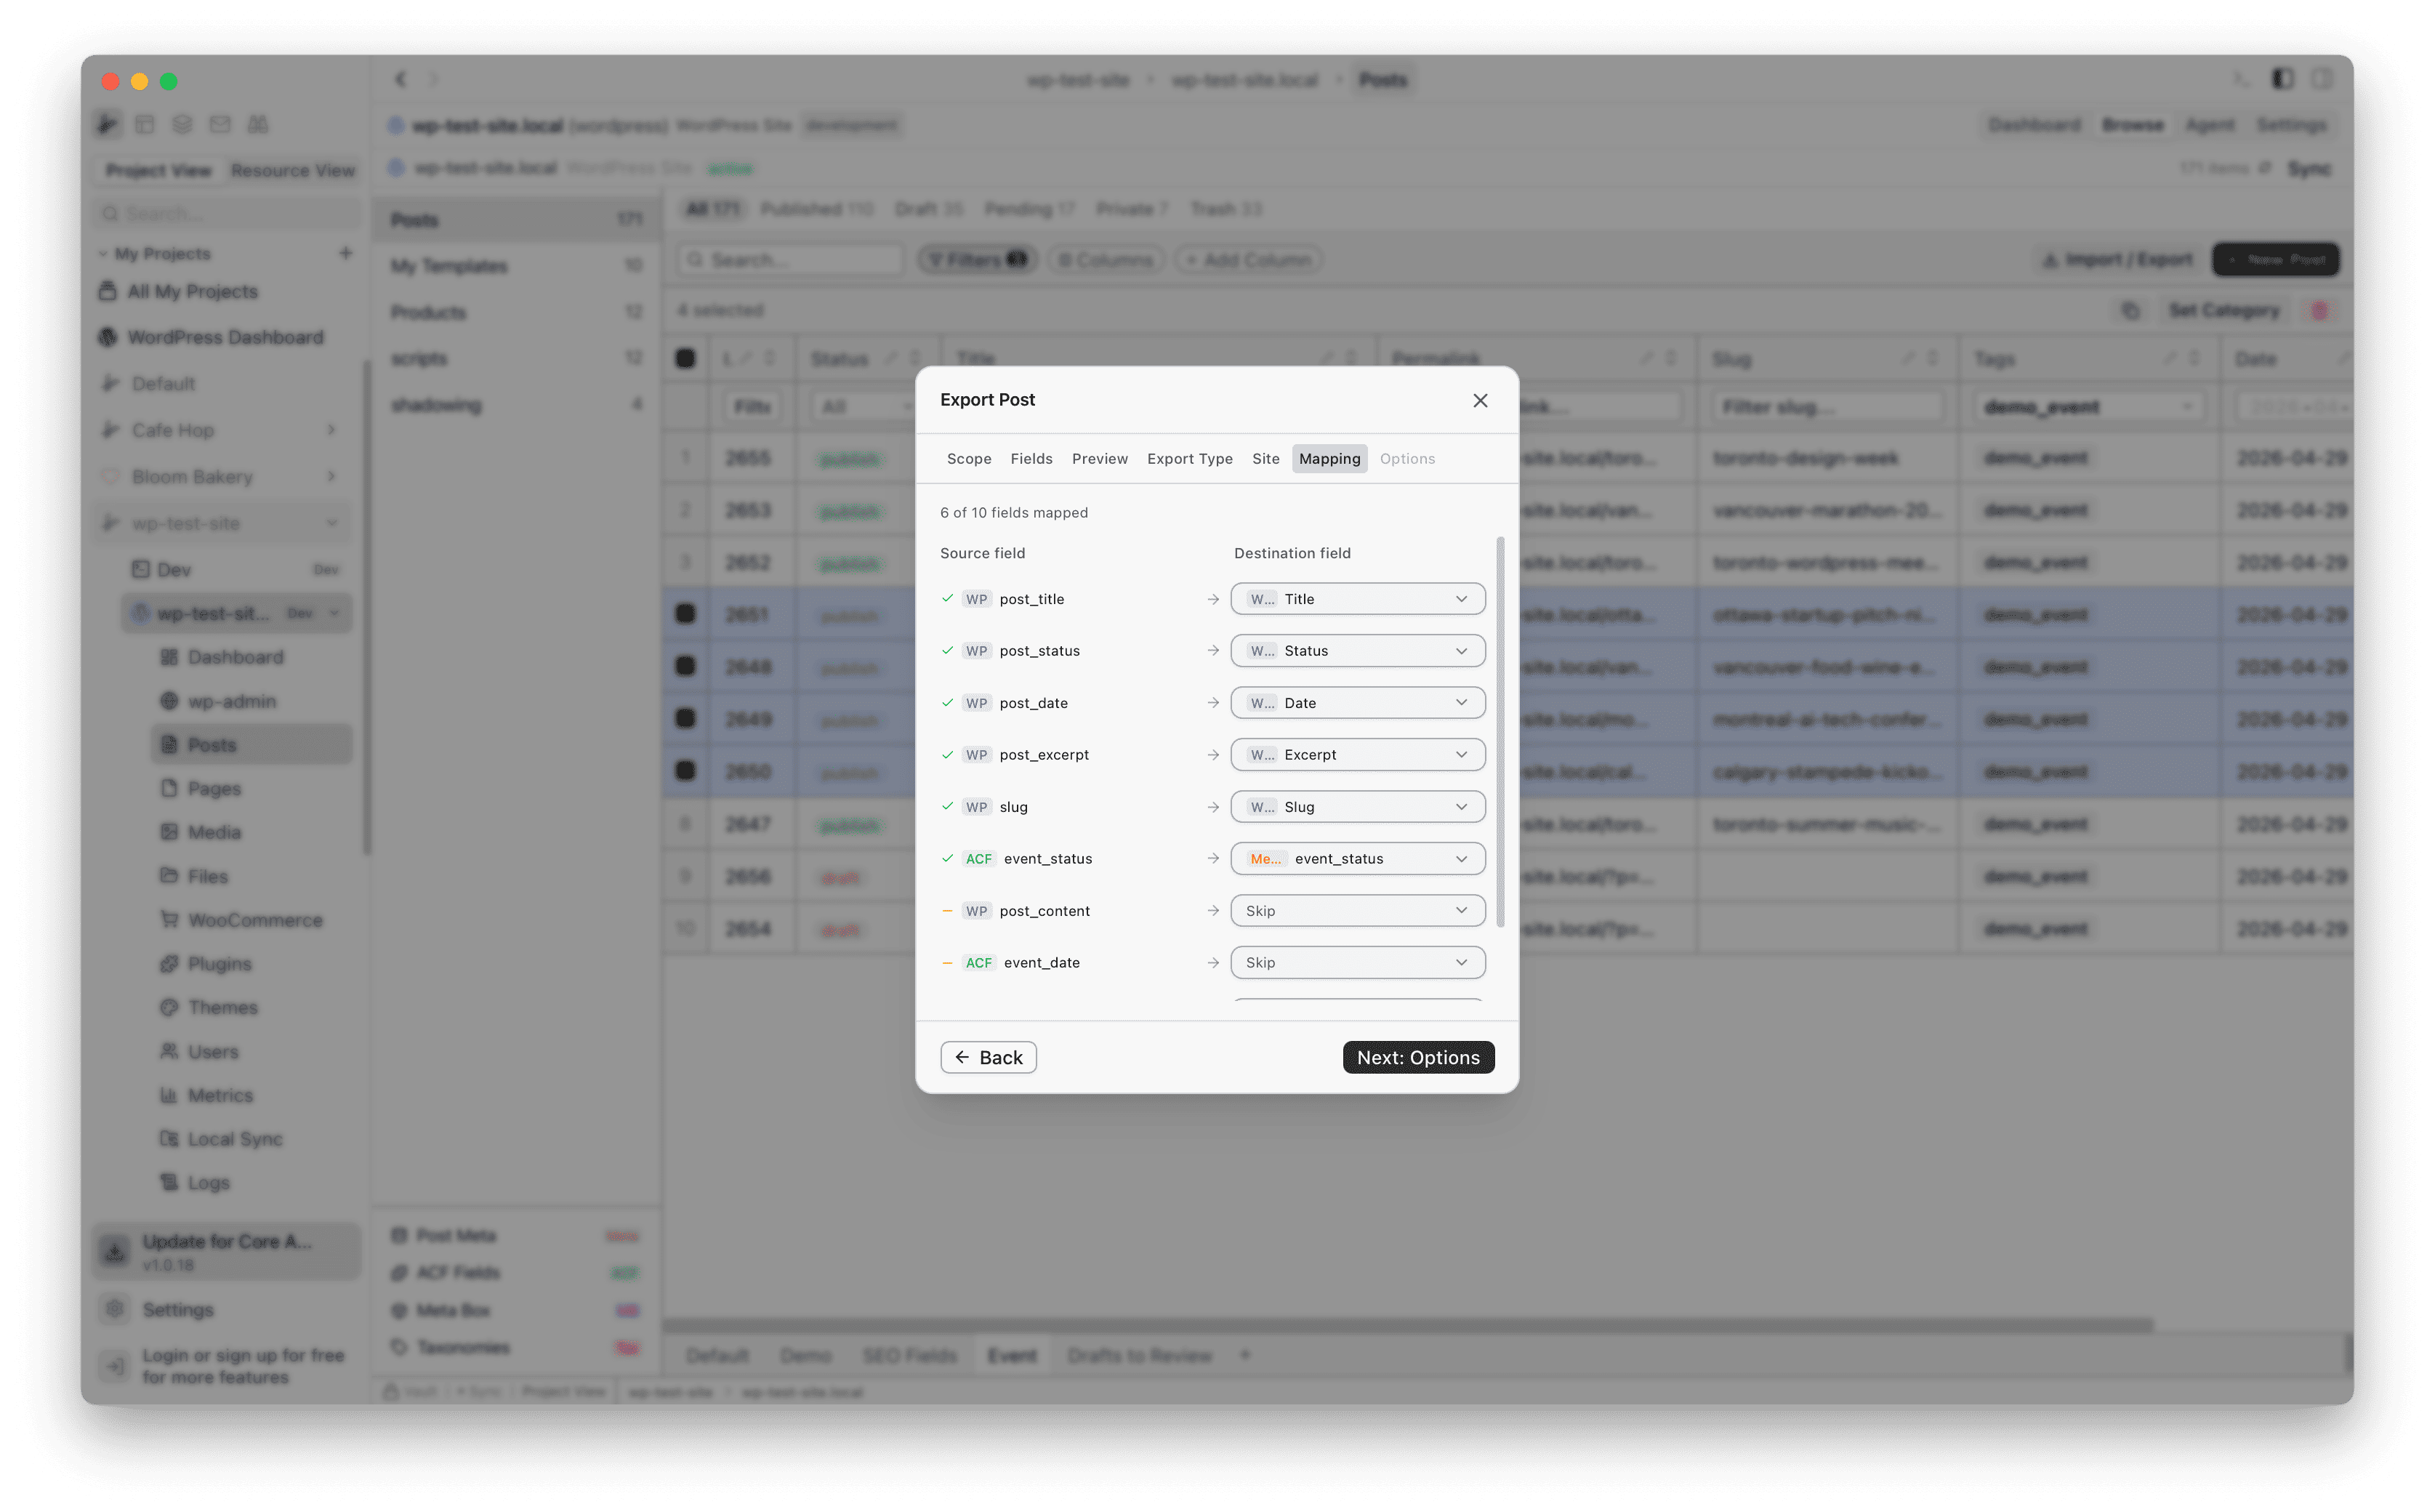
Step 7: Map fields between sites
The Mapping tab shows how source fields map to destination fields. RightPlace auto-maps matching fields. You can change the mapping or set fields to Skip if you do not want them transferred.
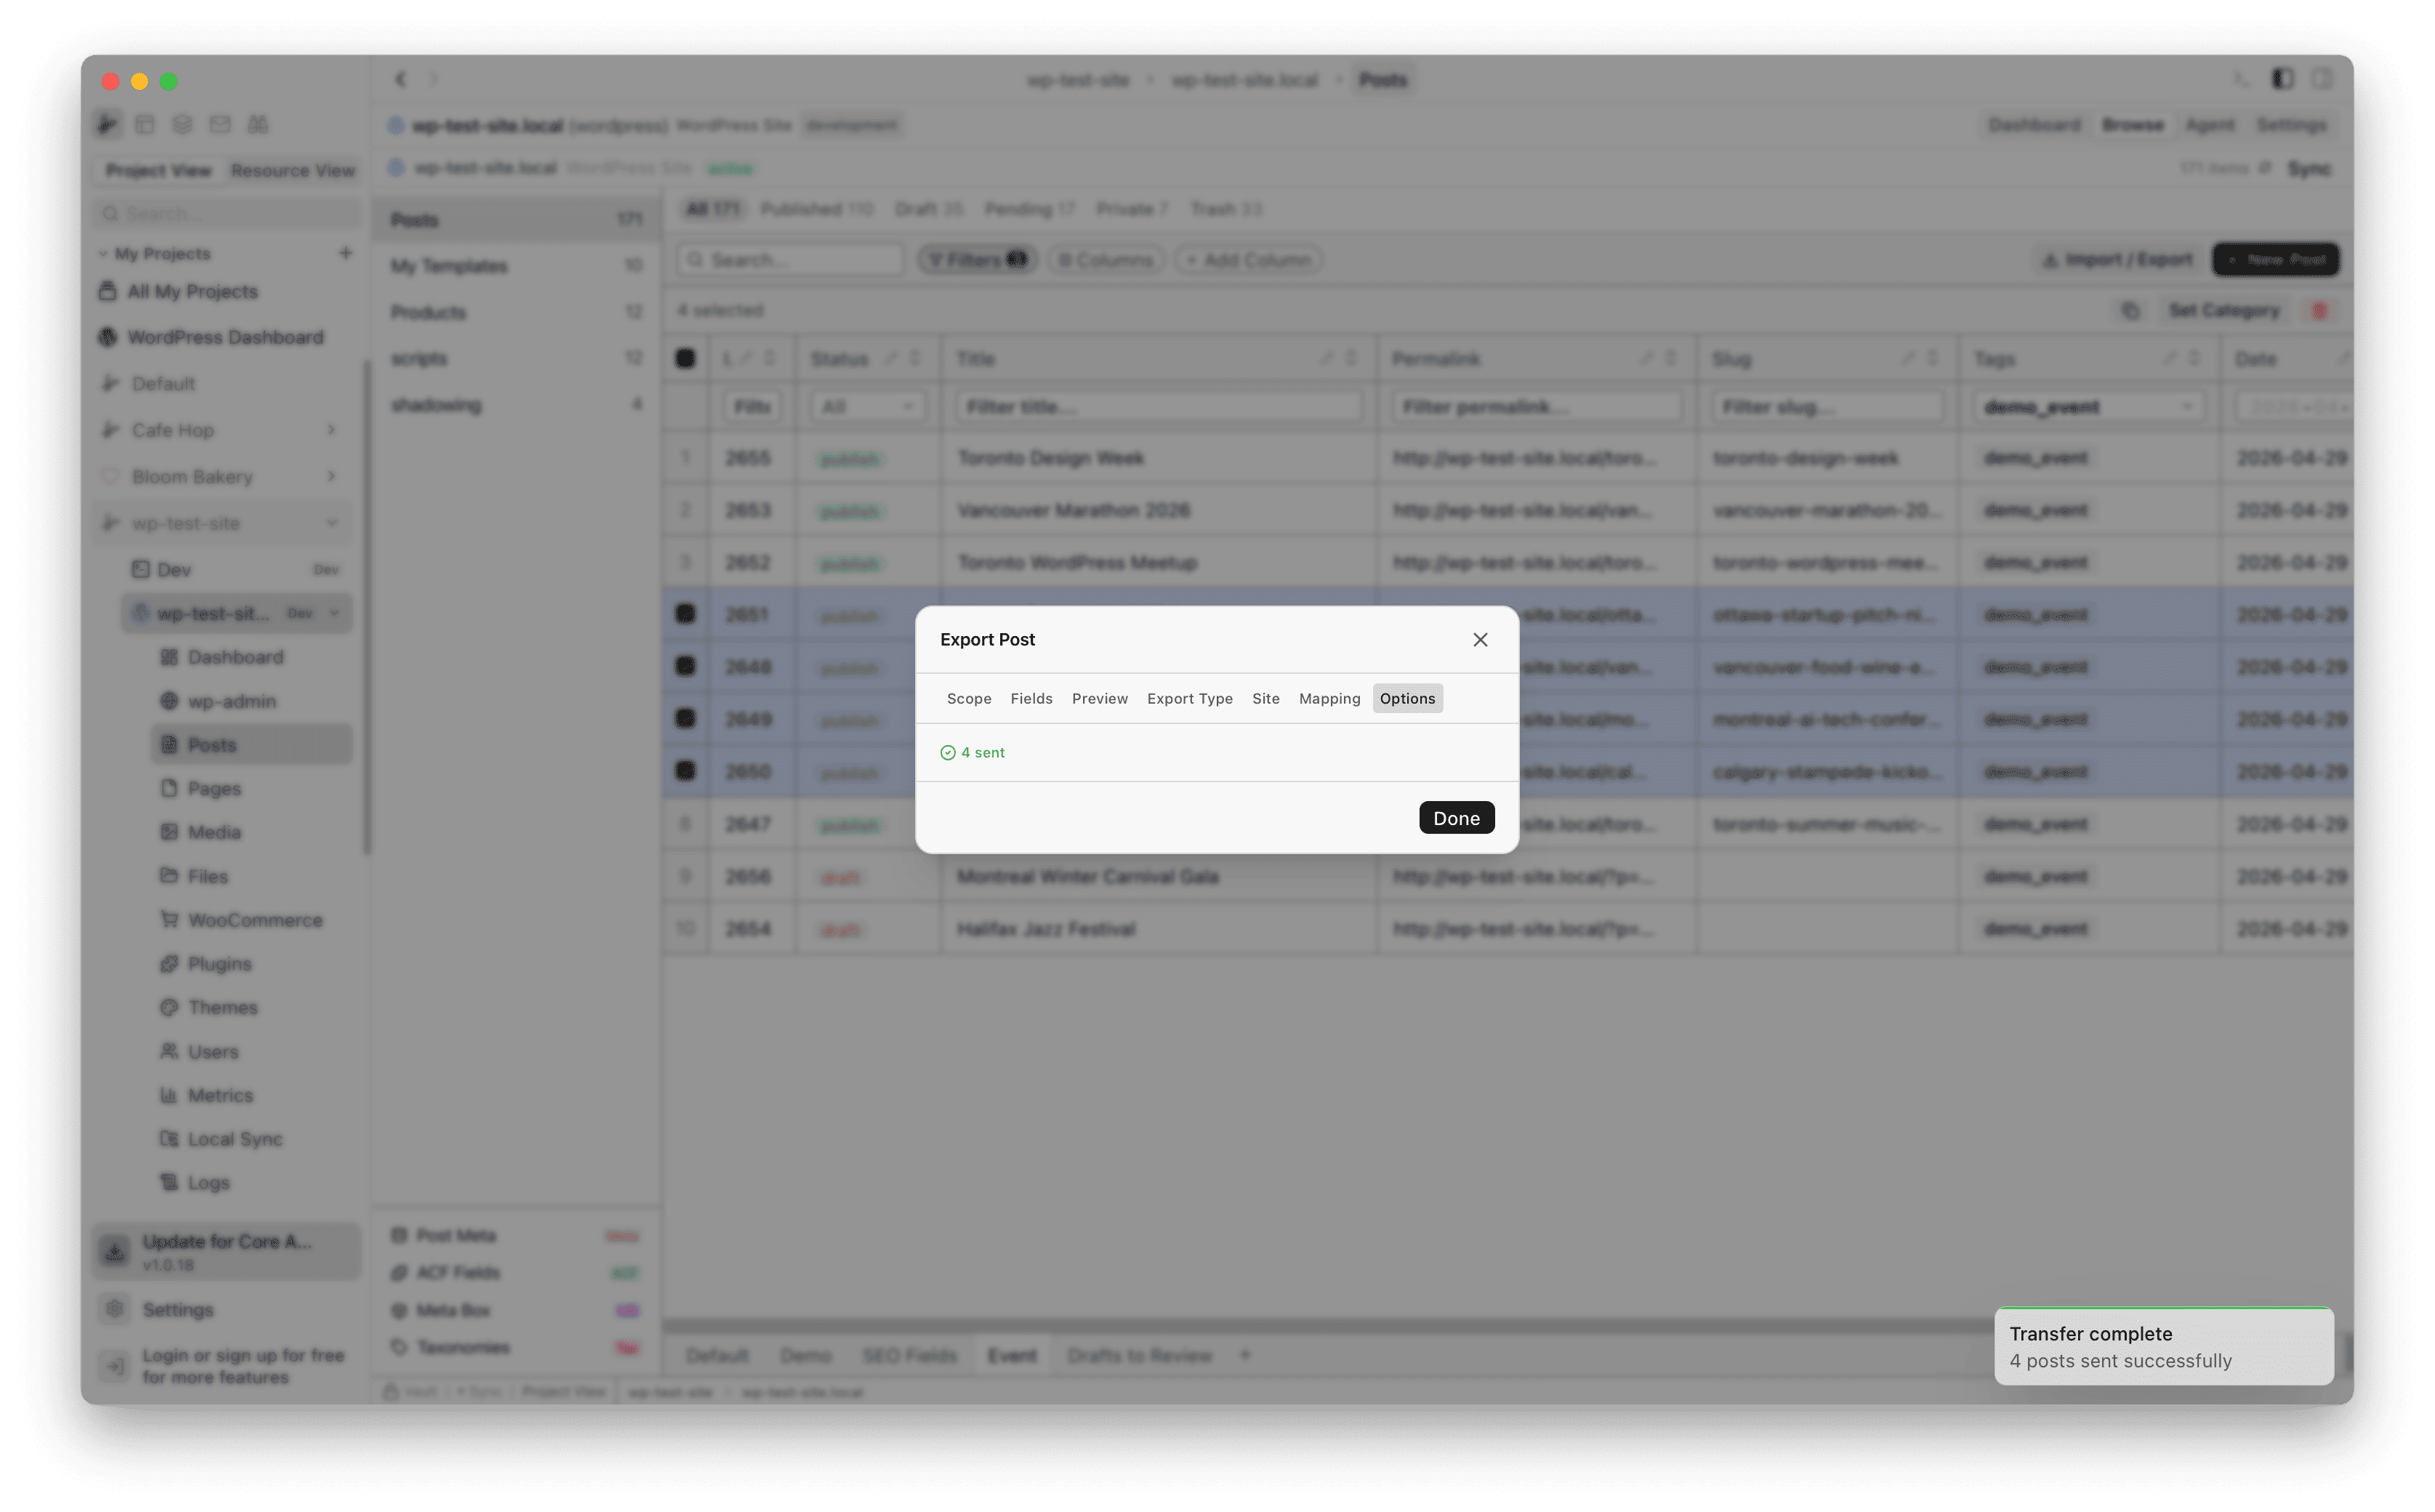
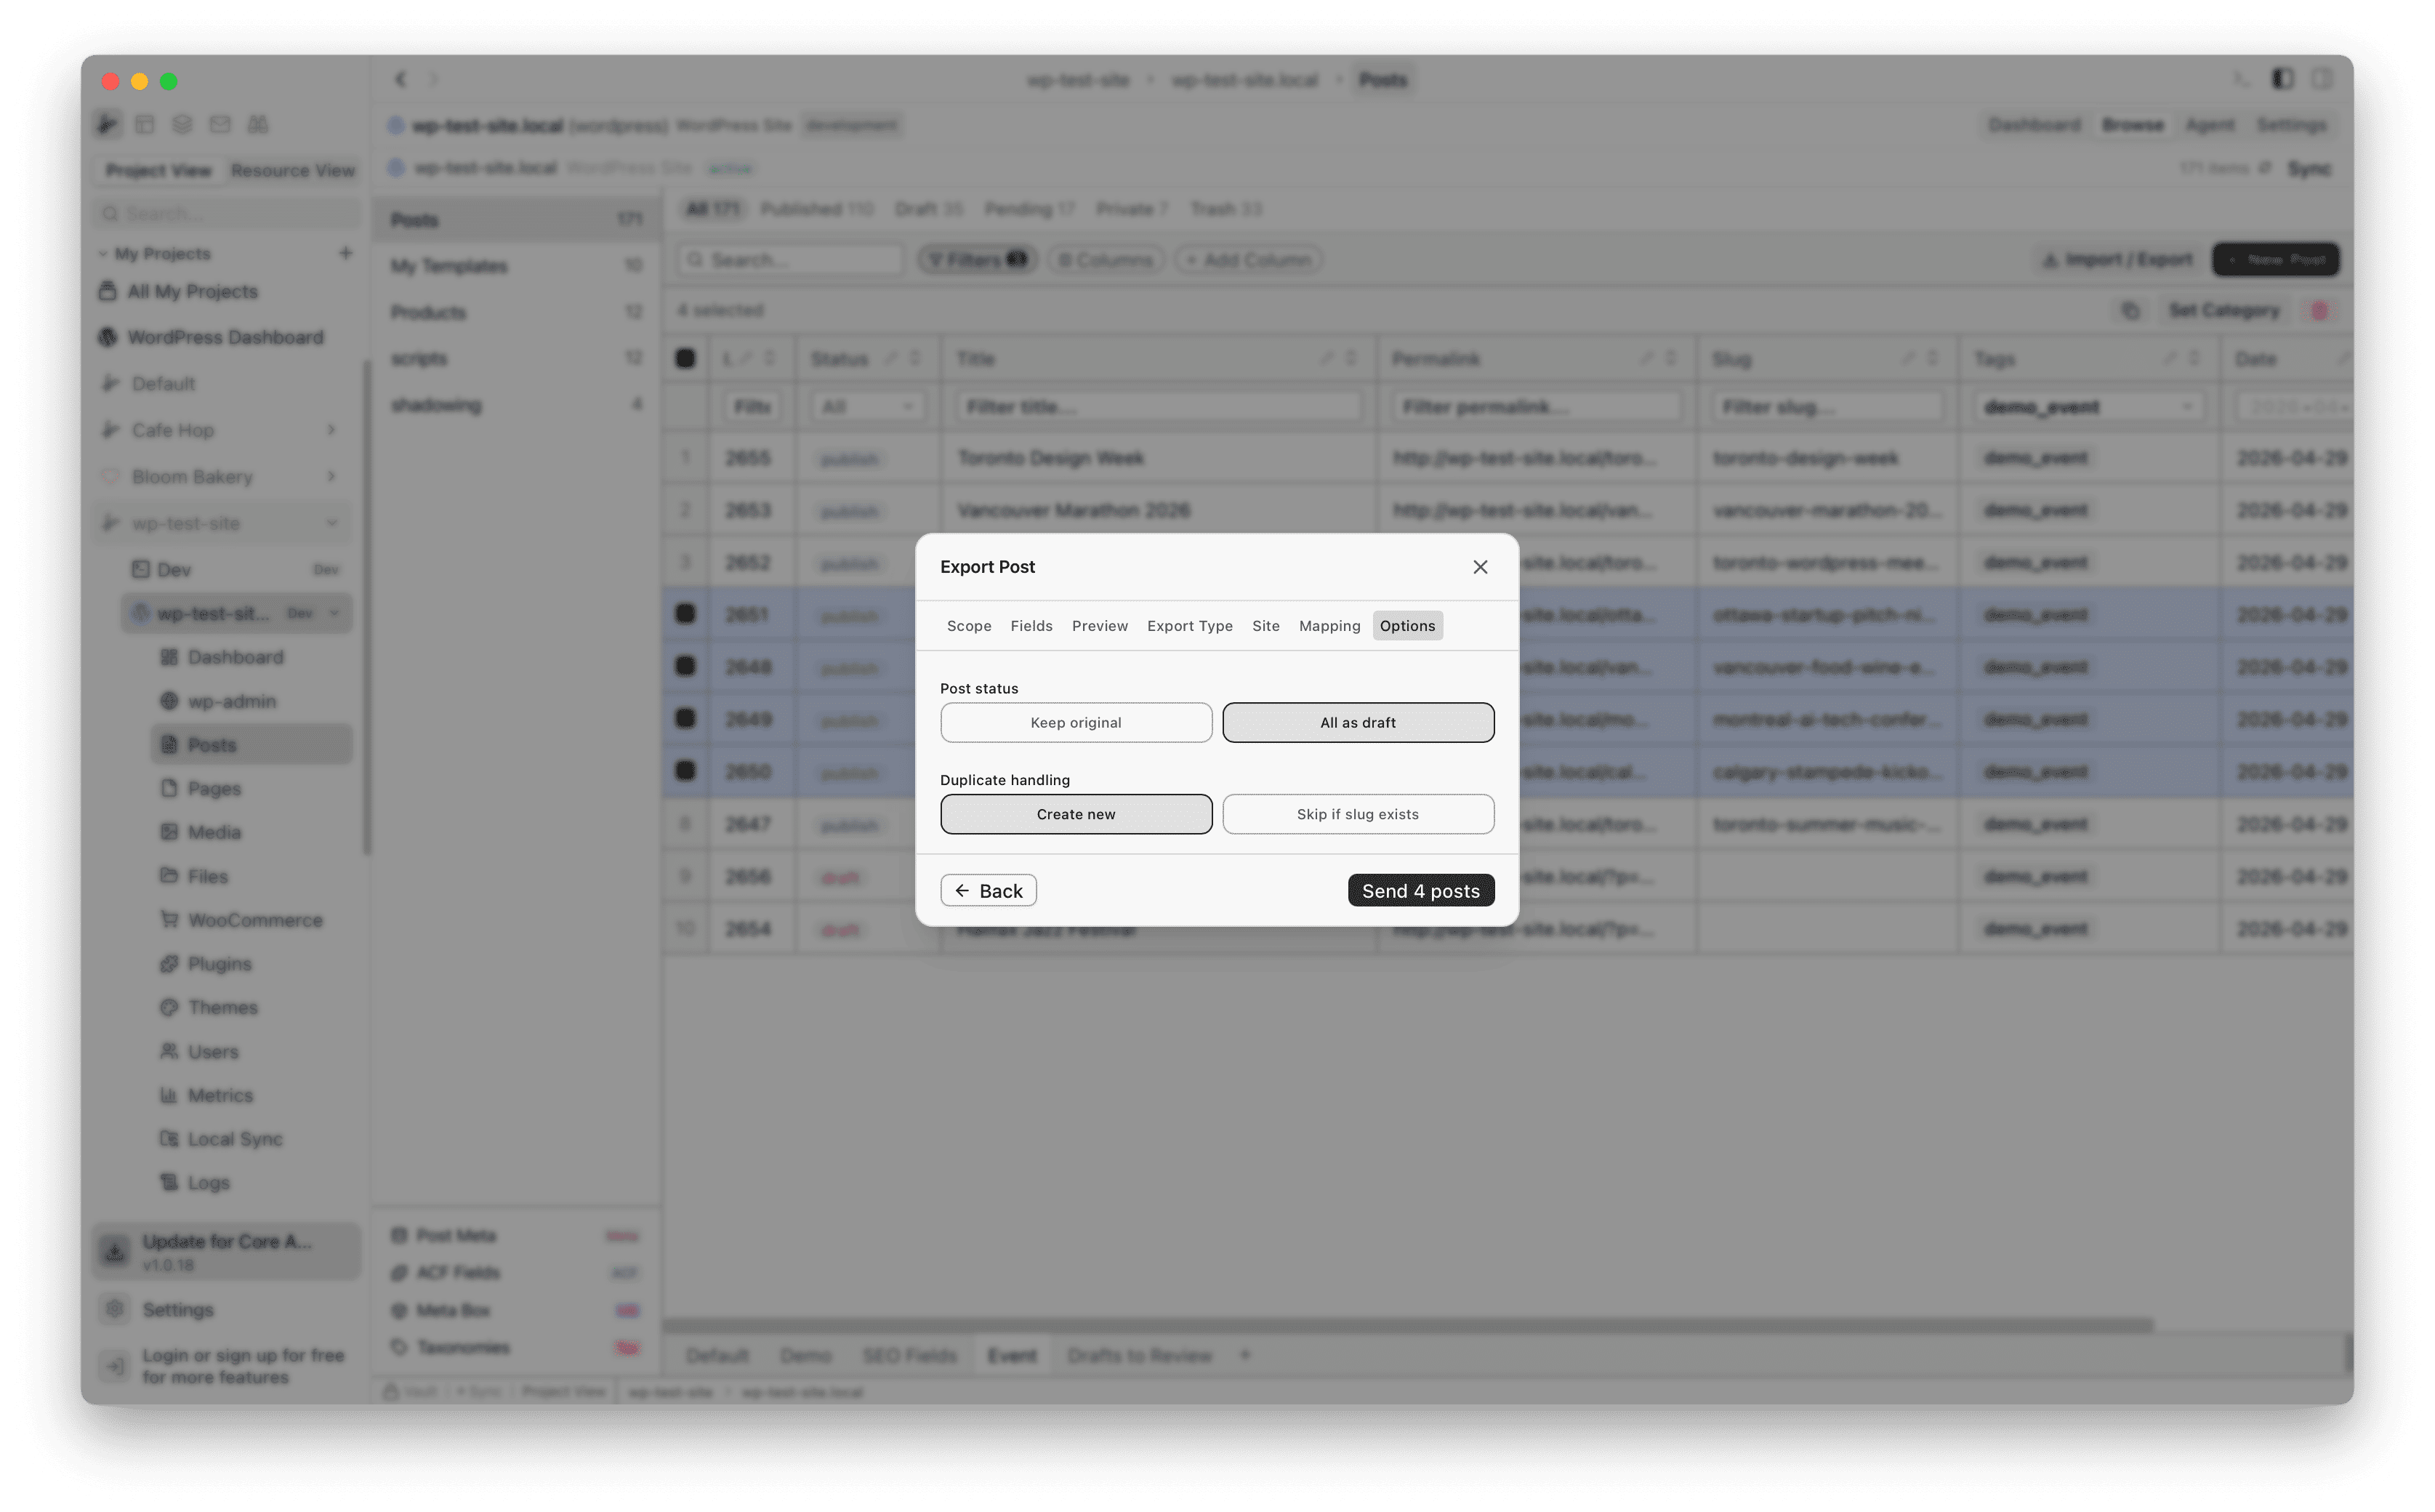
Step 8: Set post status and duplicate handling
On the Options tab, choose whether to keep the original post status or set all transferred posts as drafts. You can also choose how to handle duplicates: create new posts or skip if a post with the same slug already exists.
Step 9: Send and confirm
Click Send posts to start the transfer. RightPlace sends each post to the target site and shows a confirmation when done.