Add Custom Columns
Add ACF, Meta Box, and Post Meta fields as table columns and edit them inline
RightPlace can pull custom field data from three sources and display them as editable columns in the Posts table. This means you can view and edit ACF fields, Meta Box fields, and raw post meta without ever opening wp-admin.
Before you start
- A WordPress site connected and fully paired
- At least one custom field source on your site:
- ACF (Advanced Custom Fields) plugin, or
- Meta Box plugin, or
- Post Meta (built into WordPress, always available)
Understanding the three sources
| Source | When to use |
|---|---|
| Advanced Custom Fields ACF | You use ACF to define structured field groups |
| Meta Box MB | You use Meta Box to define structured field groups |
| Post Meta Meta | You want to access raw wp_postmeta keys (from any plugin, theme, or custom code) |
All three work the same way in the Posts table: add as a column, edit inline, filter, and sort.
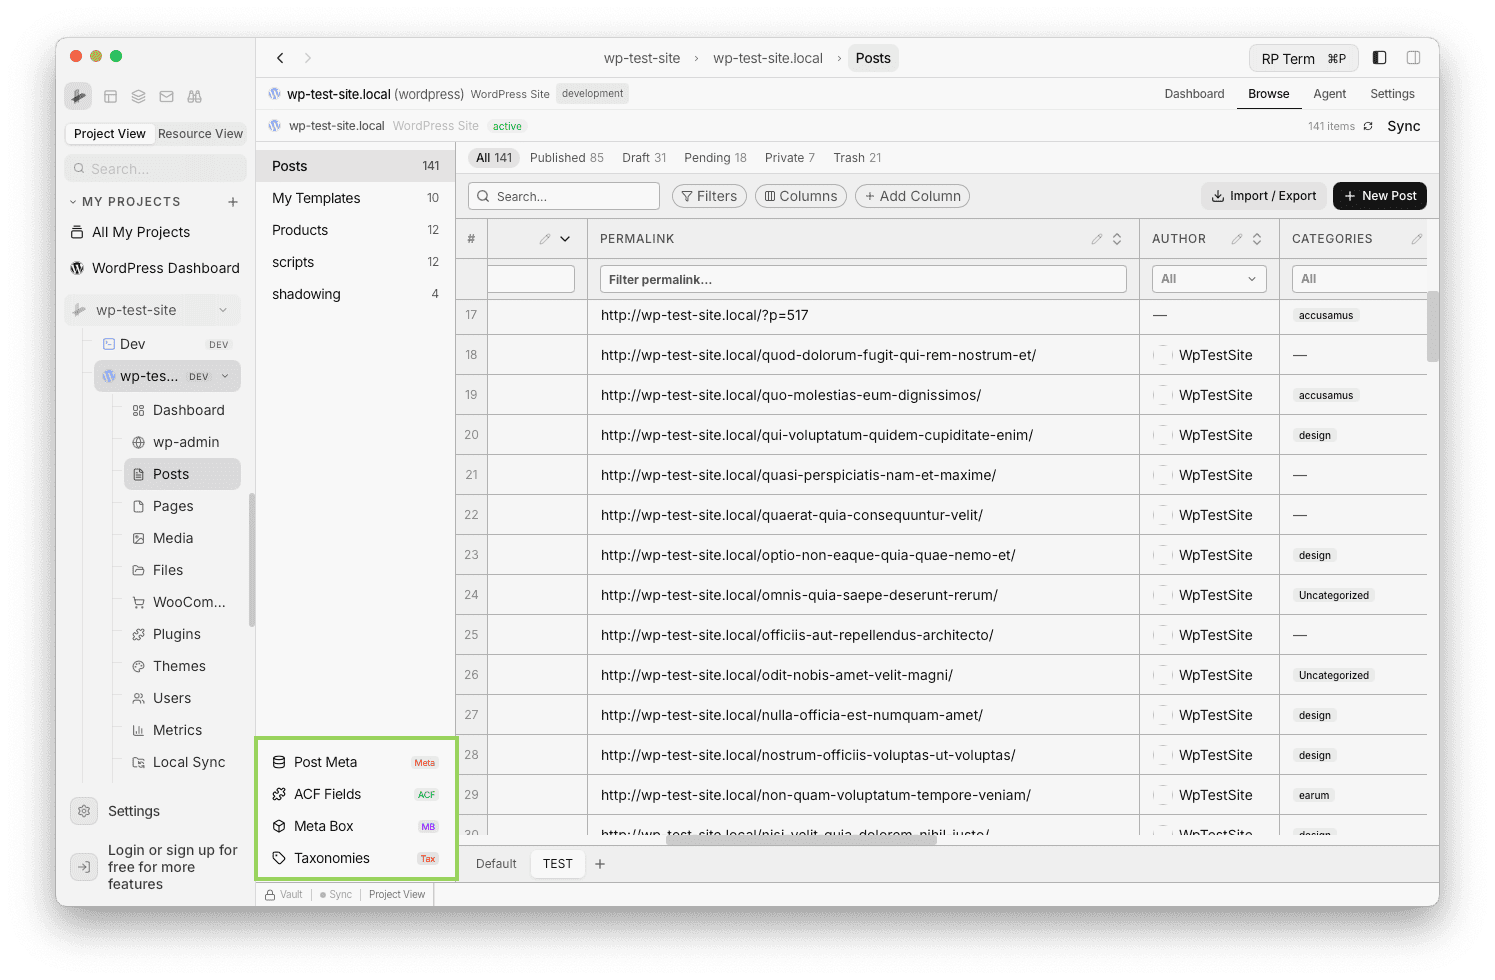
Step 1: Open the field panel
In the Posts tab, look at the left sidebar. At the bottom you will see buttons for each available source:
- ACF (if the ACF plugin is active)
- Meta Box (if the Meta Box plugin is active)
- Post Meta (always available)
Click the one you want to use.
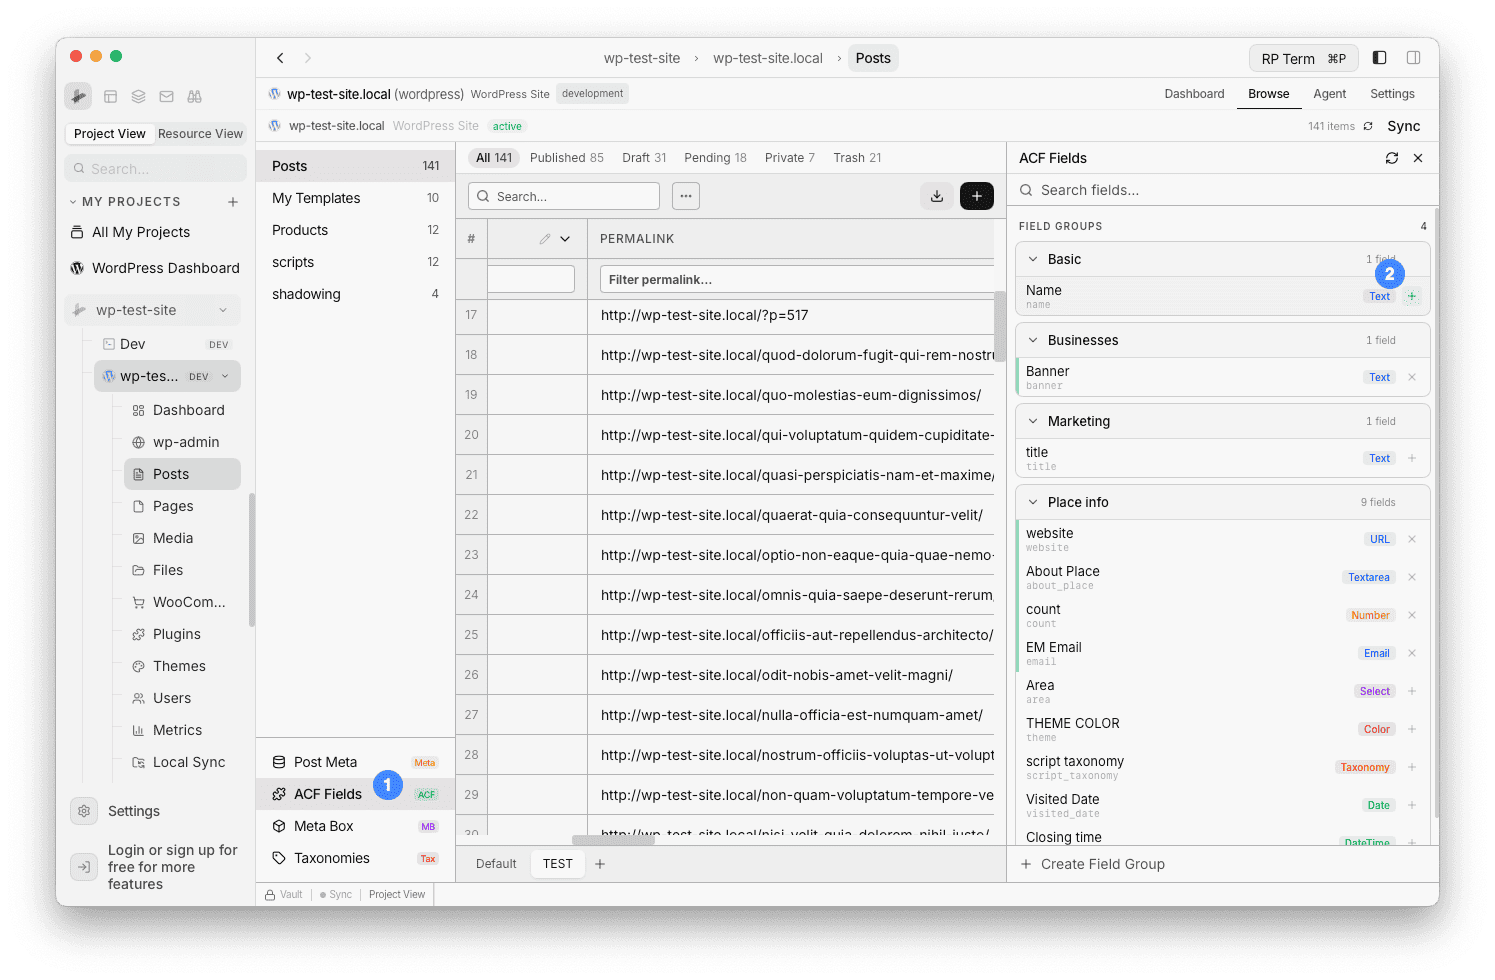
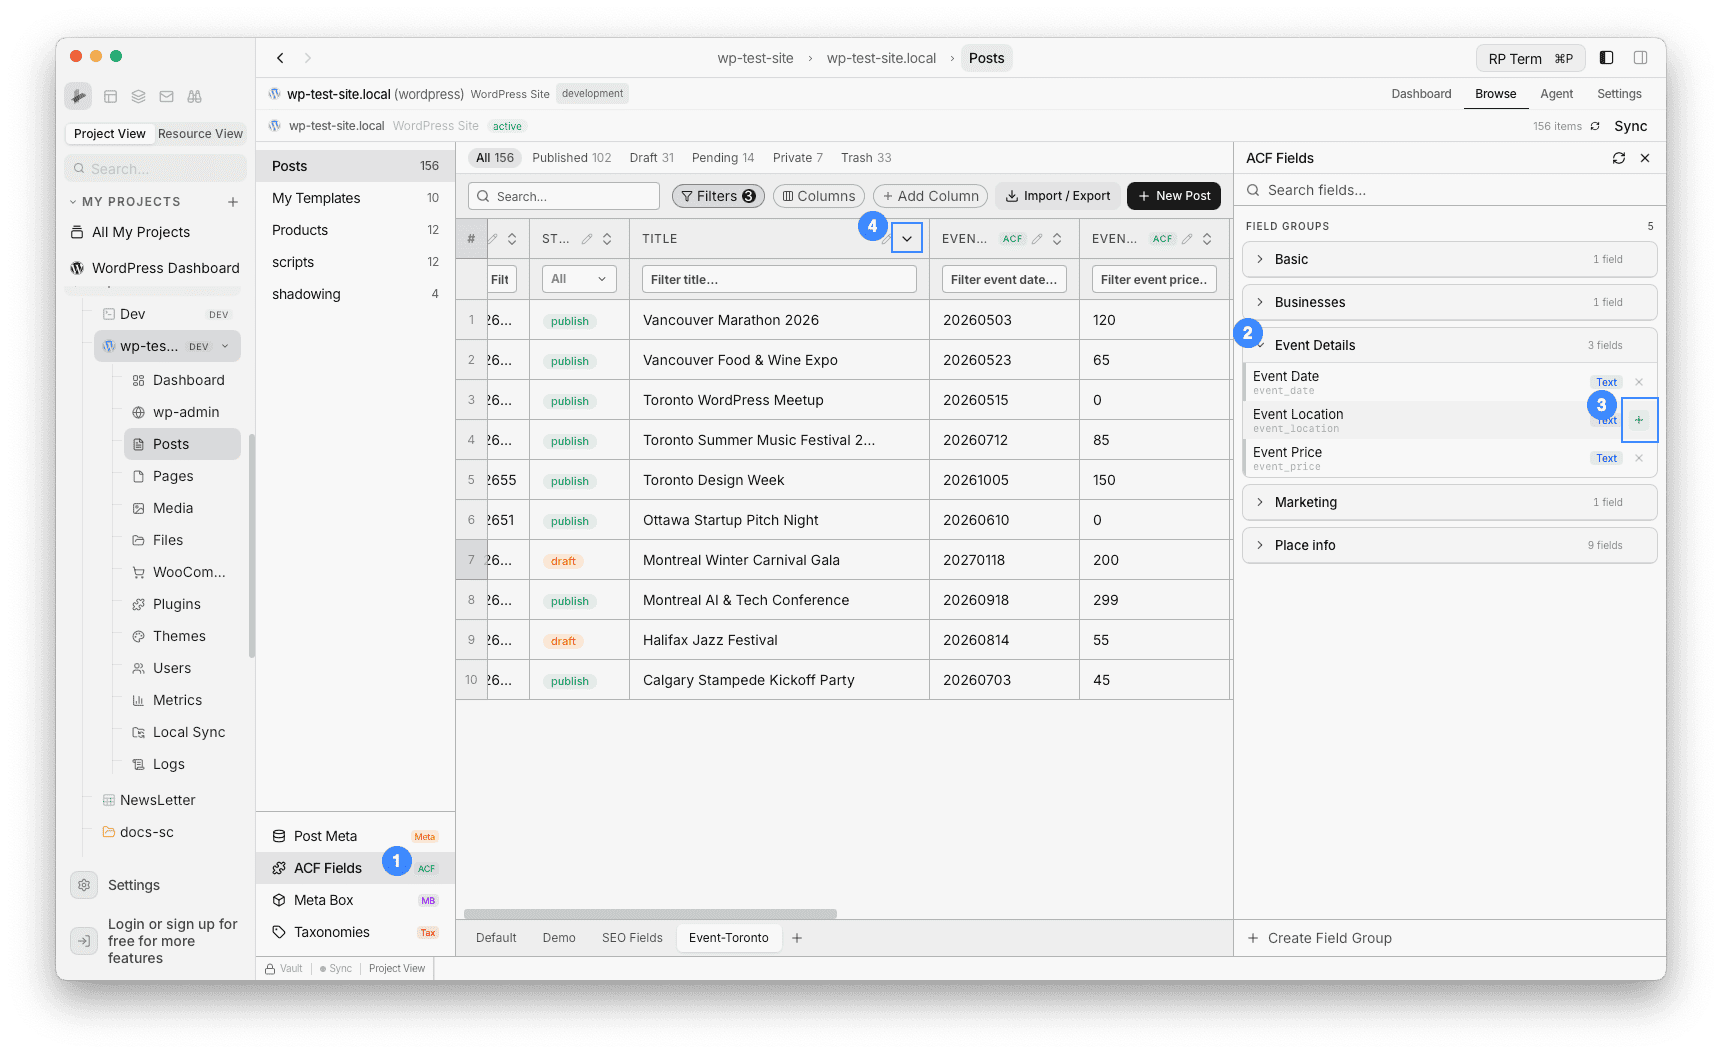
Step 2: Browse field groups (ACF)
The ACF panel shows all your field groups with their fields nested inside. Each field displays:
- Field label and name
- Field type (Text, Textarea, Number, Email, URL, Select, Color, Date, Taxonomy, etc.)
- A + button to add it as a table column
Click + on any field to add it to the table. The column appears at the right end of the table with a green ACF badge in the header.
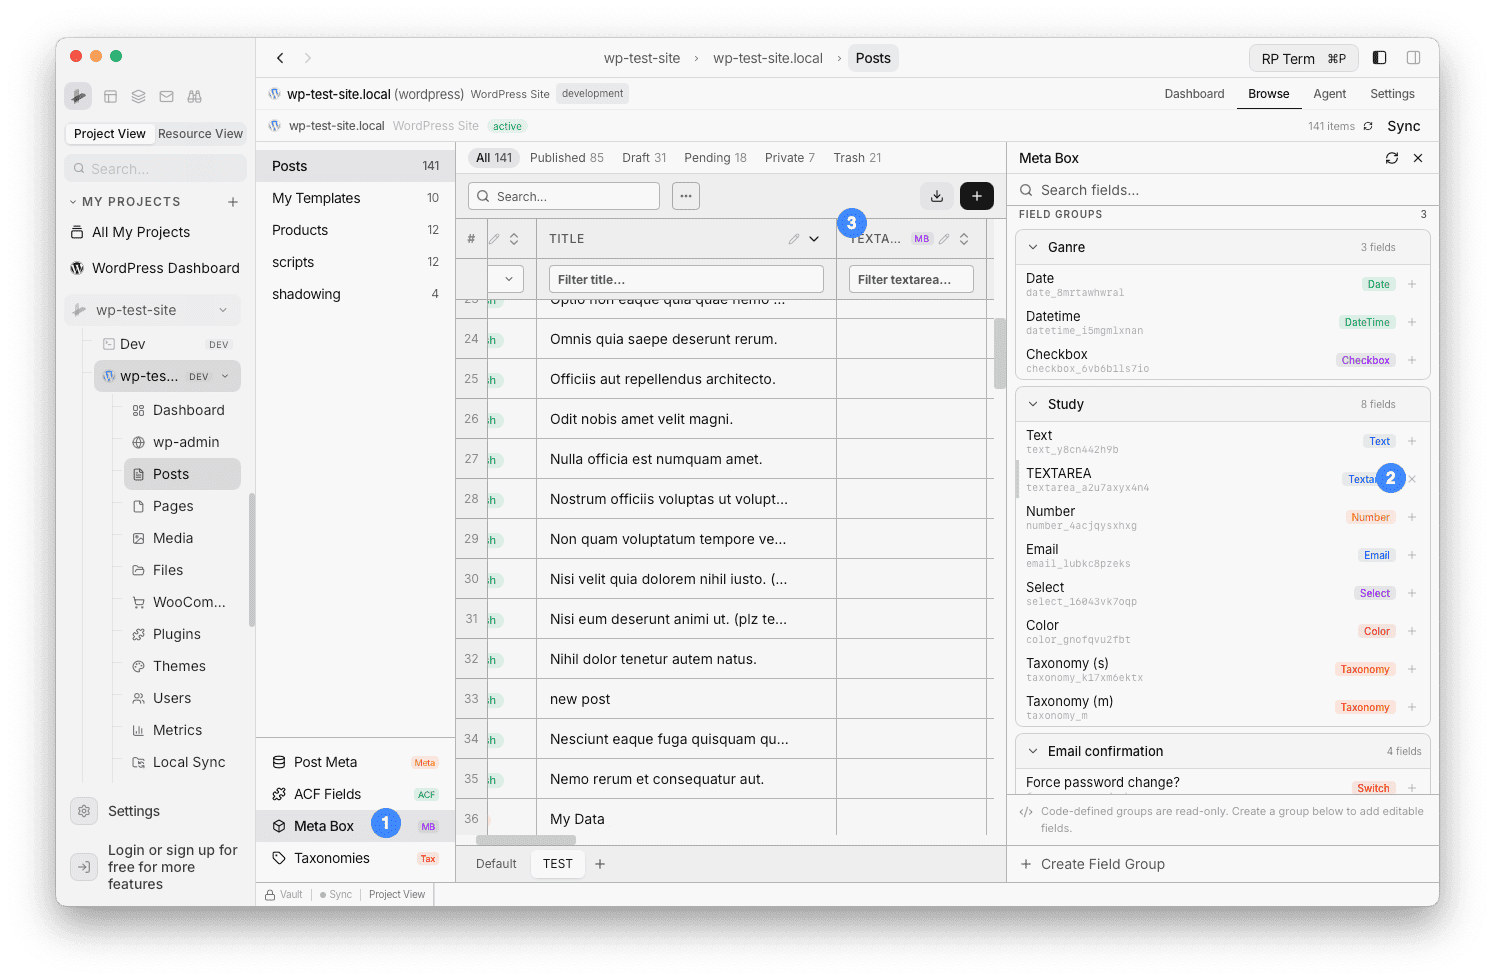
Step 3: Browse field groups (Meta Box)
The Meta Box panel works the same way:
- Browse field groups with typed fields
- Code-defined groups appear as read-only
- Click + to add any field as a column
- Columns show a purple MB badge
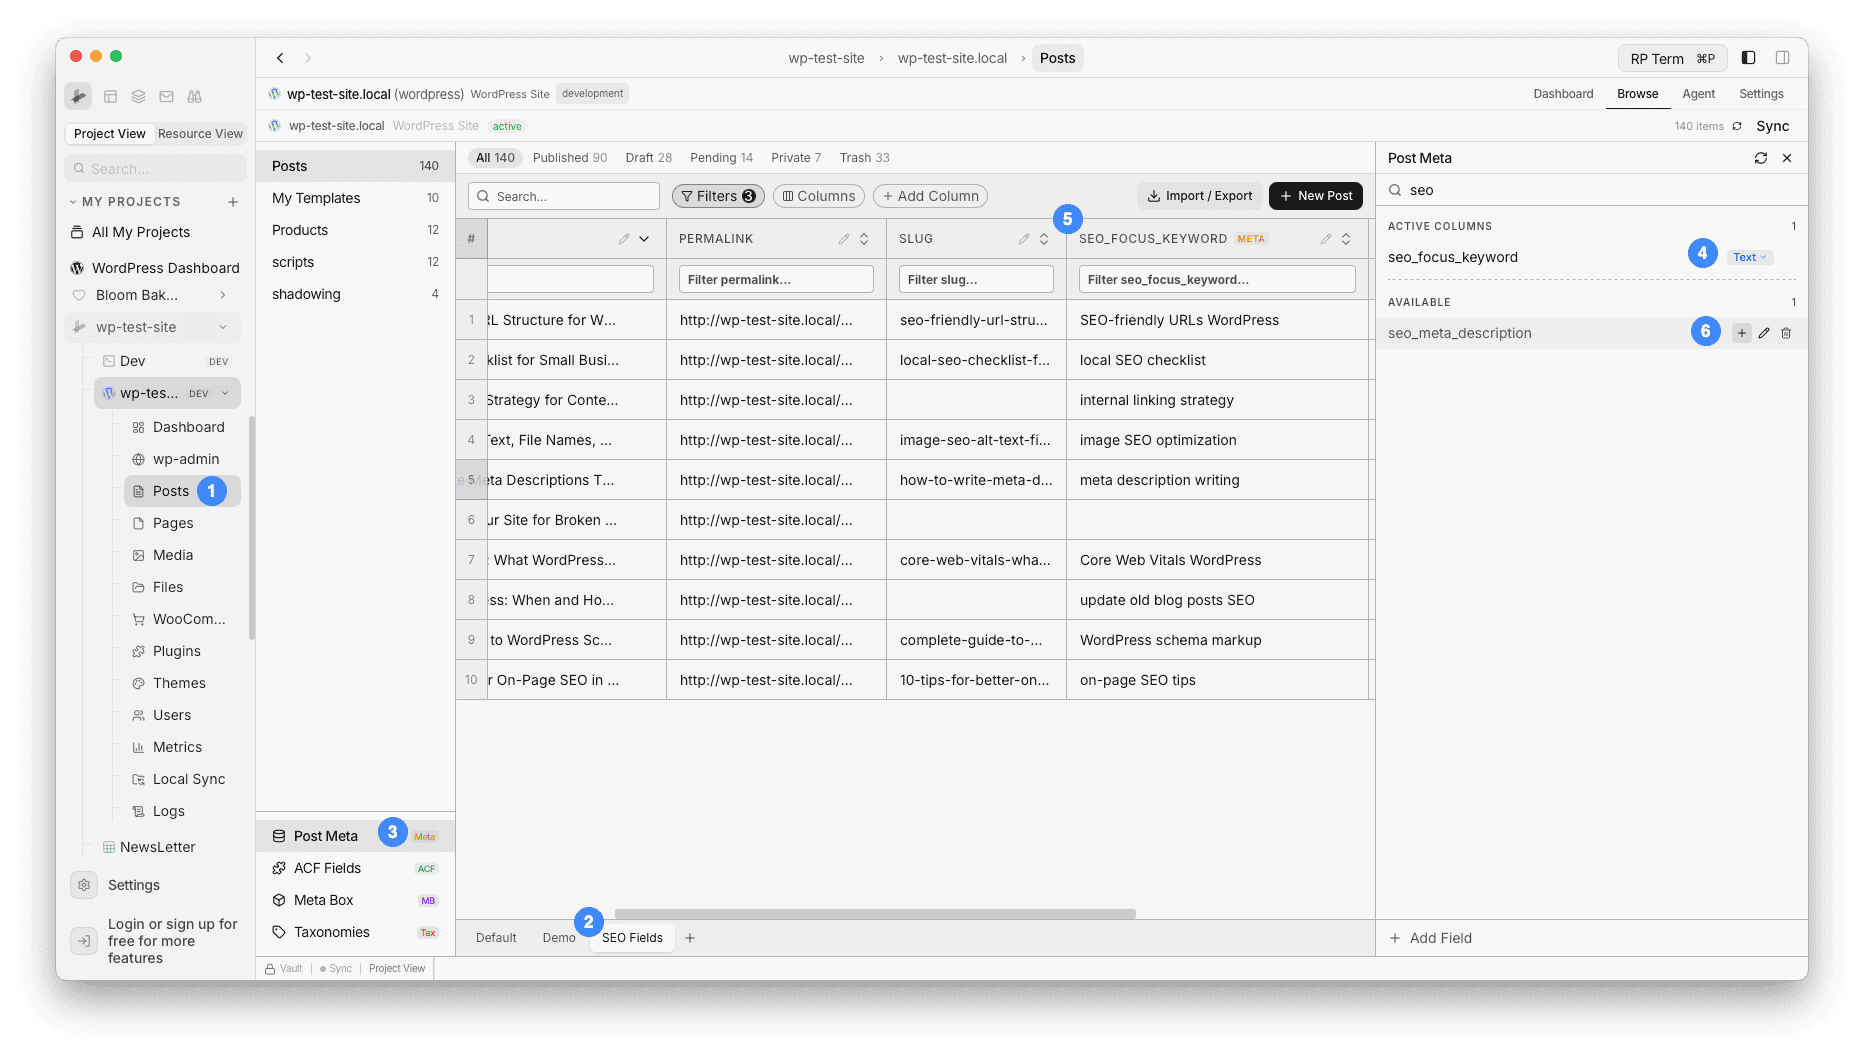
Step 4: Browse raw post meta (Post Meta)
The Post Meta panel lists all wp_postmeta keys registered on your site. This includes:
- Fields from any plugin (Yoast SEO, WooCommerce, etc.)
- Theme-specific fields
- Custom fields added via code
Use the search bar to find specific keys. Click + to add as a column. These columns show an amber Meta badge.
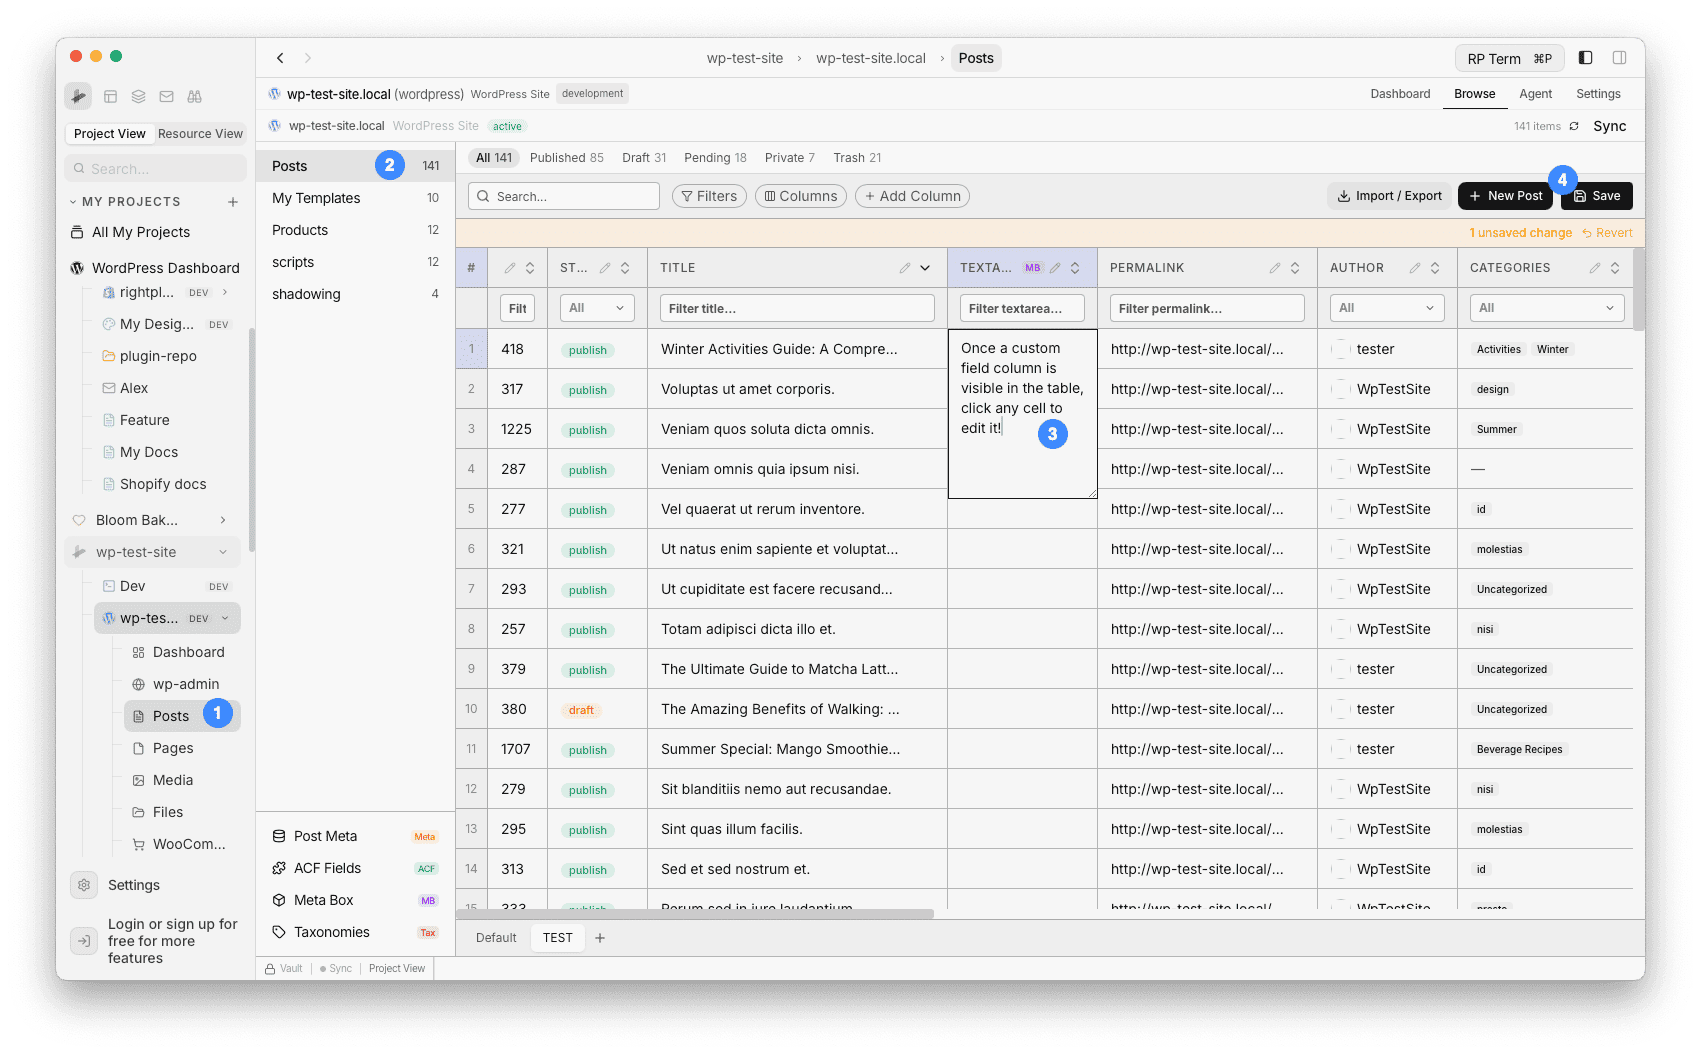
Step 5: Edit fields inline
Once a custom field column is visible in the table, click any cell to edit it. The editor adapts to the field type:
- Text / Textarea: Inline text input
- Number: Numeric input
- Select / Radio: Dropdown picker
- Date / DateTime: Date picker
- Color: Color picker
- Boolean / True-False: Toggle switch
- Taxonomy: Searchable multi-select with checkboxes
- URL / Email: Text input with validation
Changes are saved directly to WordPress via the API.
Step 6: Save as a view
Before adding custom field columns, create a dedicated view first so your Default view stays unchanged:
- Click the + button next to the view tabs at the bottom of the table
- Name the view (e.g. “SEO Fields”, “Product Specs”, “Event Dates”)
- Now add your custom field columns, arrange them, and set filters
- The view saves your column configuration automatically
This way each view has its own set of columns. Your Default view keeps only the standard columns, while custom field columns live in their own dedicated views.
See Create Filtered Views for more on creating and managing views.
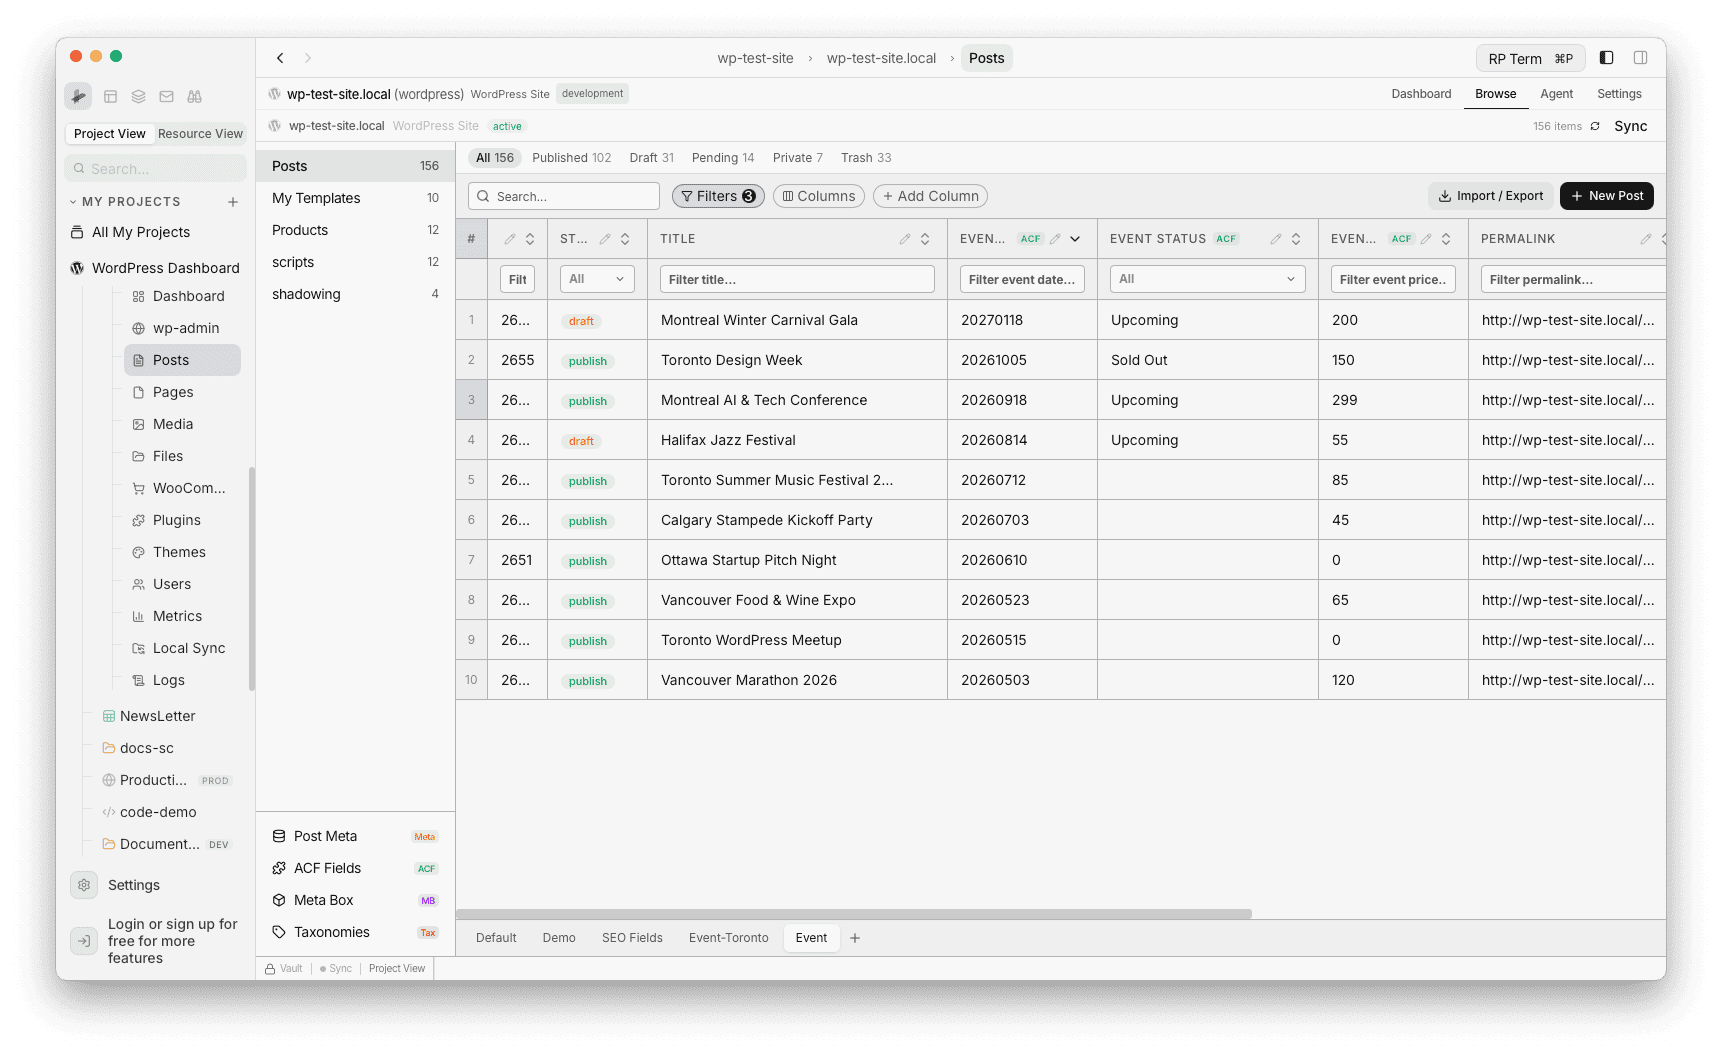
Example: Event management
If you have posts with ACF event fields:
- Open the ACF panel
- Find your “Event Details” field group
- Click + on
event_date,event_location,event_priceto add them as columns - The table now shows event data inline with ACF badges in the column headers
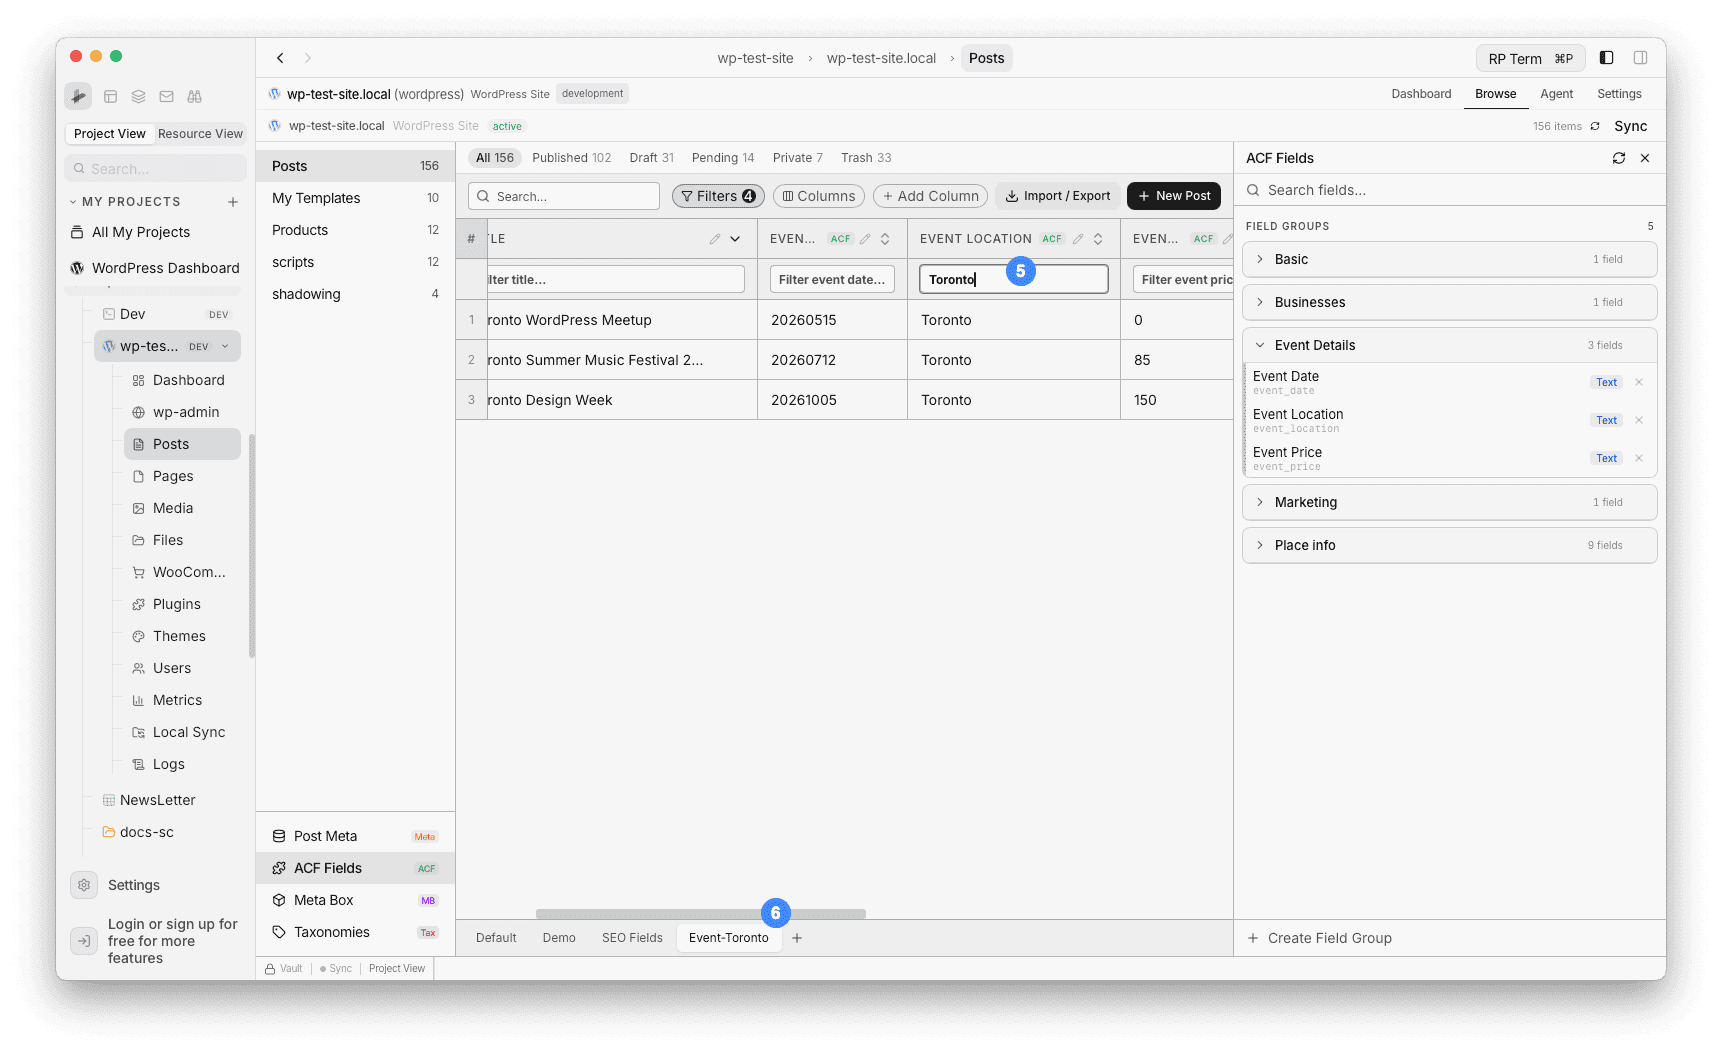
- Filter by
event_location(e.g. type “Toronto”) to see events in a specific city - Save as an “Event-Toronto” view to keep this filtered layout for quick access
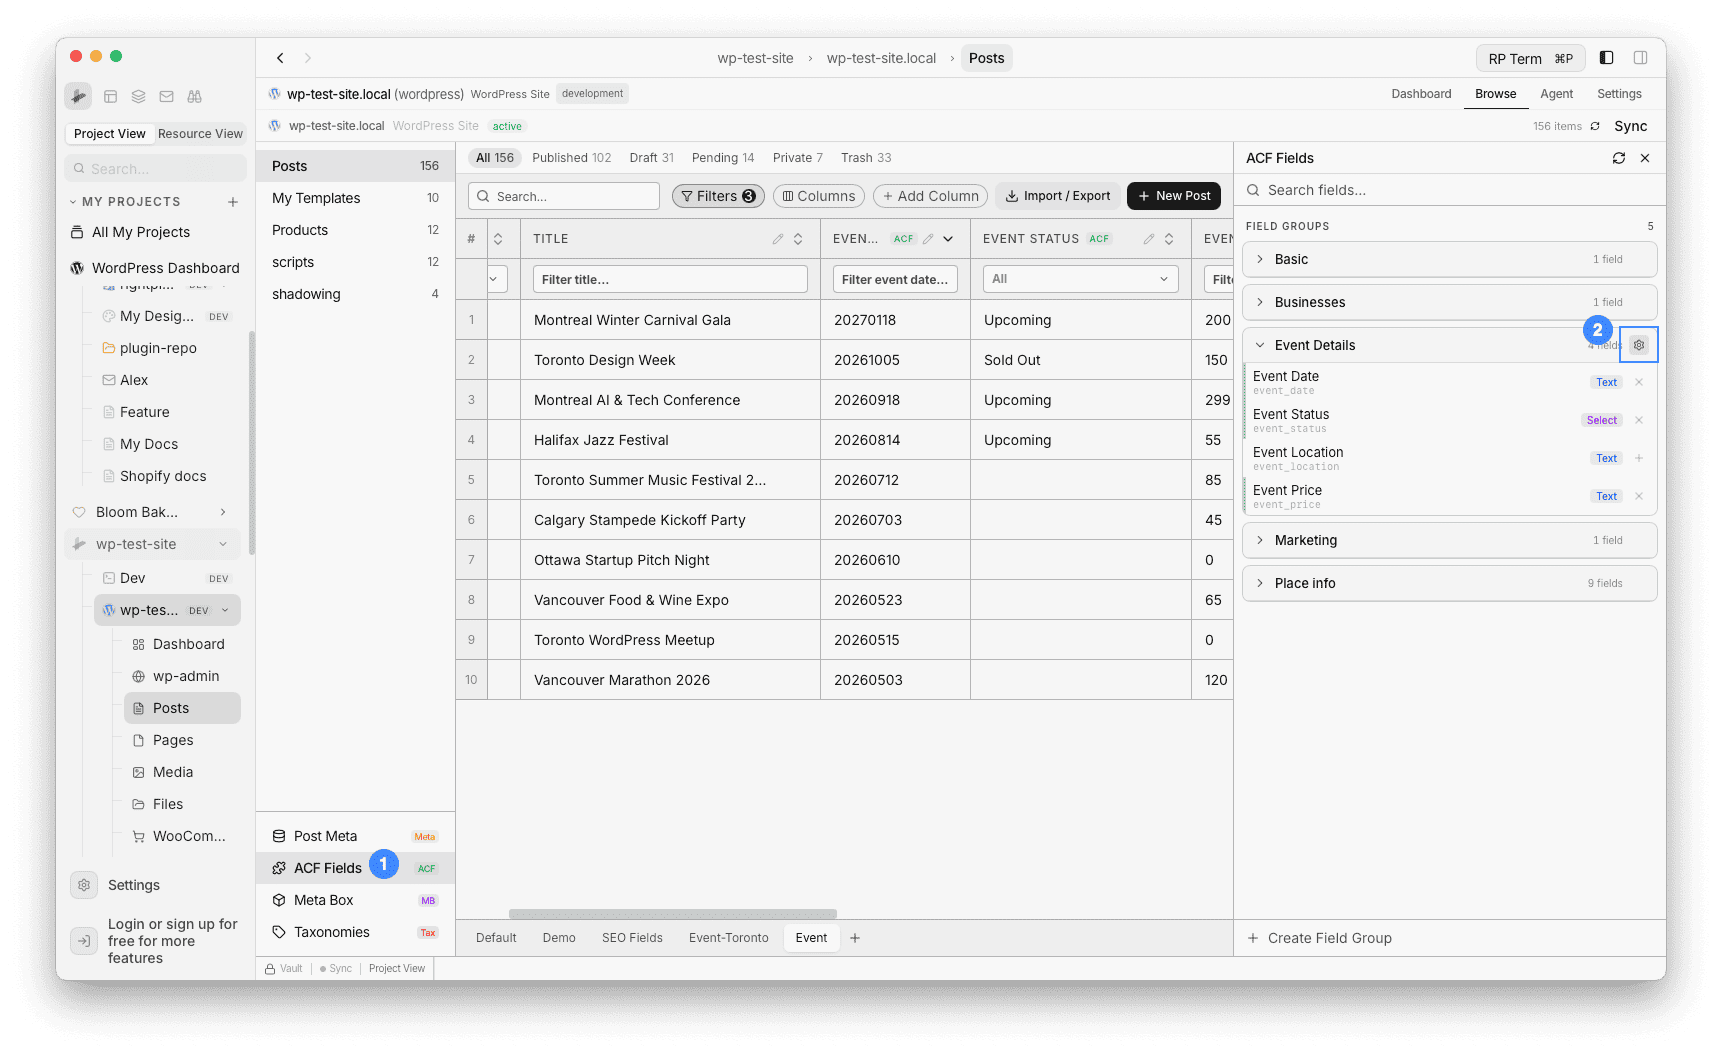
You can also add new fields to the group without leaving RightPlace:
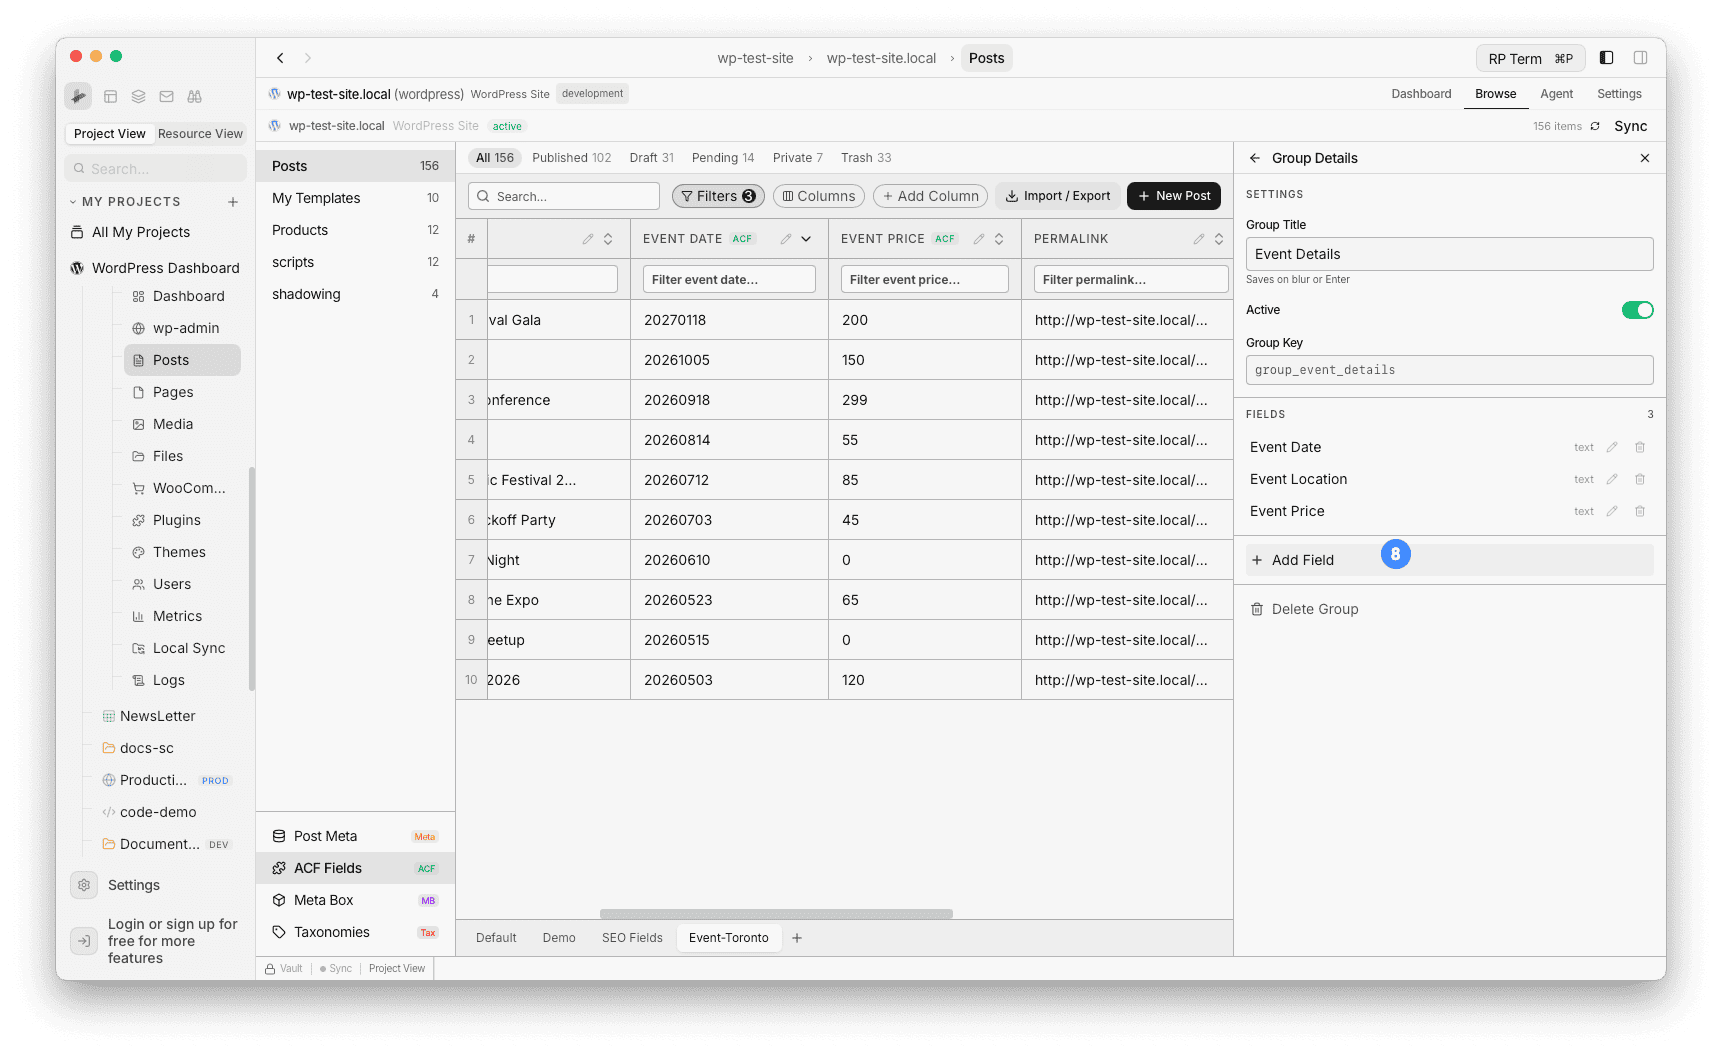
- Click the gear icon on the “Event Details” group to open Group Details
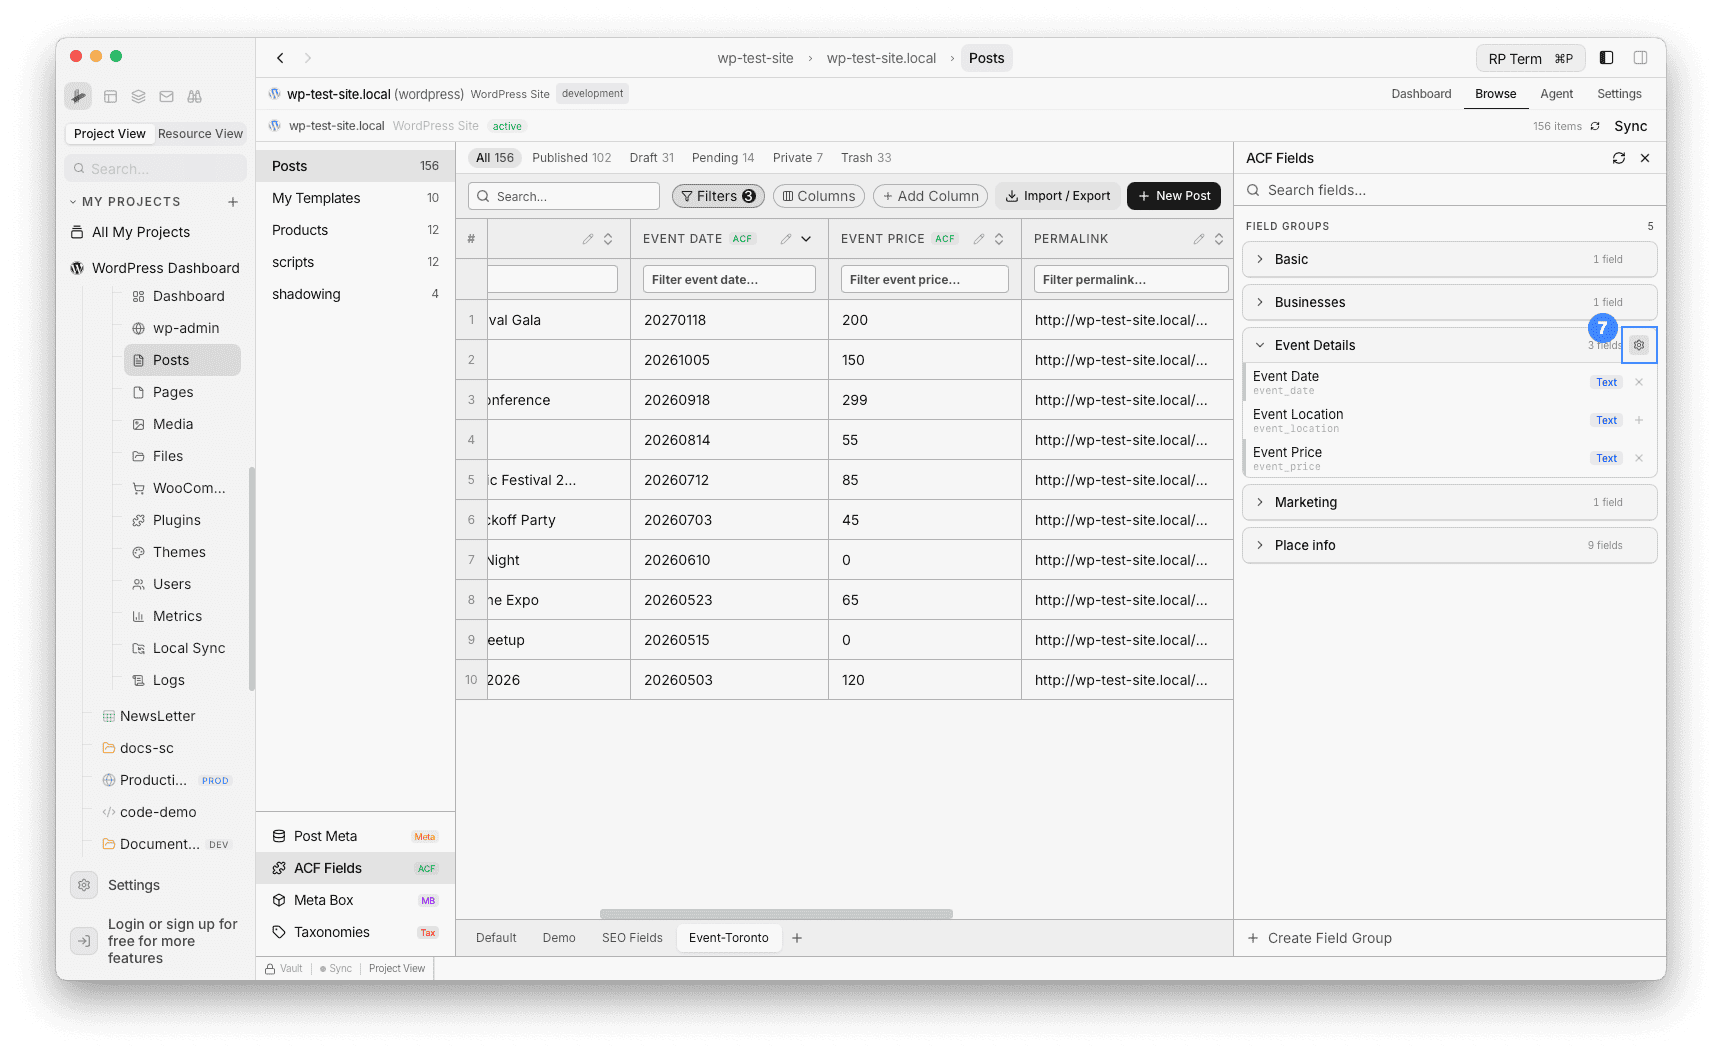
- The Group Details panel shows the group settings and existing fields. Click + Add Field
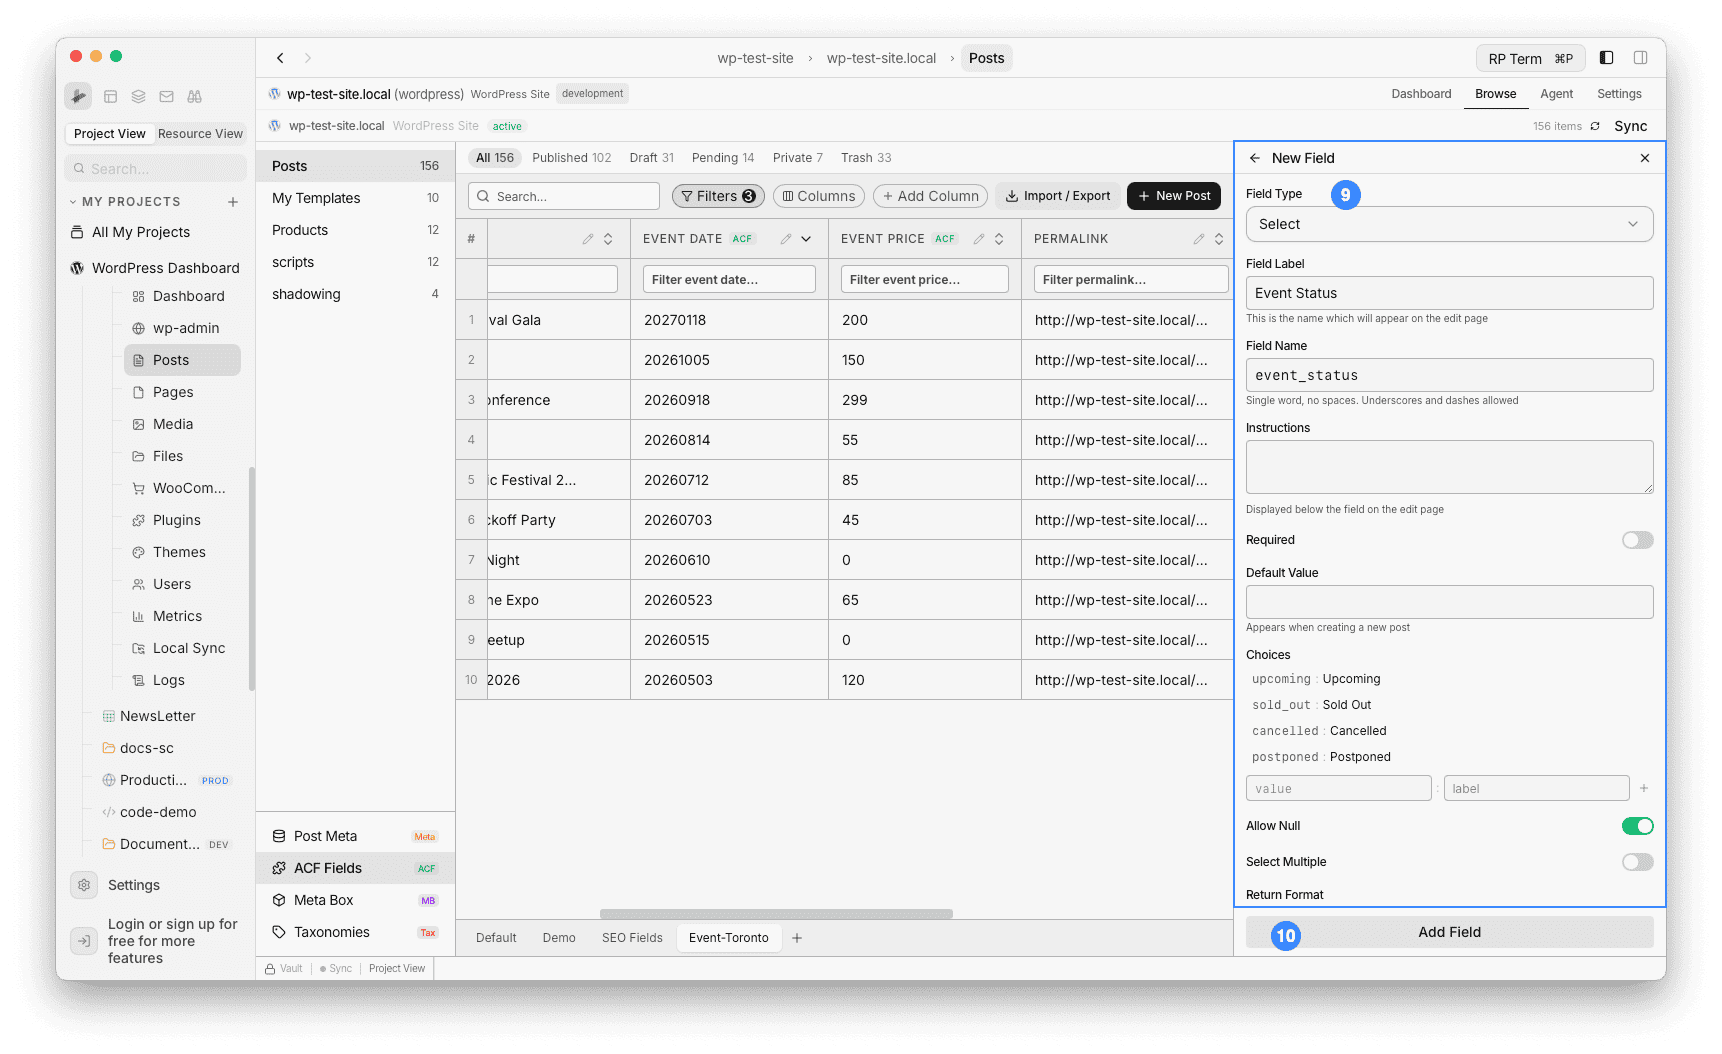
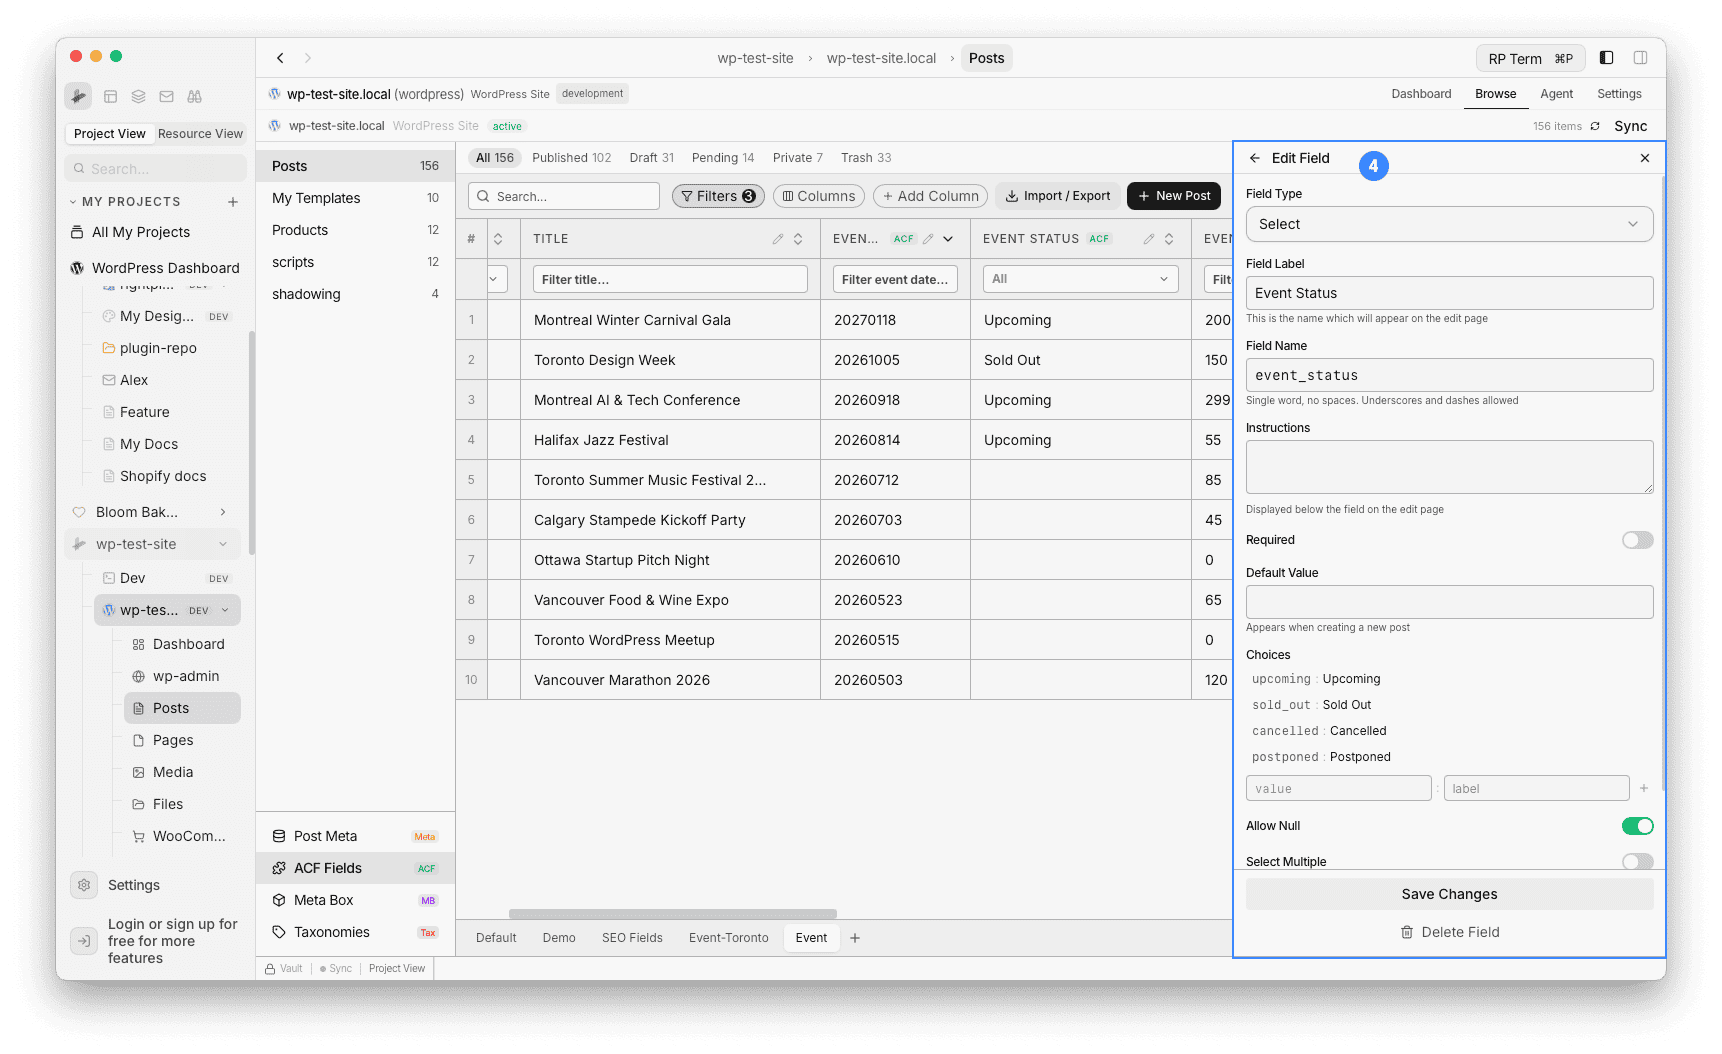
- Fill in the new field form:
- Field Type: Select
- Field Label: Event Status
- Field Name:
event_status(auto-generated) - Choices:
upcoming : Upcoming,sold_out : Sold Out,cancelled : Cancelled,postponed : Postponed - Click Add Field
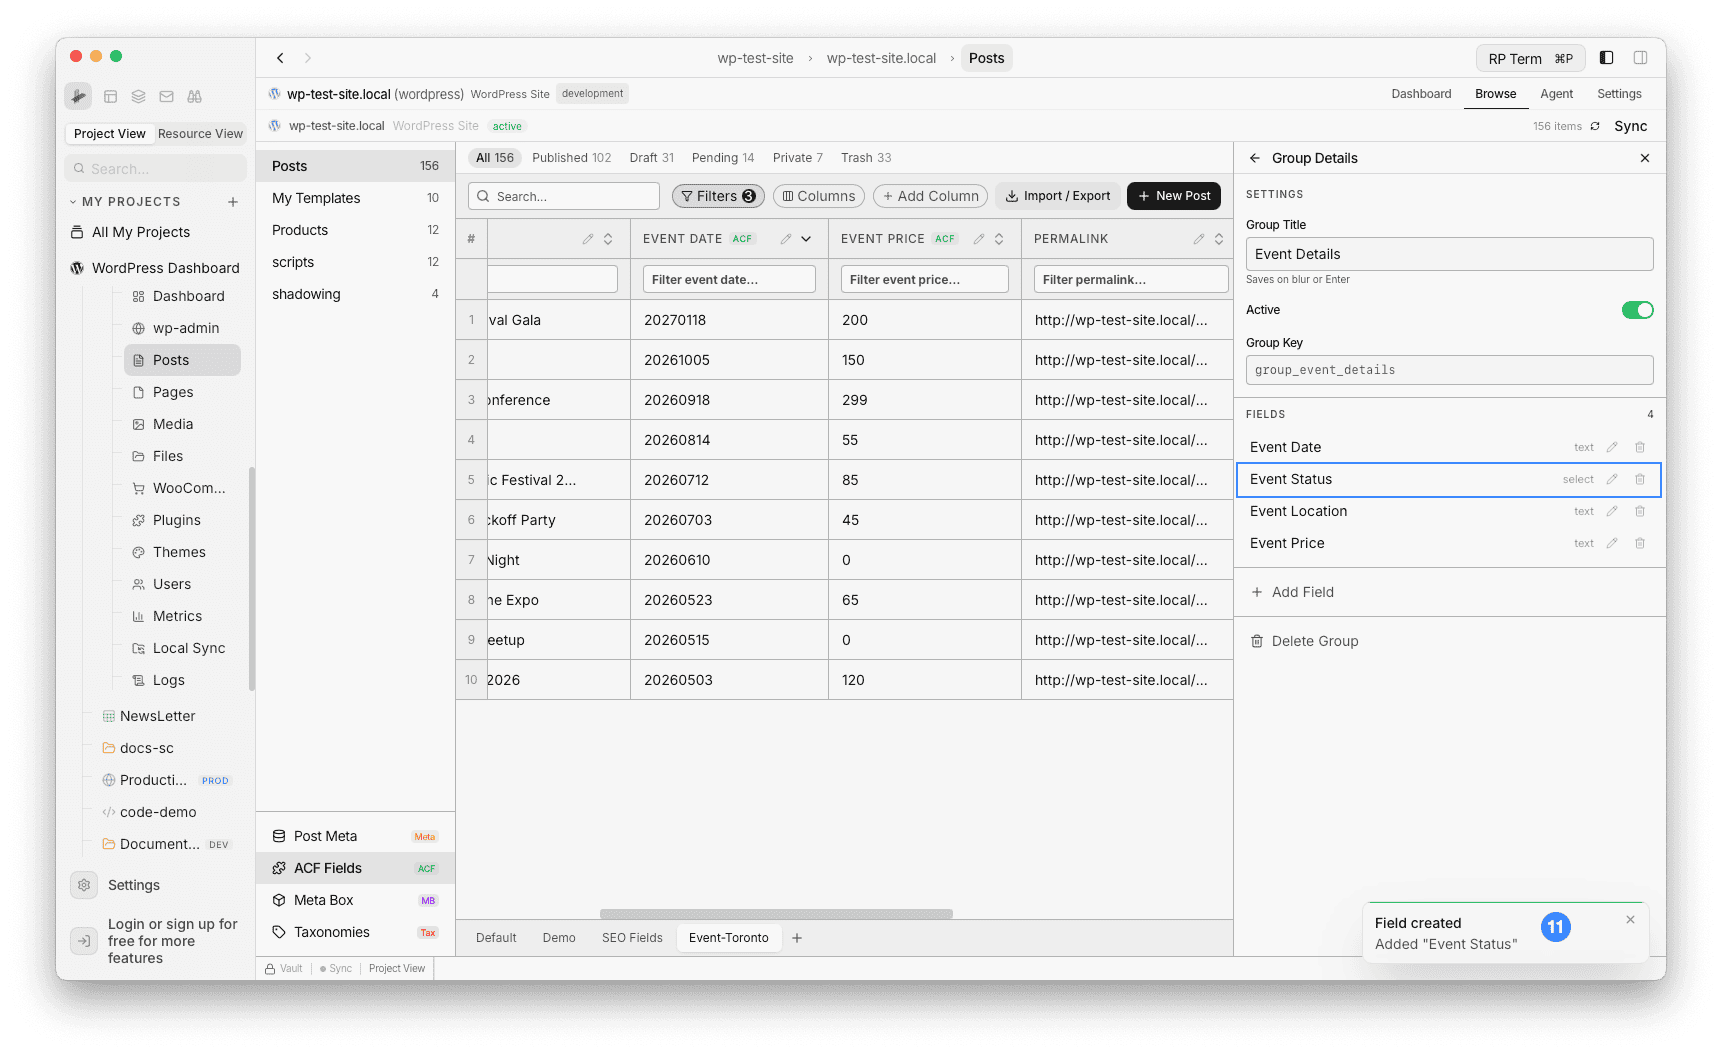
- The field is created. The Group Details panel now shows 4 fields, and a confirmation toast appears: “Added Event Status”
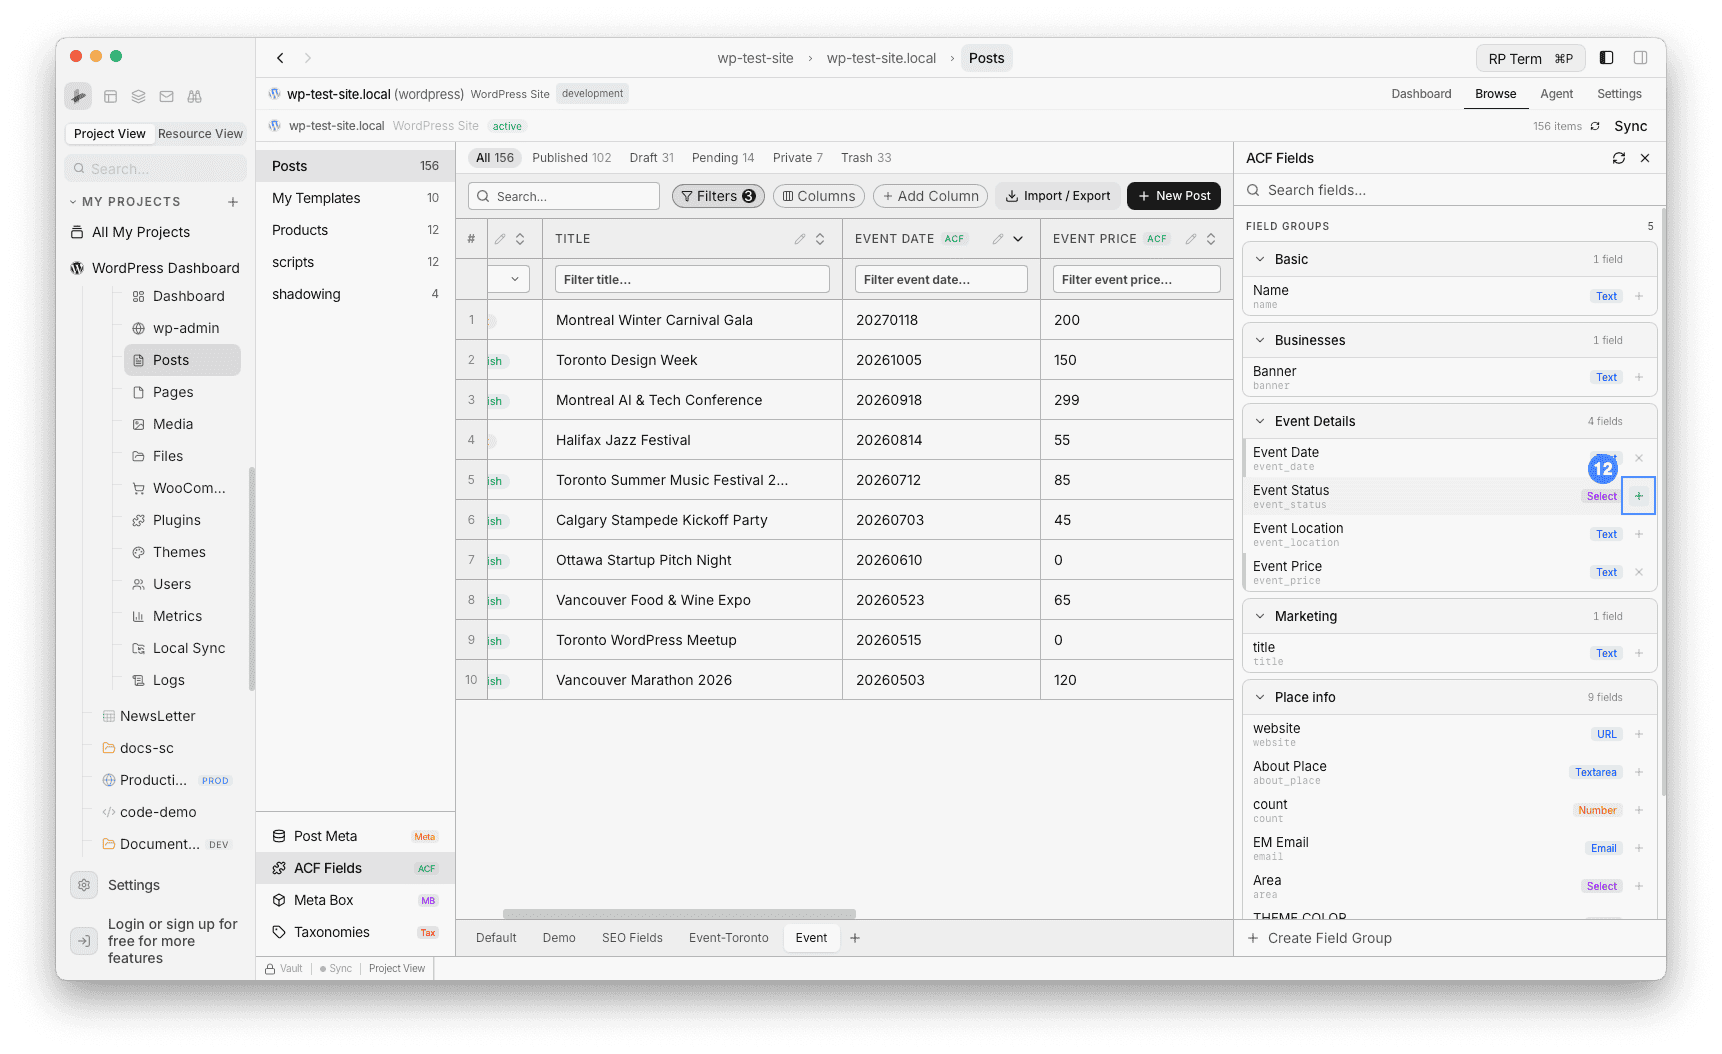
- Go back to the ACF Fields list. The “Event Details” group now shows
Event Statuswith a Select badge. Click + to add it as a column
- Click any cell in the Event Status column to open the dropdown picker. Select from the choices you defined: Upcoming, Sold Out, Cancelled, Postponed

- The table now shows all event data with the new Event Status column filled in. Save the view to keep this layout
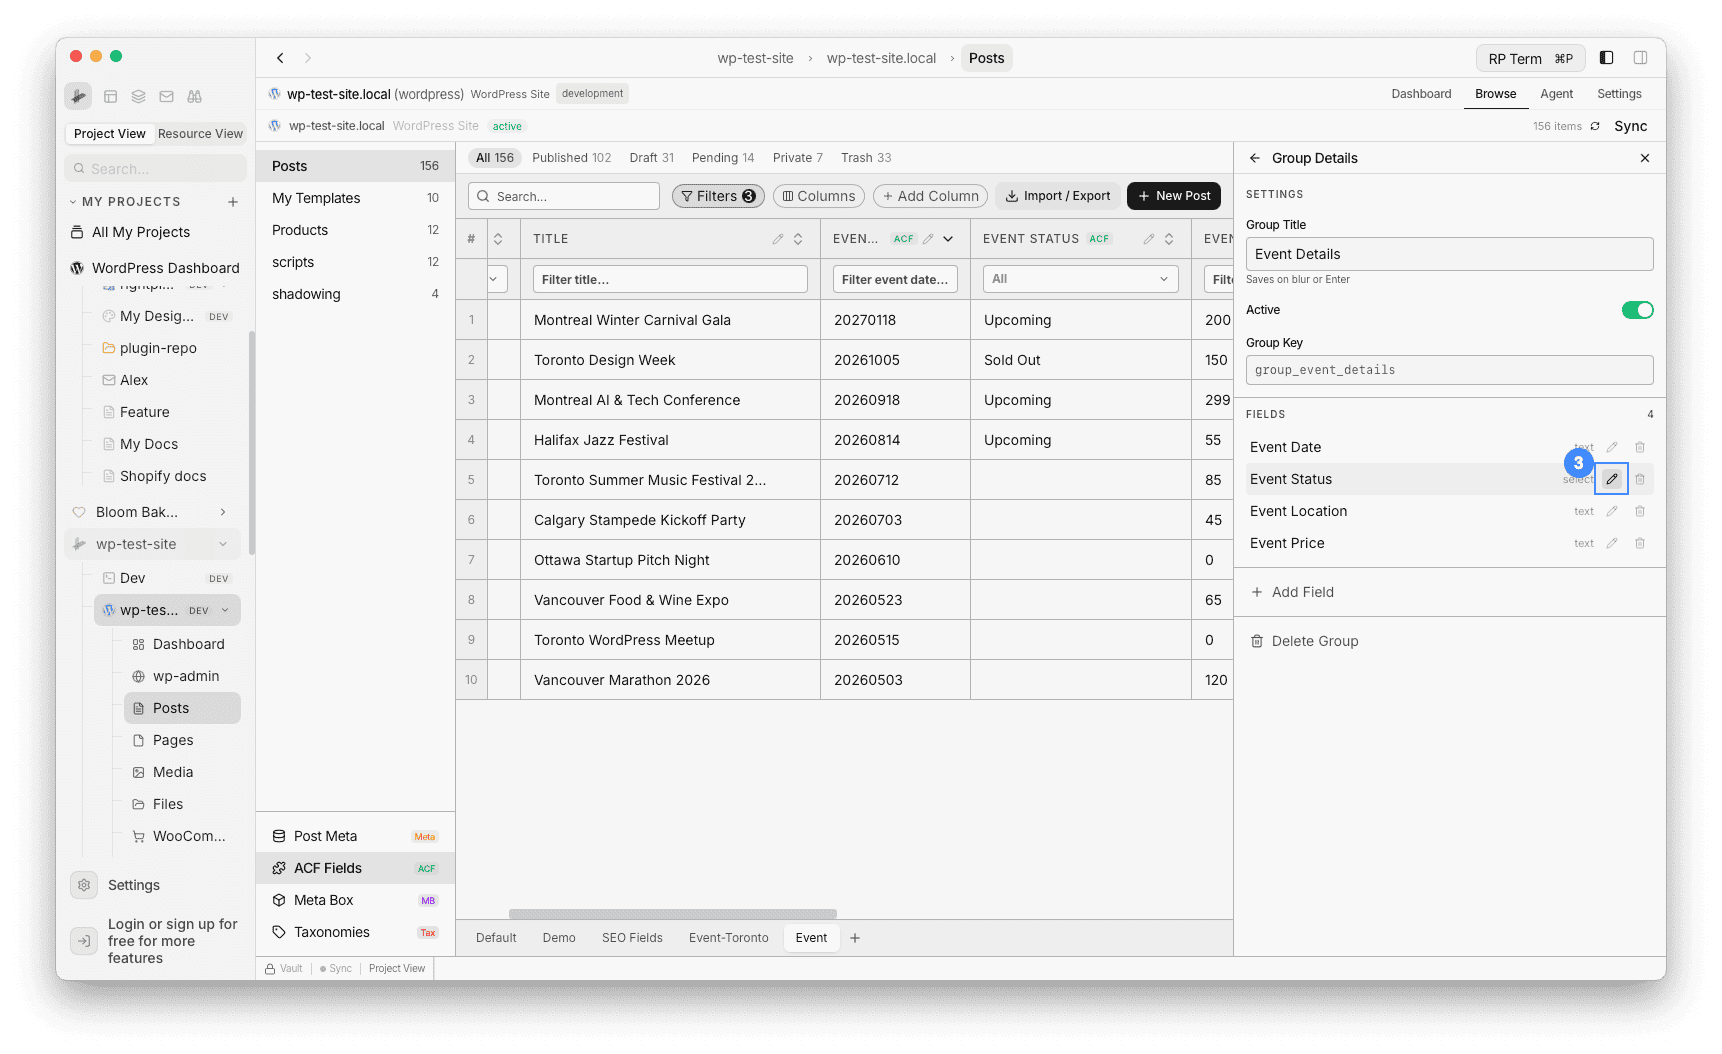
Editing field settings (ACF)
For ACF fields, you can edit field definitions without leaving RightPlace:
- Open the ACF Fields panel from the sidebar
- Click the gear icon on a field group to open Group Details. Then click the pencil icon on the field you want to edit
- The Edit Field panel lets you change: label, name, instructions, required, default value, choices, and other type-specific settings. Click Save Changes when done
Changes are saved directly to the ACF field group on your WordPress site. This is useful for quick adjustments without navigating to wp-admin.
Tips
- Start with a view: Create a dedicated view first, then add only the 3-5 fields you need for your current task as columns. This keeps your Default view clean.
- Mix sources: You can combine ACF, Meta Box, and Post Meta columns in the same view. Each column shows its source badge so you can tell them apart.
- Custom taxonomies: For taxonomy-type fields, use the Taxonomies button instead. Custom taxonomies get their own searchable dropdown editor in the table.
Next steps
- Create Filtered Views: Save column and filter configurations as reusable views
- Import Posts from CSV: Import posts with custom field mapping
- Posts: Full Posts feature reference