Adding Applets
How to add applets to your project and start using them
Once you have a project, the next step is adding applets. Applets are the tools and connections that live inside your project: databases, documents, terminals, file browsers, email, and more. Each one opens as a tab in your workspace.
How to add an applet
Step 1: Open the Add Applet dialog
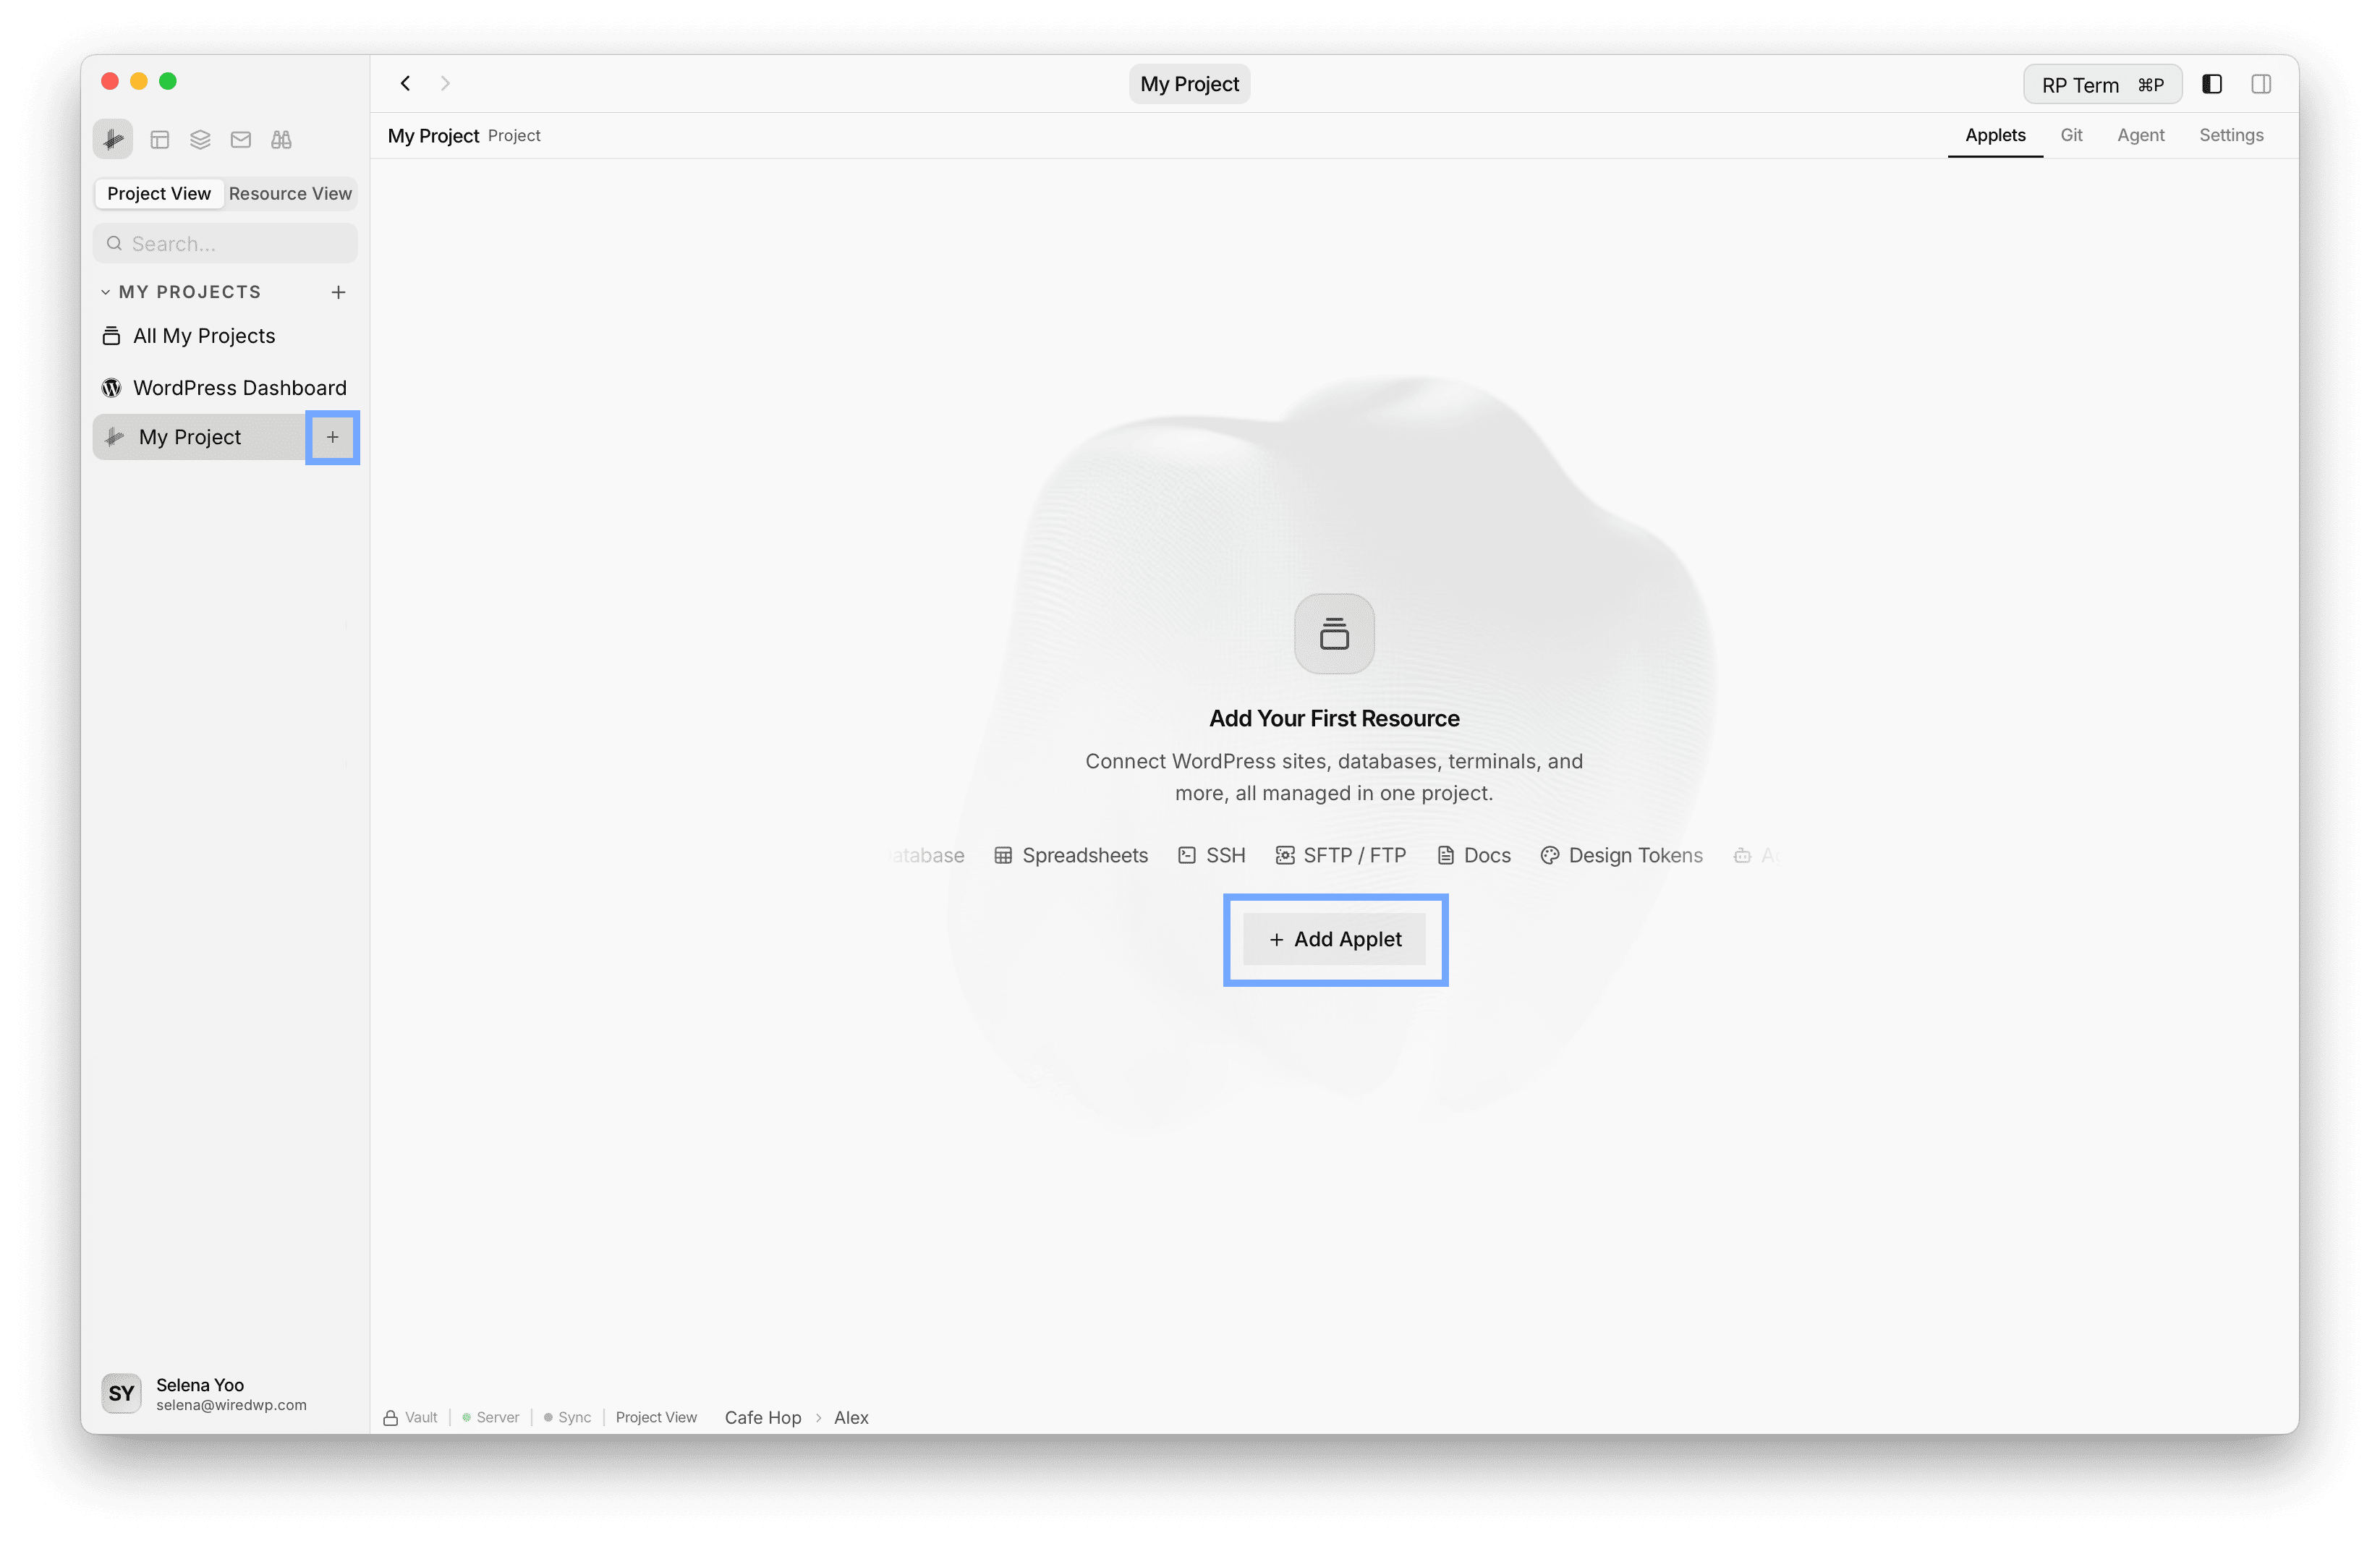
There are two ways to open the applet picker:
- From the sidebar: Click the + button next to your project name.
- From the toolbar: Use the Add Applet button in the project header.
Step 2: Pick a category and applet
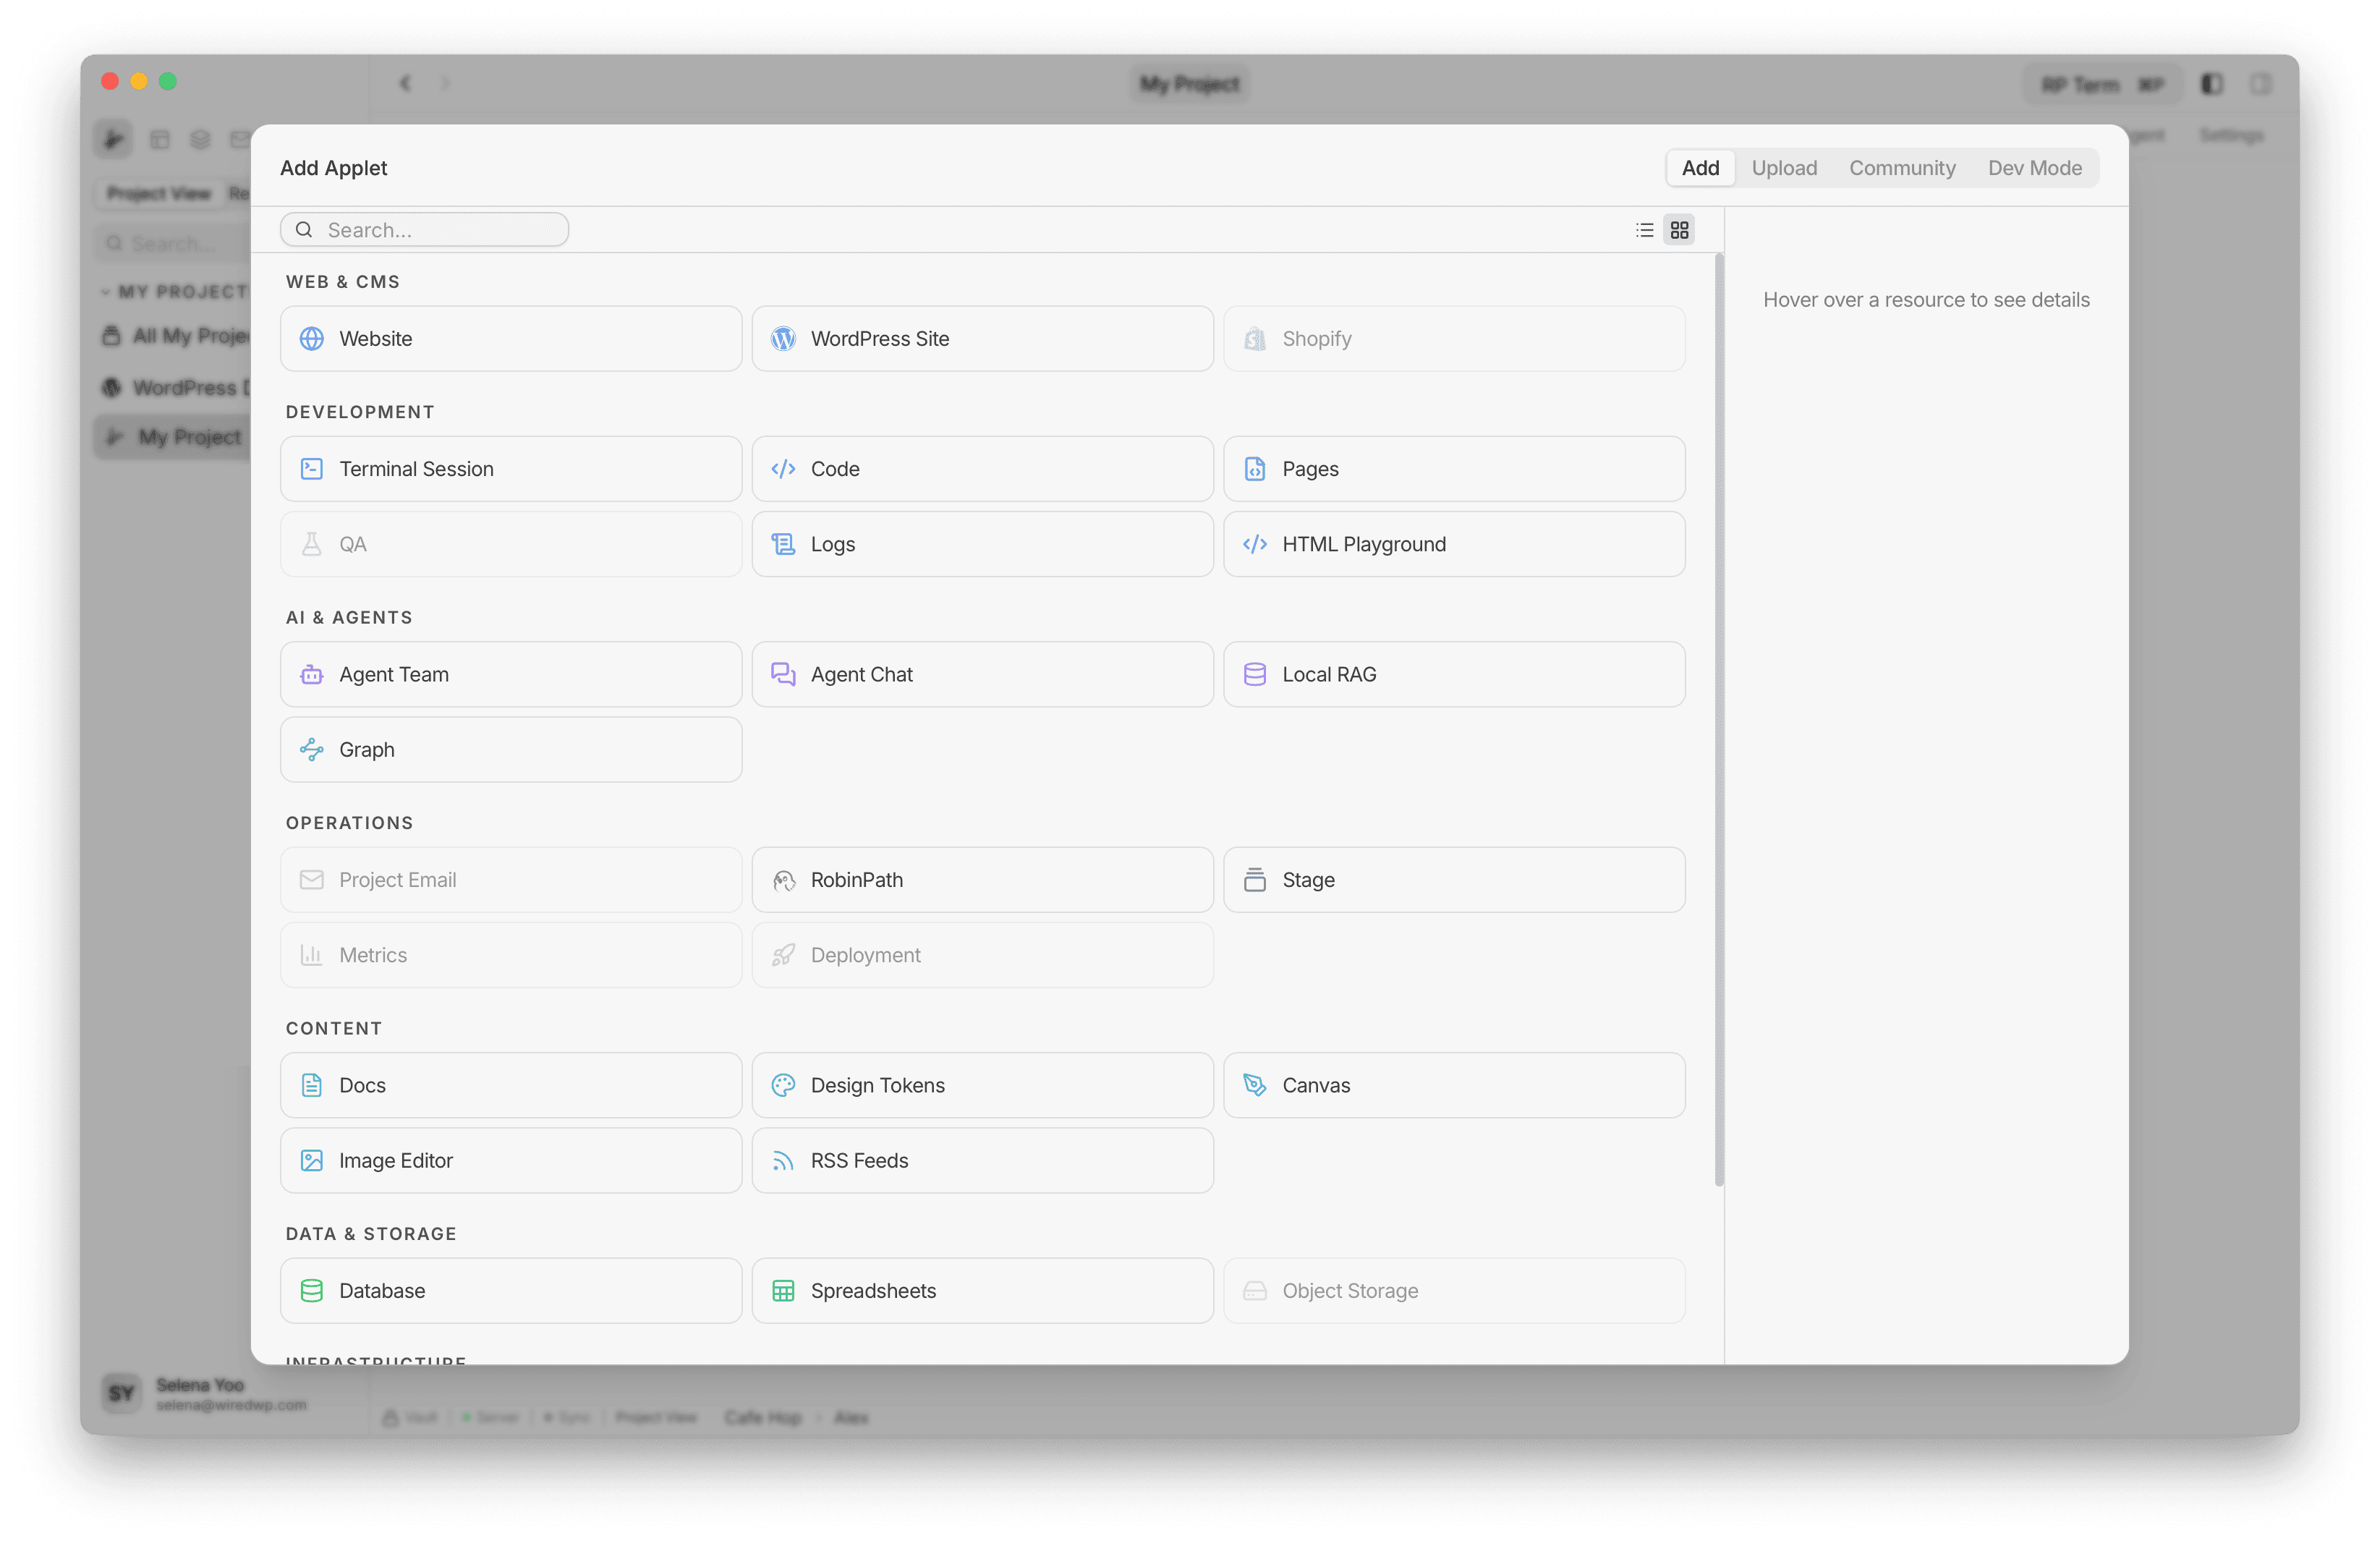
The Add Applet dialog shows all available applets organized by category:
- Web & CMS: Website, WordPress Site, Shopify
- Development: Terminal Session, Code, Pages, QA, Logs, HTML Playground
- AI & Agents: Agent Team, Agent Chat, Local RAG, Graph
- Operations: Project Email, RobinPath, Stage, Metrics, Deployment
- Content: Docs, Design Tokens, Canvas, Image Editor, RSS Feeds
- Data & Storage: Database, Spreadsheets, Object Storage
- Infrastructure: SSH, SFTP / FTP, Local Folder, Git
Click any applet to see its description and feature list in the detail panel on the right.
Step 3: Configure the applet
Each applet has its own setup form. Most ask for:
- Name: a display label for the applet (e.g. “Production DB”, “Sprint Notes”)
- Environment: an optional tag like Production, Staging, or Development
Some applets need additional details. A database connection needs a host and credentials. An SFTP applet needs a server address. A Docs applet creates a folder for your markdown files.
Step 4: Start using it
Click the confirm button to create the applet. It appears in your project sidebar and opens in a new tab, ready to use.
Resource applets vs utility applets
There are two kinds of applets:
Resource applets are saved connections. You set them up once and they persist across sessions. A WordPress site, a database, a docs folder - these stay in your project until you remove them.
Utility applets are quick-use sessions. Open a browser tab, launch a terminal, edit an image. Close the tab and it is gone. No setup, no configuration.
Some applets work as both. A Terminal can be saved as a resource (a named session tied to your project) or launched fresh as a utility applet from the New Tab page.
Managing applets
Reorder and organize
Applets appear in your project sidebar in the order you added them. You can drag them to rearrange.
Settings
Each resource applet has a Settings tab where you can update its name, environment tag, and applet-specific options.
Remove an applet
Open the applet’s Settings tab and scroll to the bottom. The Danger Zone section has a delete option. Removing an applet does not delete external data (your database, server, or website stays untouched) but does remove any local data the applet stored inside your project folder.
Browse the full catalog
Every built-in applet has its own documentation page with features, screenshots, and usage details. See the full list at Applets.
Next steps
- Connecting a WordPress Site: Add your first WordPress site to the project
- Applets Overview: Learn about resource vs utility applets in detail