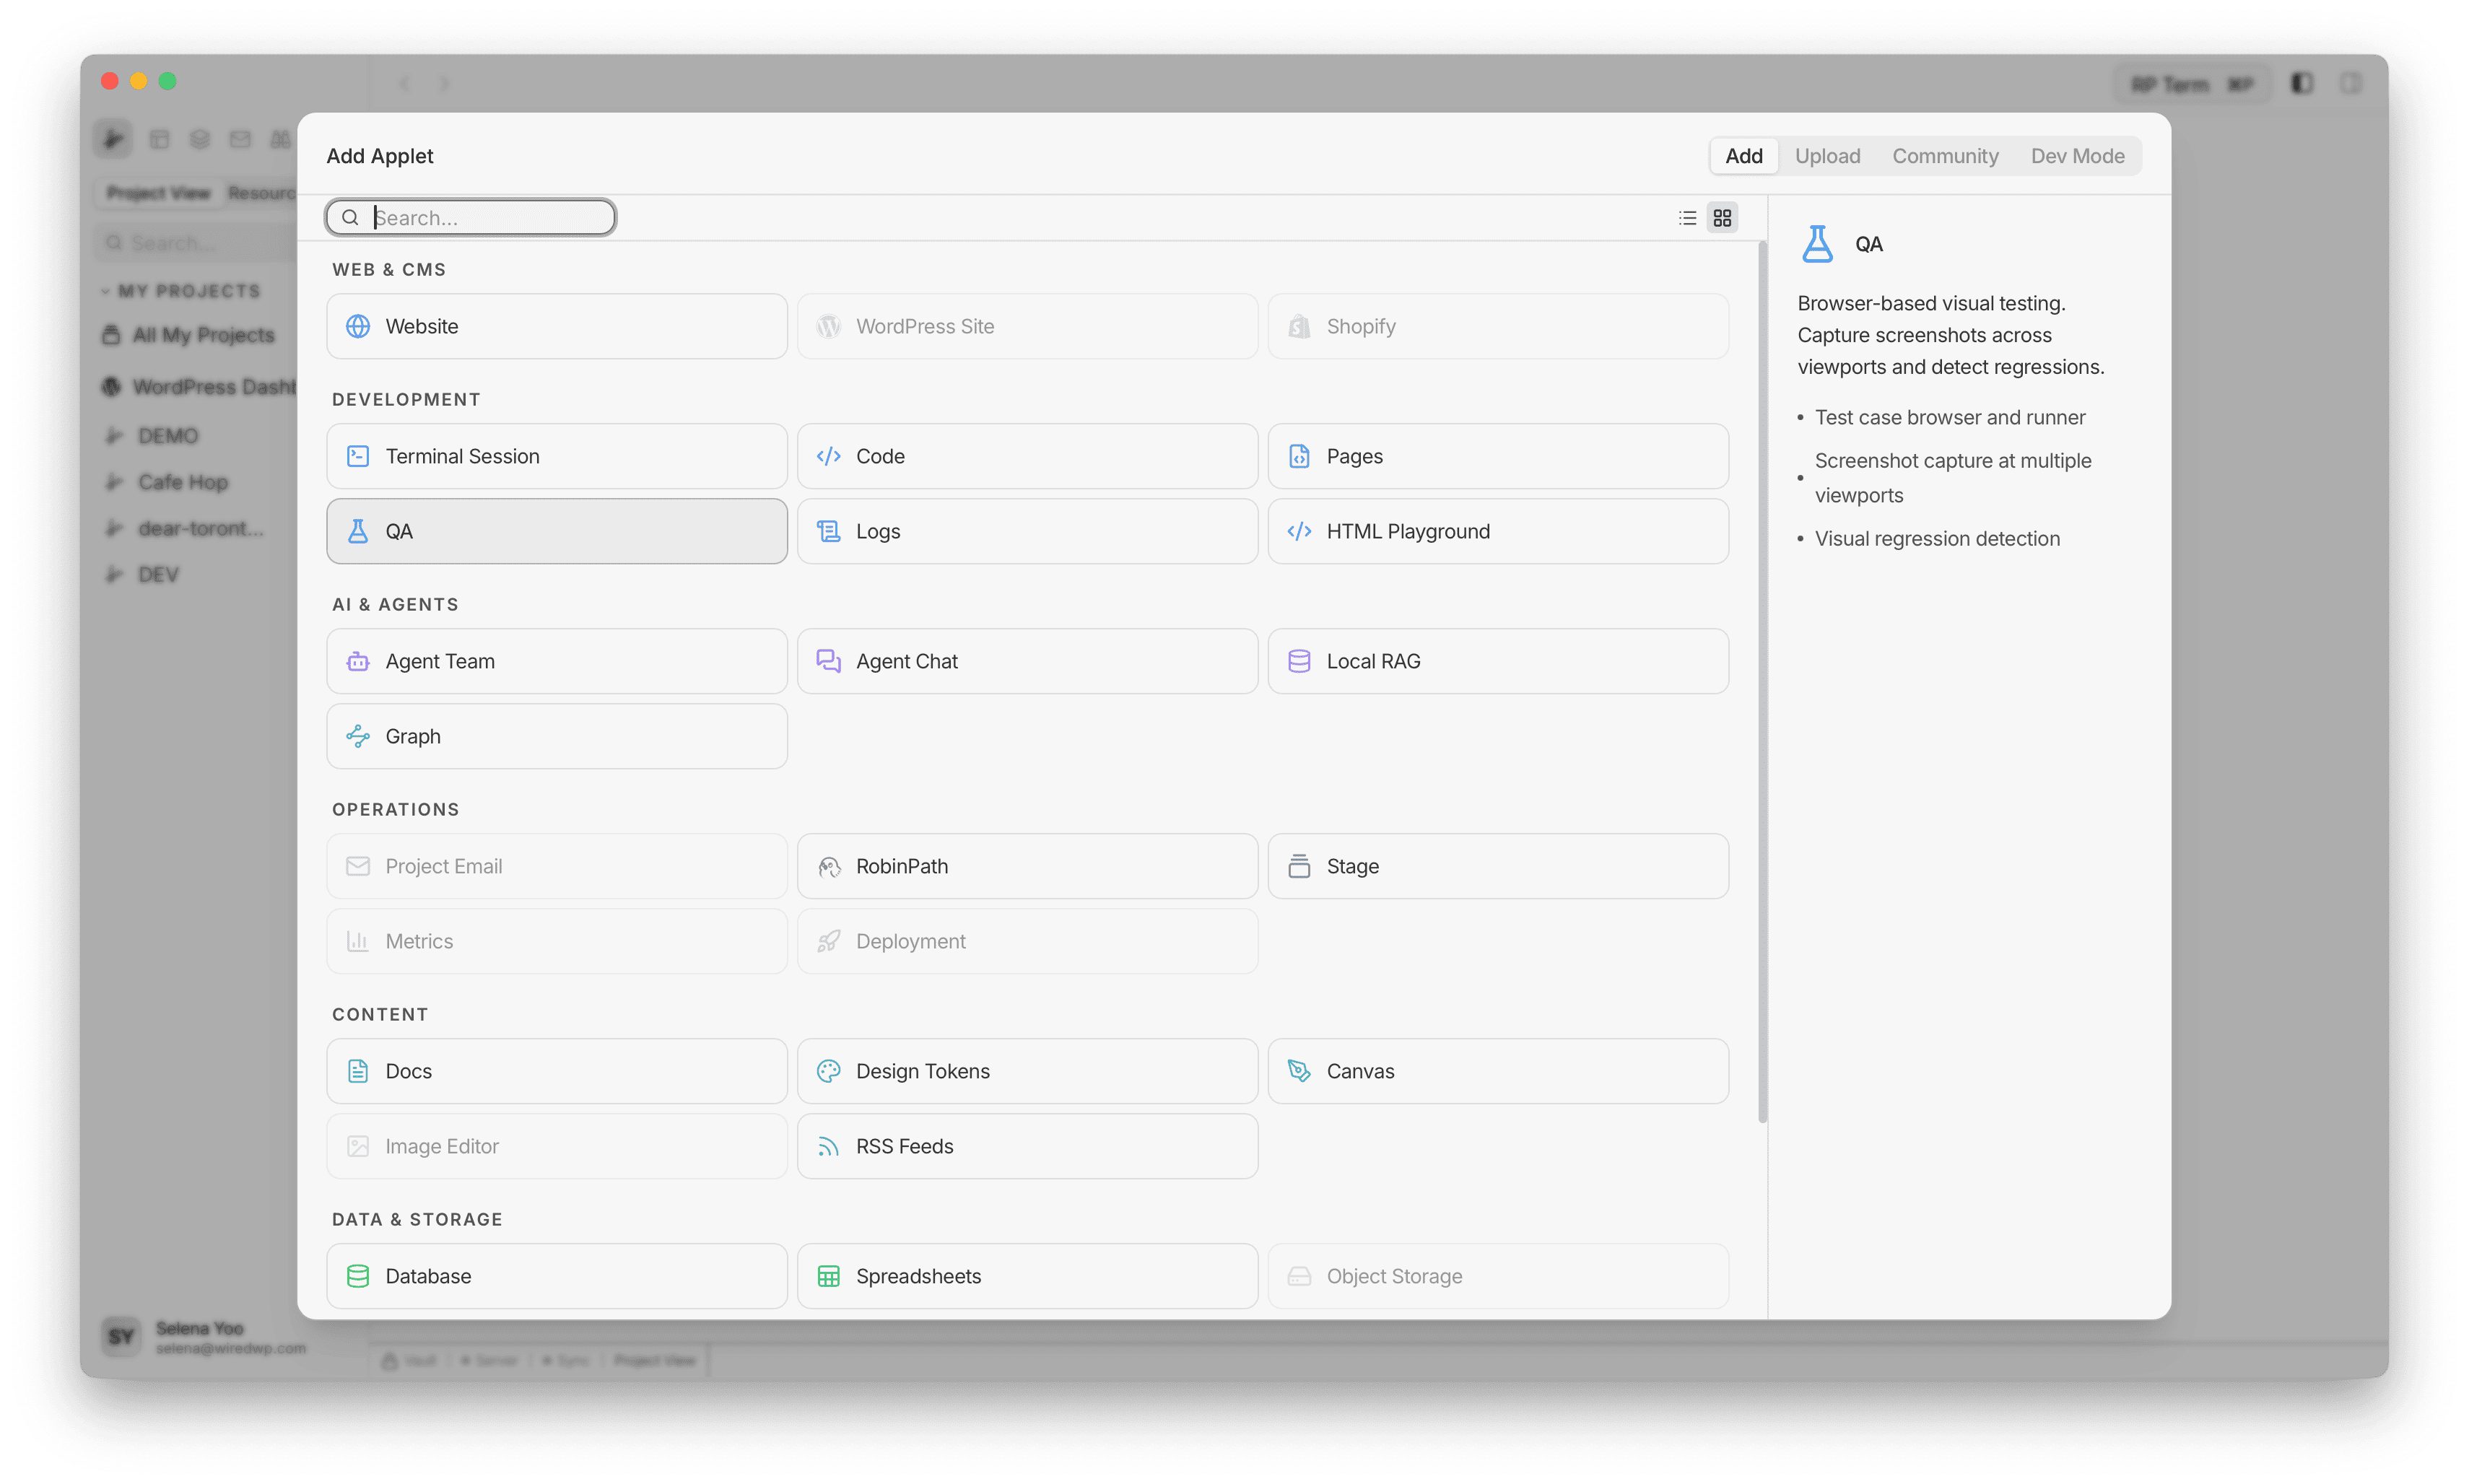
QA
Browser-based visual testing. Capture screenshots across viewports and detect regressions.
Features
- Saved QA test list with run and status badges
- Benchmark capture and pixel diff comparison
- Run history with optional screenshot retention
- Built-in browser preview with viewport controls
Catch visual bugs before anyone else does
You changed the CSS, deployed the update, and everything looked fine on your screen. Then a teammate notices the signup button shifted 10 pixels on tablet. Small changes break layouts in ways you cannot see by eyeballing one viewport.
The QA applet captures screenshots of your pages and compares them pixel by pixel against a saved baseline. Set up a test once, run it whenever you want, and get a clear diff showing exactly what changed.
- Pixel-level comparison. Capture a benchmark, run a compare, and see the exact percentage of pixels that changed. No guessing.
- Multiple viewports. Test the same page at different widths to catch responsive issues before they ship.
- Run history. Every comparison is saved with its diff percentage, so you can track visual stability over time.
- Built-in browser preview. See your page live while configuring tests. No need to switch to a separate browser.
- One-click run all. Execute every test in the list at once and review results from a single dashboard.
Adding a QA applet
Open Add Resource and choose QA in the Development category.
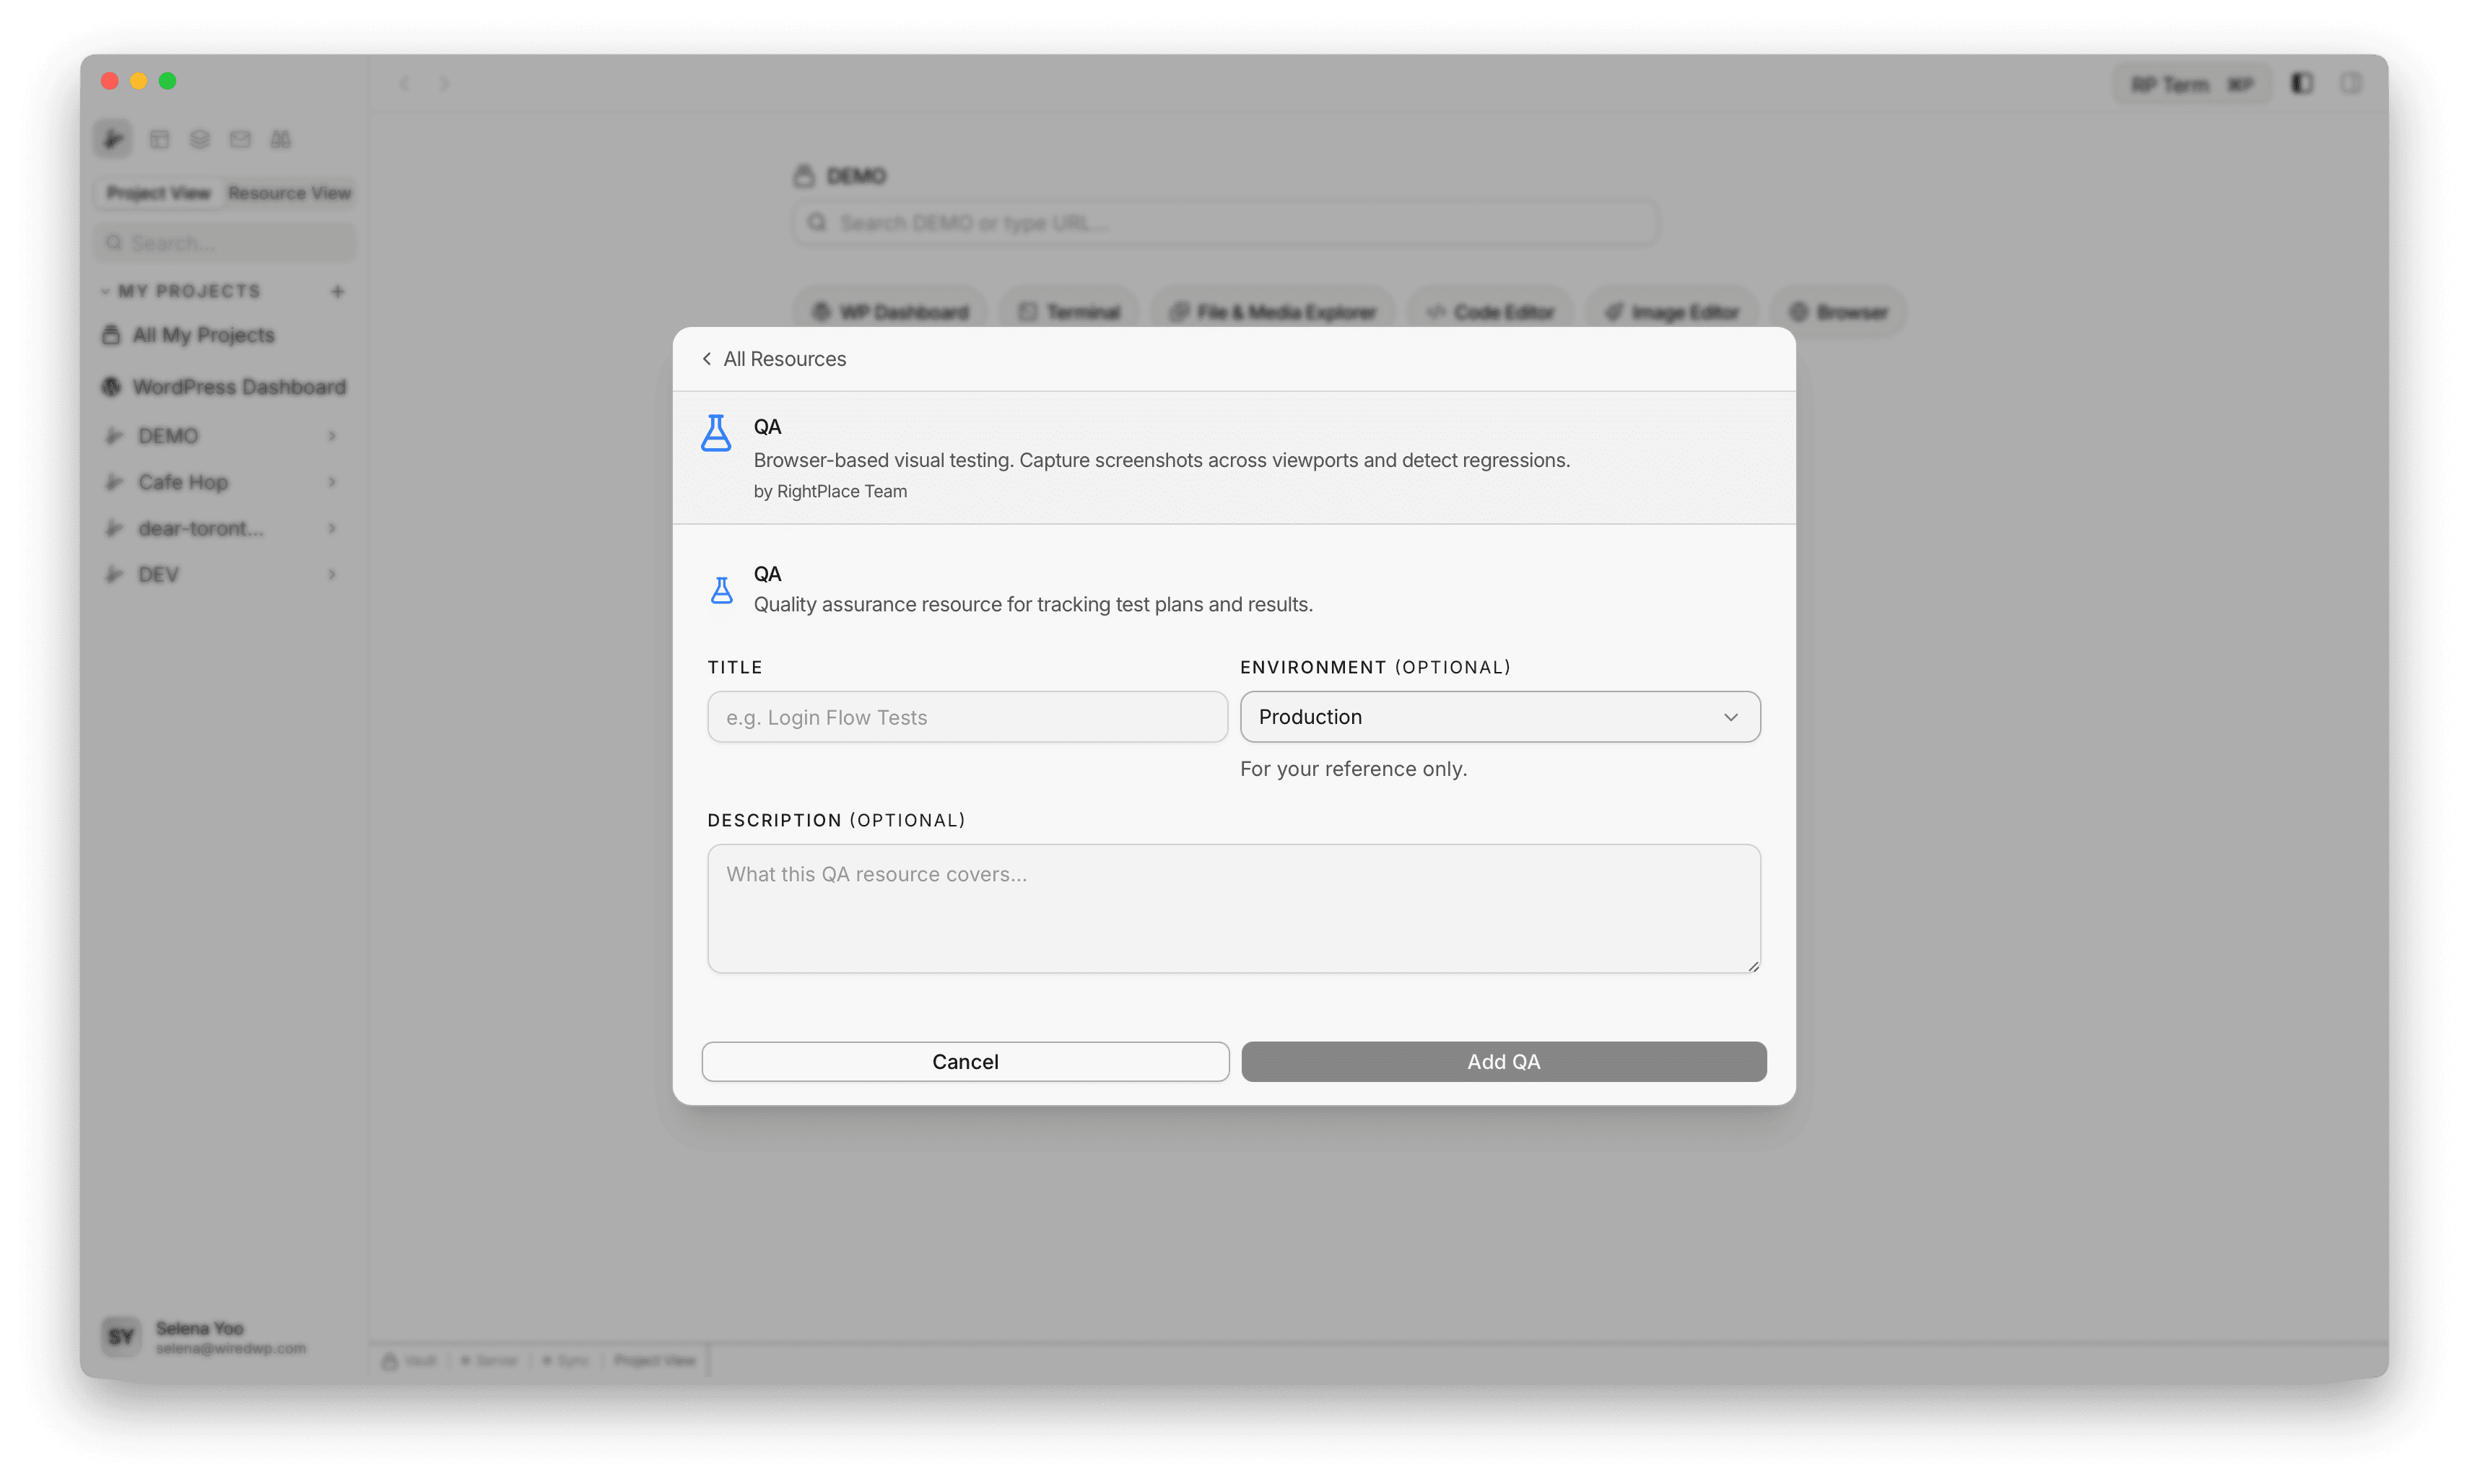
The create form includes:
- Title
- Environment
- Description (optional)
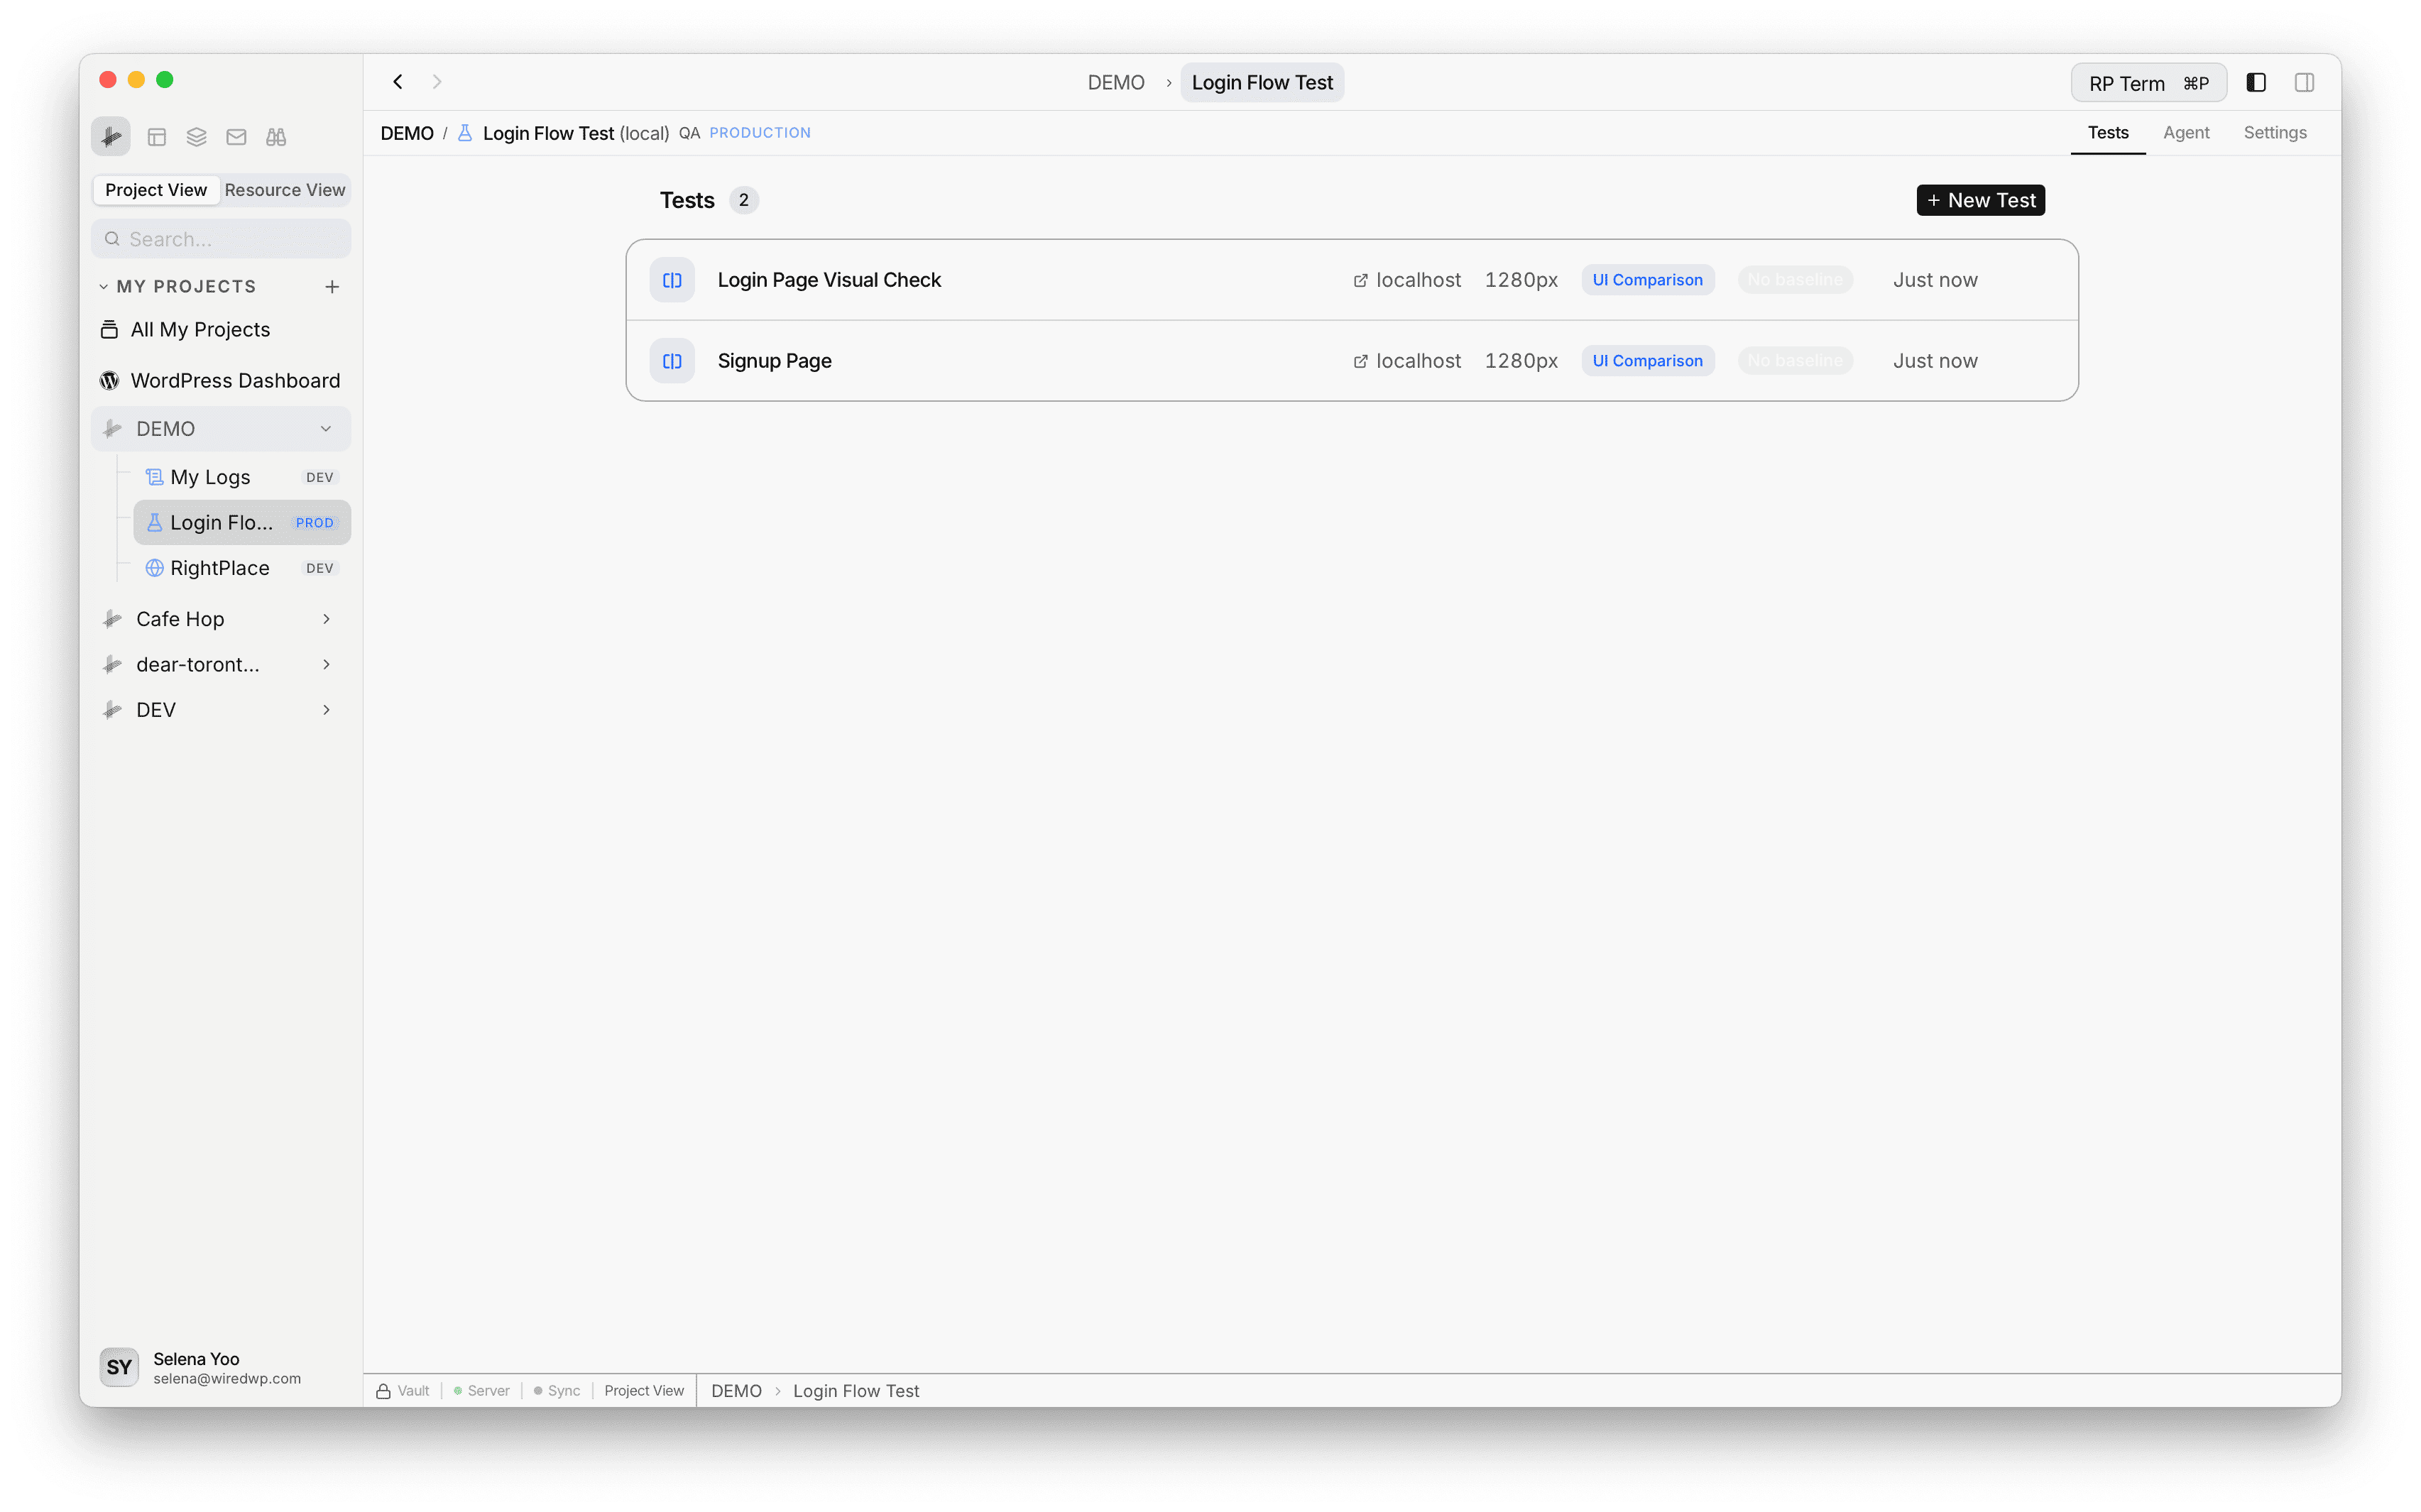
QA test list
After creating the resource, the main page shows your test list. Each row includes:
- Test name
- Target URL hostname
- Viewport width
- Test mode badge
- Current status badge
- Last updated time
- Row actions for run, edit, and delete
Status badges in the list:
- No baseline: benchmark not captured yet
- Benchmark: baseline exists and test is ready to run
- Running: compare is currently in progress
- Identical / percentage diff / Error: most recent run result
Creating and editing tests
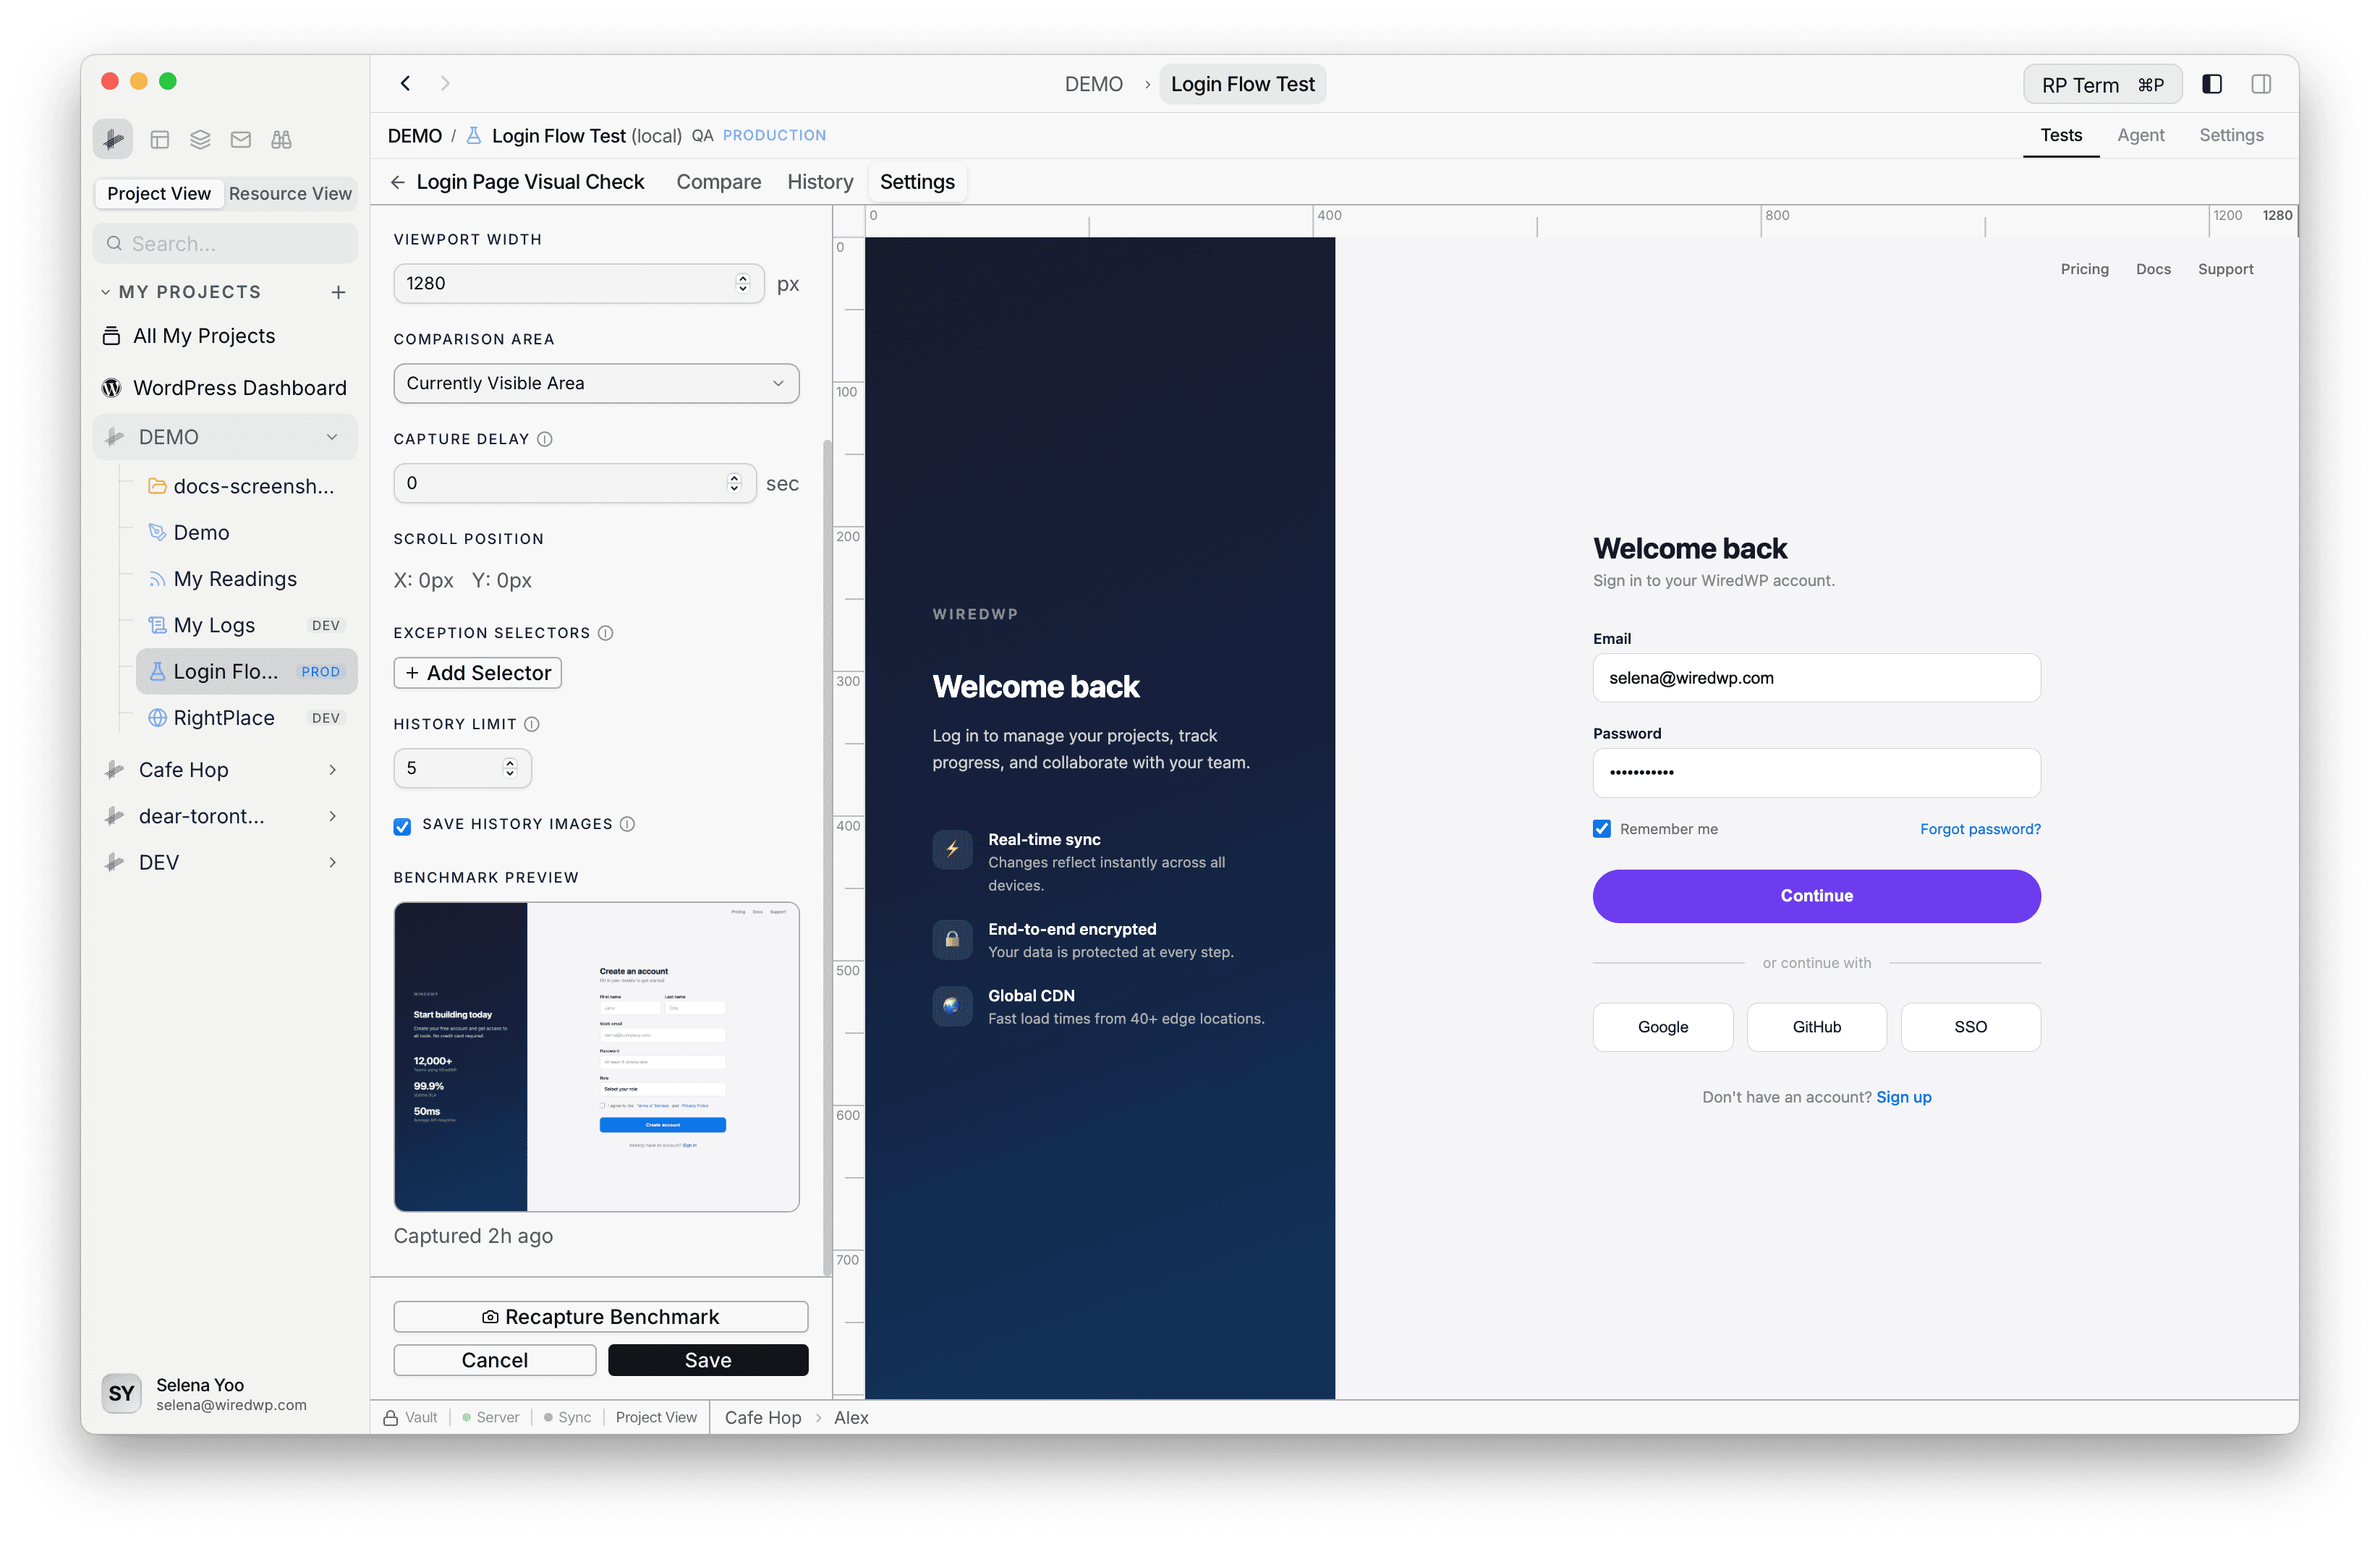
Click New Test to open the detail screen on the Settings tab.
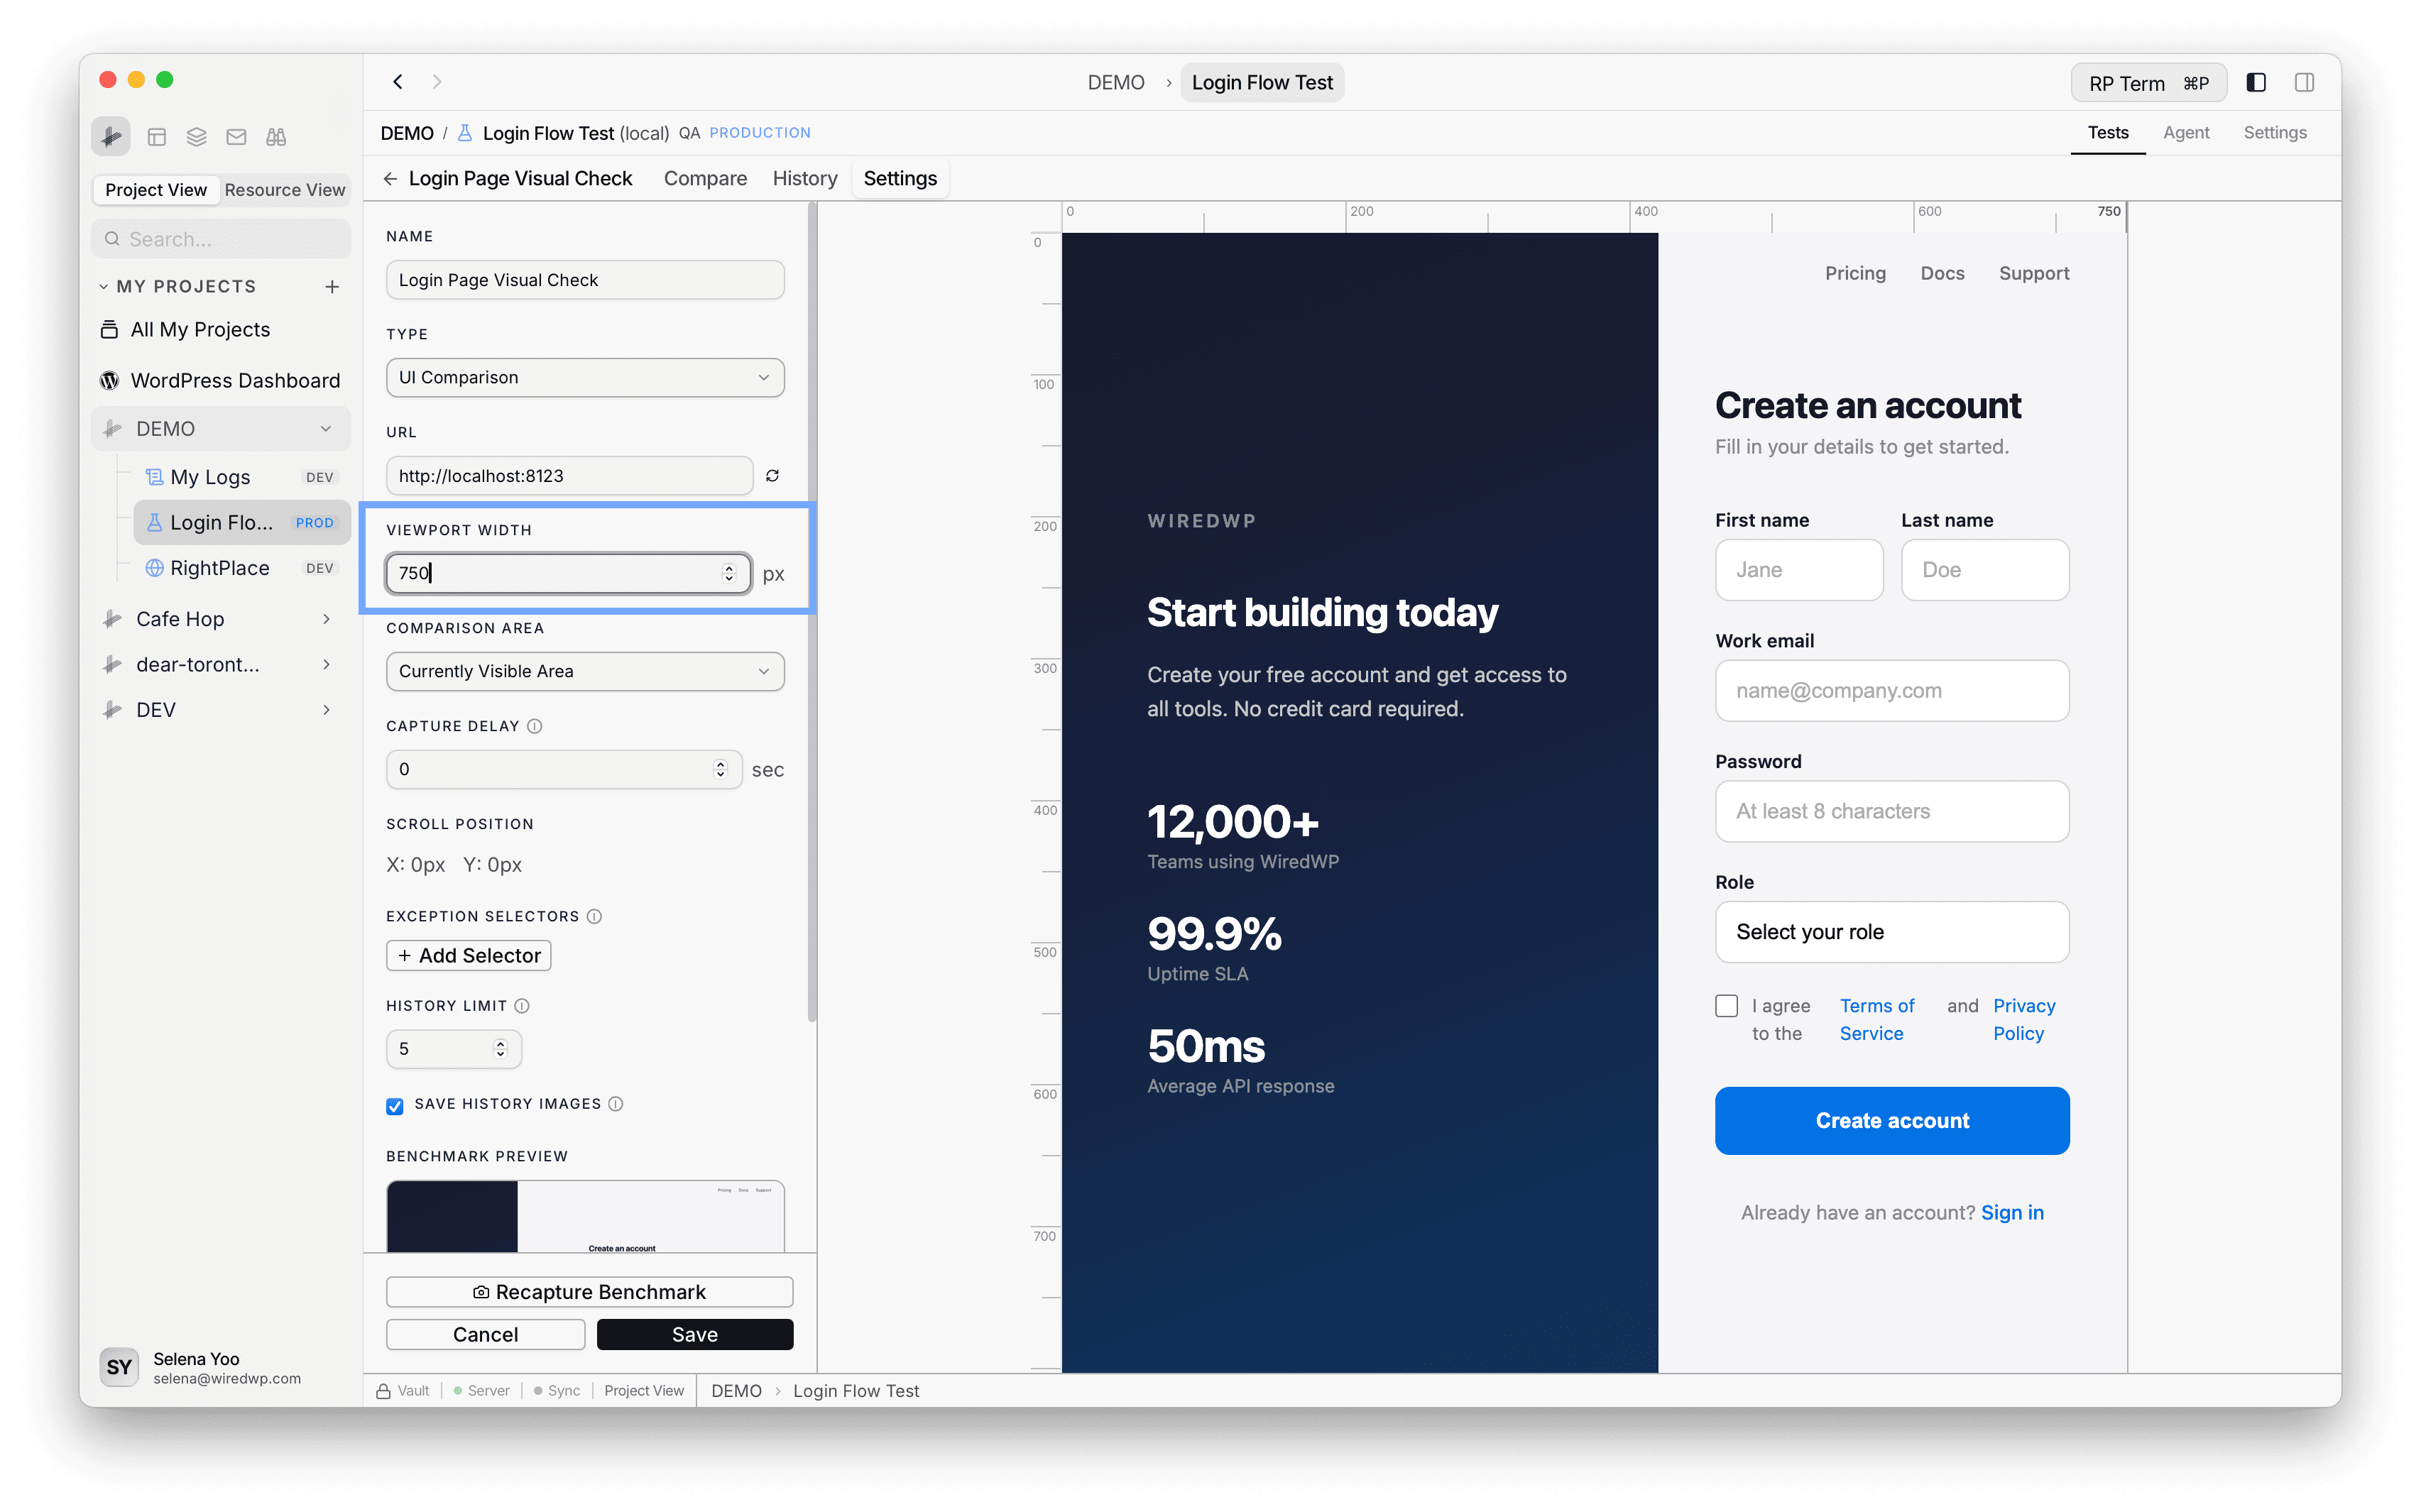
Config fields currently implemented:
- Name
- Type: UI Comparison
- URL
- Viewport Width (px)
- Comparison Area: currently visible area or entire page
- Capture Delay (seconds)
- Exception Selectors (CSS selectors hidden before capture)
- History Limit (max saved runs)
- Save History Images (store live/diff images for each run)
Notes:
DOM AssuranceandClick and Verifyappear in the type menu as coming soon and are disabled in the current implementation.- While editing, the embedded browser preview updates from the configured URL and viewport width.
- Exception selectors are highlighted in preview and hidden during benchmark/live capture.
Benchmark capture
Each test needs a benchmark before compare runs. In Settings, use Set as Benchmark (or Recapture Benchmark) to store the baseline image.
The benchmark capture stores:
- Screenshot image
- Browser width and height
- Scroll position
- CSS zoom used during capture
Compare tab
The Compare tab runs live capture against the saved benchmark and calculates pixel difference.
Compare features:
- Run Compare button per test
- Diff percentage badge (
Identicalwhen 0%) - Optional Diff Overlay
- Slider-based benchmark versus live (or diff) view
- Subview switch between Comparison and Browser
Run history
The History tab keeps past run reports per test.
Per run, QA stores:
- Timestamp
- Diff percent
- Config snapshot used for that run
- Optional images (benchmark/live/diff), depending on Save History Images
History is automatically pruned based on History Limit.
Run all tests
From the test list, Run All executes every test that already has a benchmark. Tests without a benchmark are skipped until a baseline is captured.
Storage behavior
QA test data is stored in your project folder under:
rightplace/qa/<resourceId>/
Each test has its own folder containing config, latest screenshots, and optional history files.
Widget
Appears when a QA tab is active. Reserved for future QA-specific widgets.
Agent tools
Every action this applet exposes as a typed, permissioned tool that agents can discover and run over MCP, the same actions your team uses in the UI.