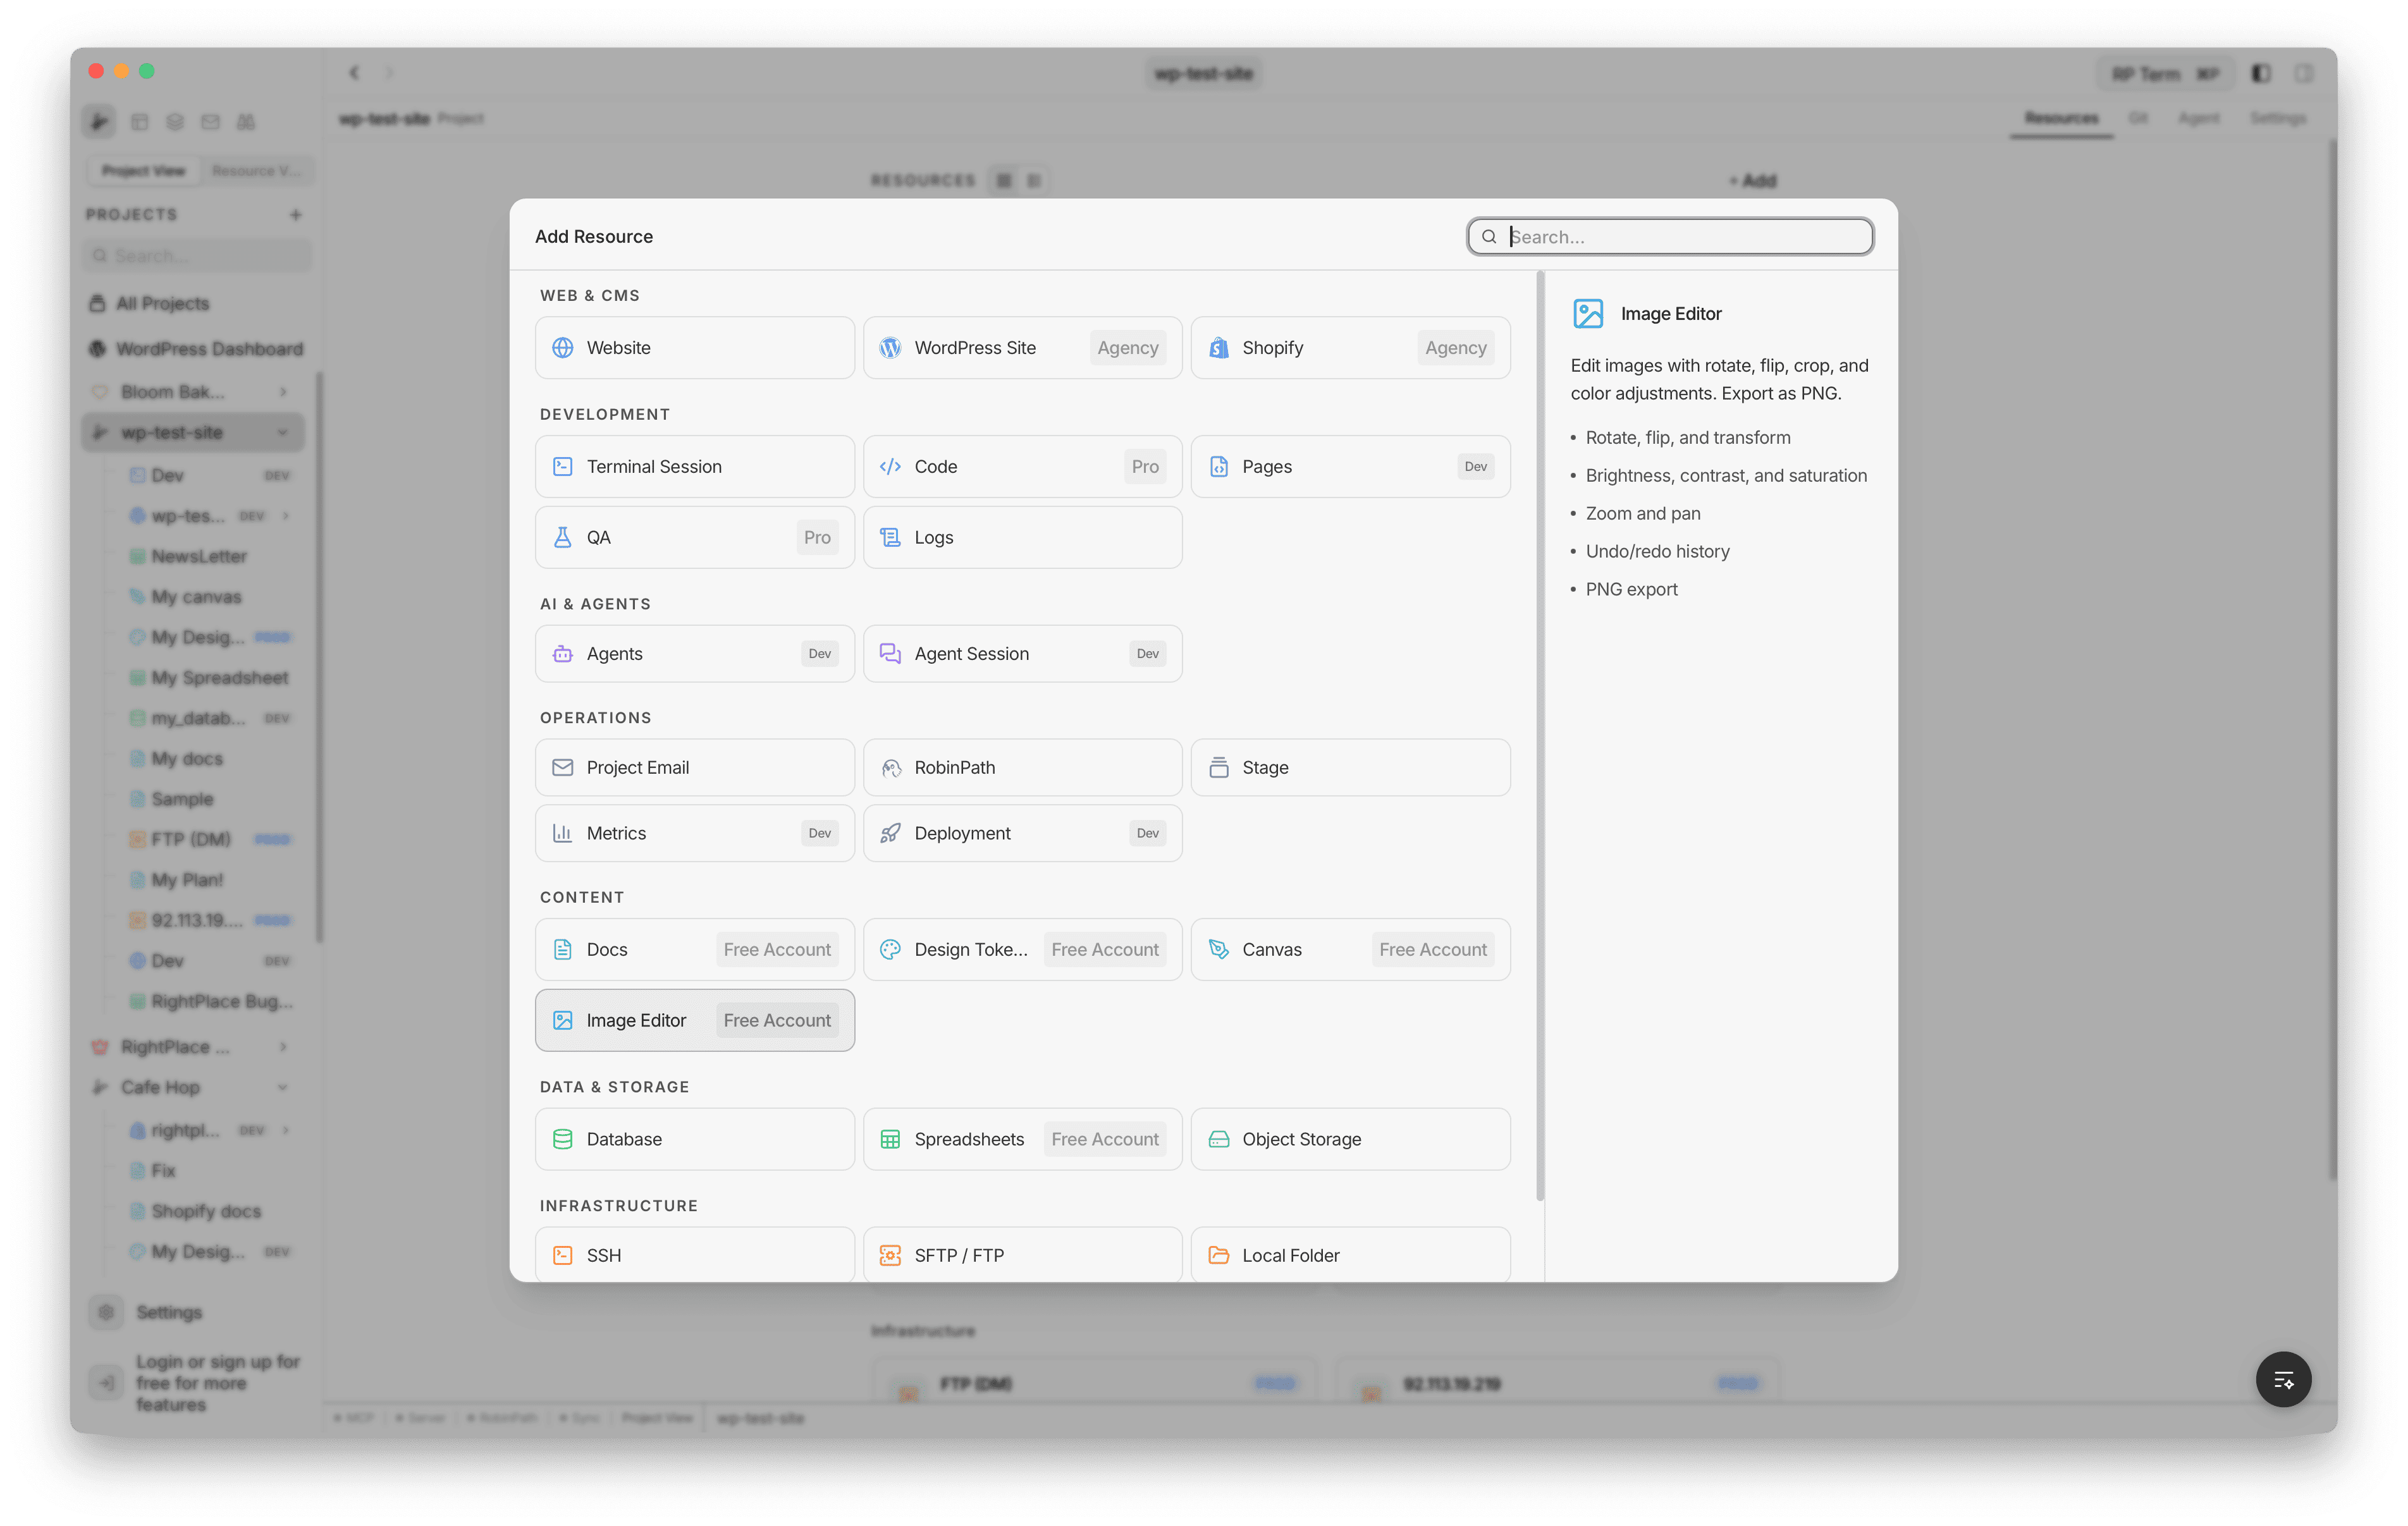
Image Editor
Edit images with rotate, flip, crop, and color adjustments. Export as PNG.
Features
- Rotate, flip, and transform
- Brightness, contrast, and saturation
- Zoom and pan
- Undo/redo history
On this page
- Quick edits without leaving your project
- Adding an Image Editor
- File Operations
- Export Options
- Undo, Redo, and History
- Zoom and Navigation
- Layers
- Layer Types
- Layer Operations
- Transform Tools
- Rotate
- Crop (C)
- Resize (R)
- Skew (W)
- Adjustments (A)
- Light
- Color
- Detail
- Effects
- Filter Presets
- Levels (L)
- Curves (U)
- Draw Tools (B)
- Annotate Tools (N)
- Text Tool (T)
- Selection Tools (S)
- Selection Modes
- Selection Operations
- Eyedropper (I)
- Keyboard Shortcuts
- Saving Edited WordPress Media
- AI Tools - Coming Soon
- Widget
- Agent tools
- Next steps
Quick edits without leaving your project
You need to crop a screenshot, adjust the brightness of a photo, or add an annotation before uploading. For something that takes 30 seconds, opening a separate image editor feels like overkill.
The Image Editor handles common image tasks right inside your project. Rotate, crop, adjust colors, draw annotations, and export - all without switching to another app.
- Edit in place. Open images from your project files, WordPress media, or local folders and edit them where they are.
- Non-destructive. Full undo/redo history. Experiment freely and revert any change.
- Essential tools built in. Crop, rotate, flip, brightness, contrast, saturation, and more. Covers everyday editing needs.
- Annotations and drawing. Add text, arrows, and shapes directly on images for documentation or feedback.
- Export as PNG. Save your edits and use the result immediately in your project, docs, or uploads.
Adding an Image Editor
To add an Image Editor to your project, open the Add Resource dialog and select Image Editor under the Content category.
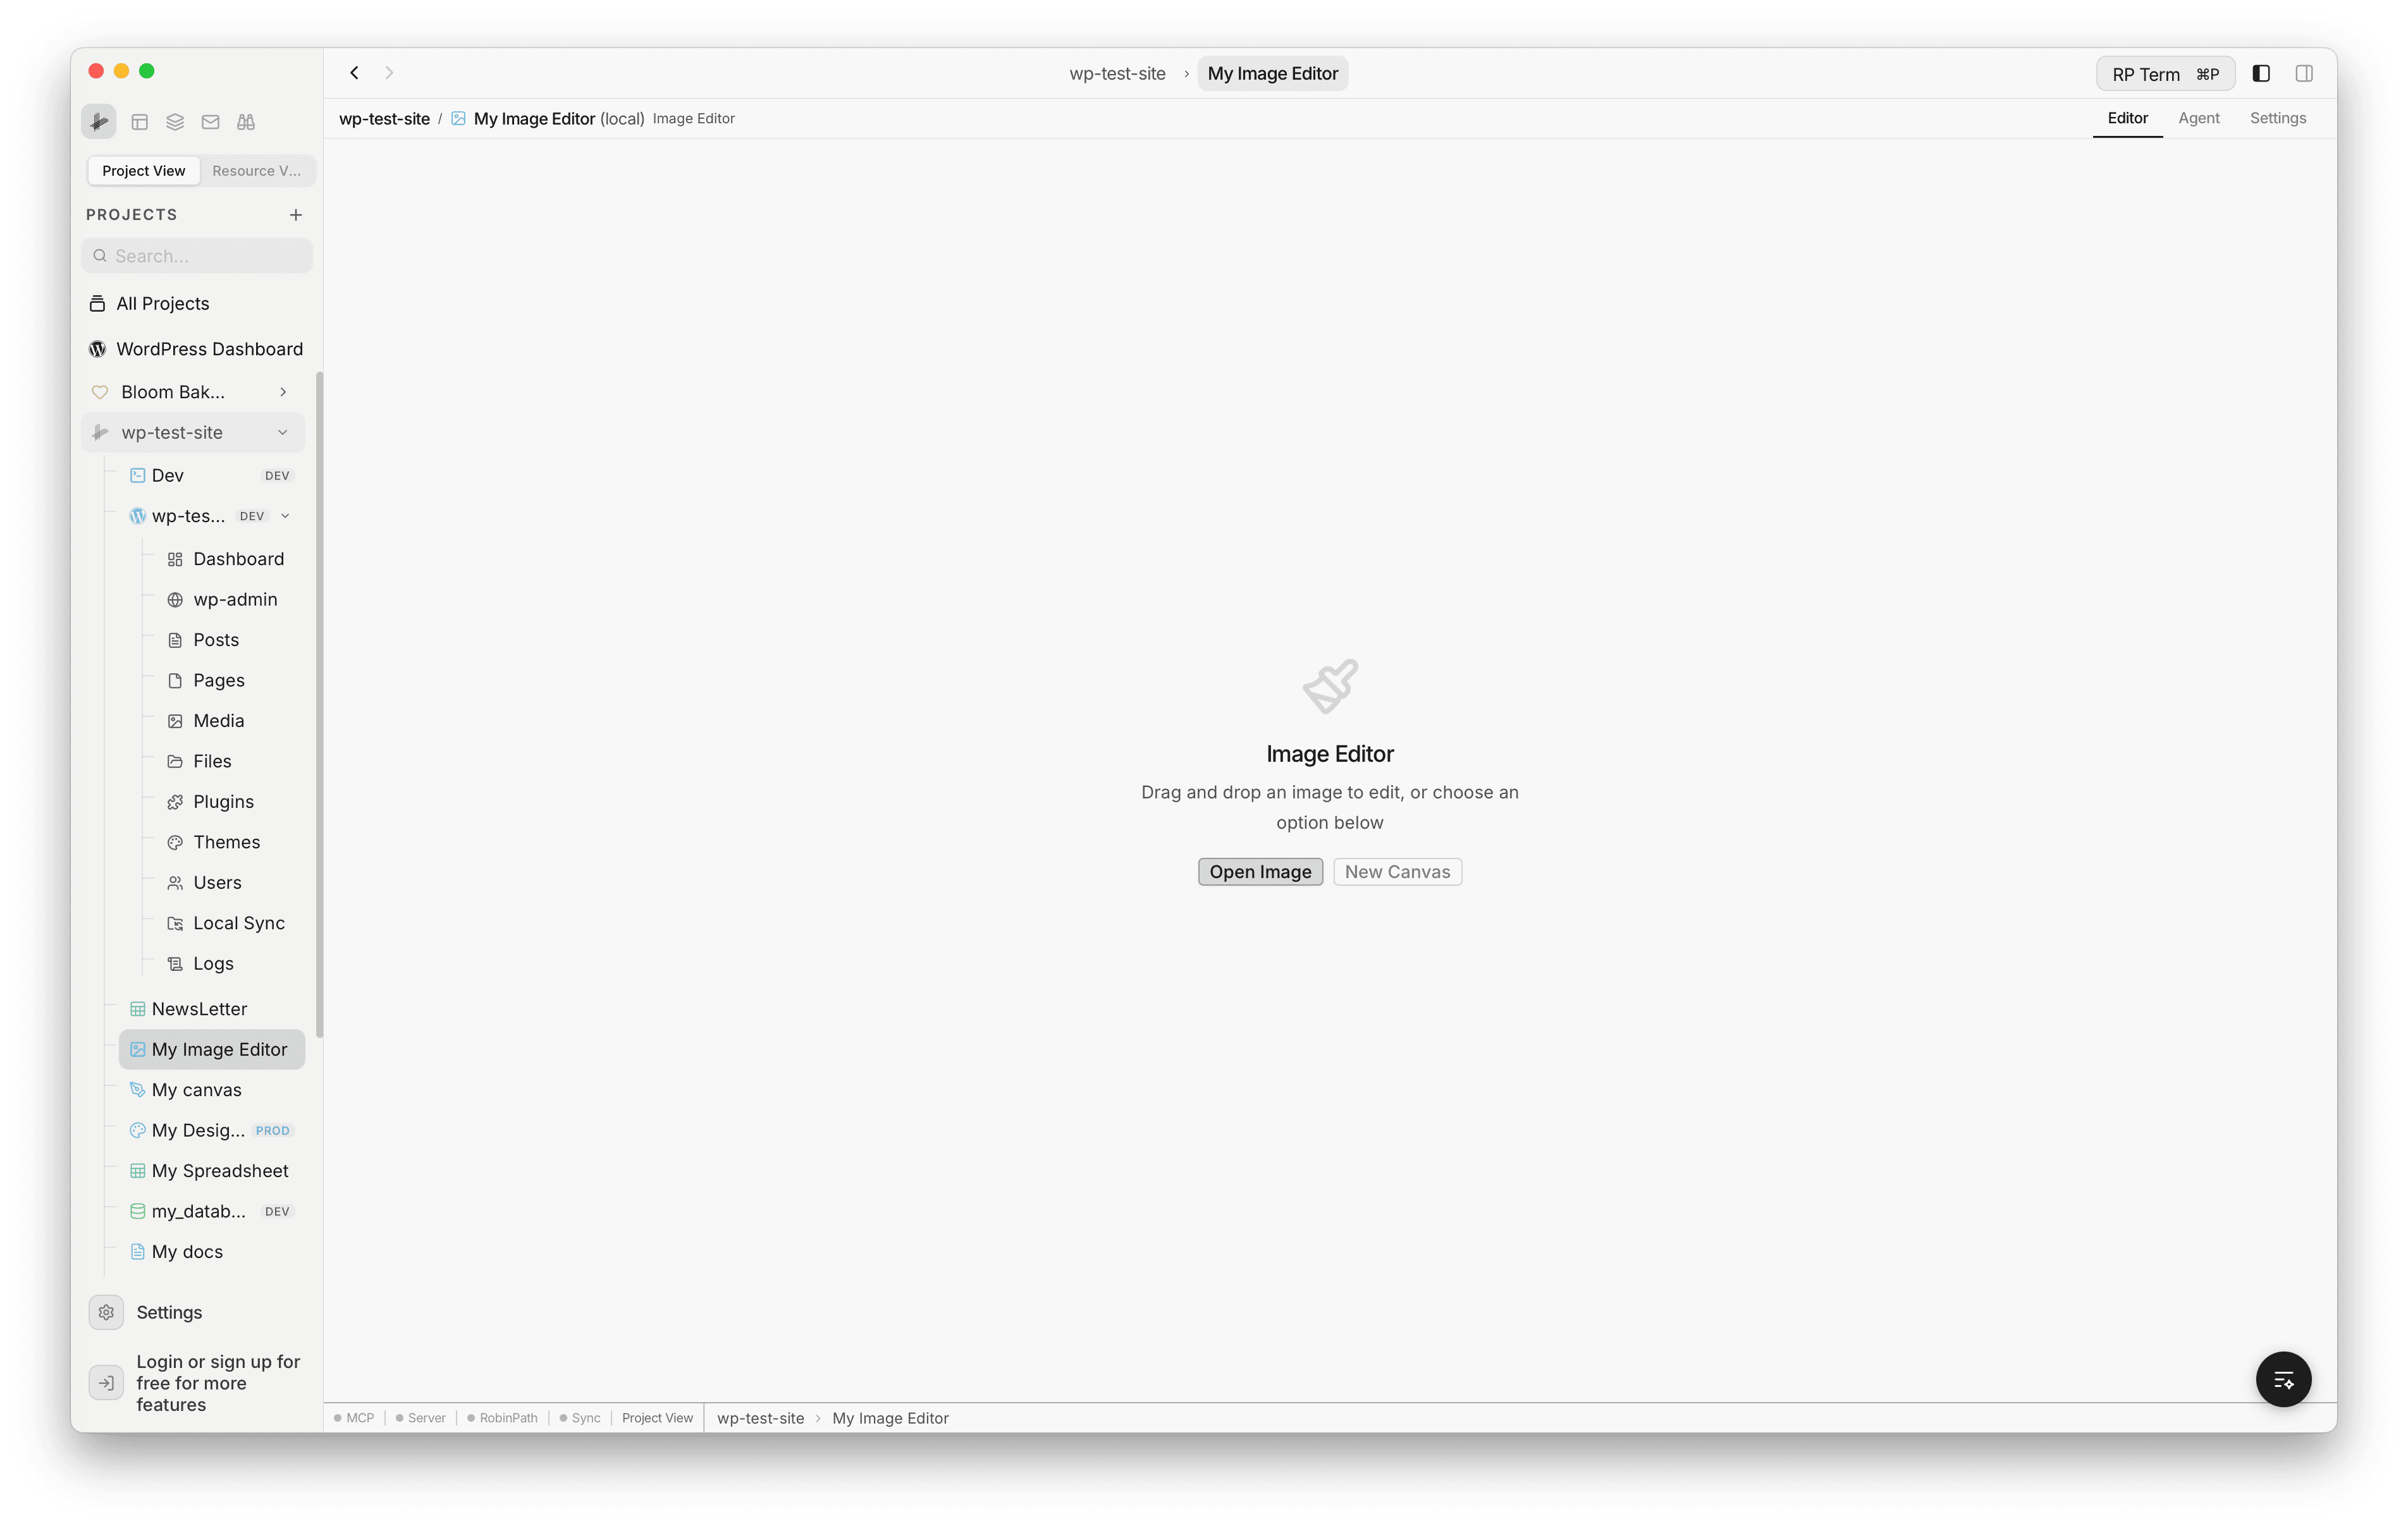
Once created, the editor appears in your project sidebar. Click it to open the empty state where you can drag and drop an image, click Open Image to load a file from disk, or click New Canvas to start with a blank canvas.
You can also open images directly in the editor:
- From WordPress Media: double-click an image, right-click and select Open in Image Editor, or click Edit in Image Editor from the media detail panel
- From Project Files: right-click any image file and select Open in Image Editor
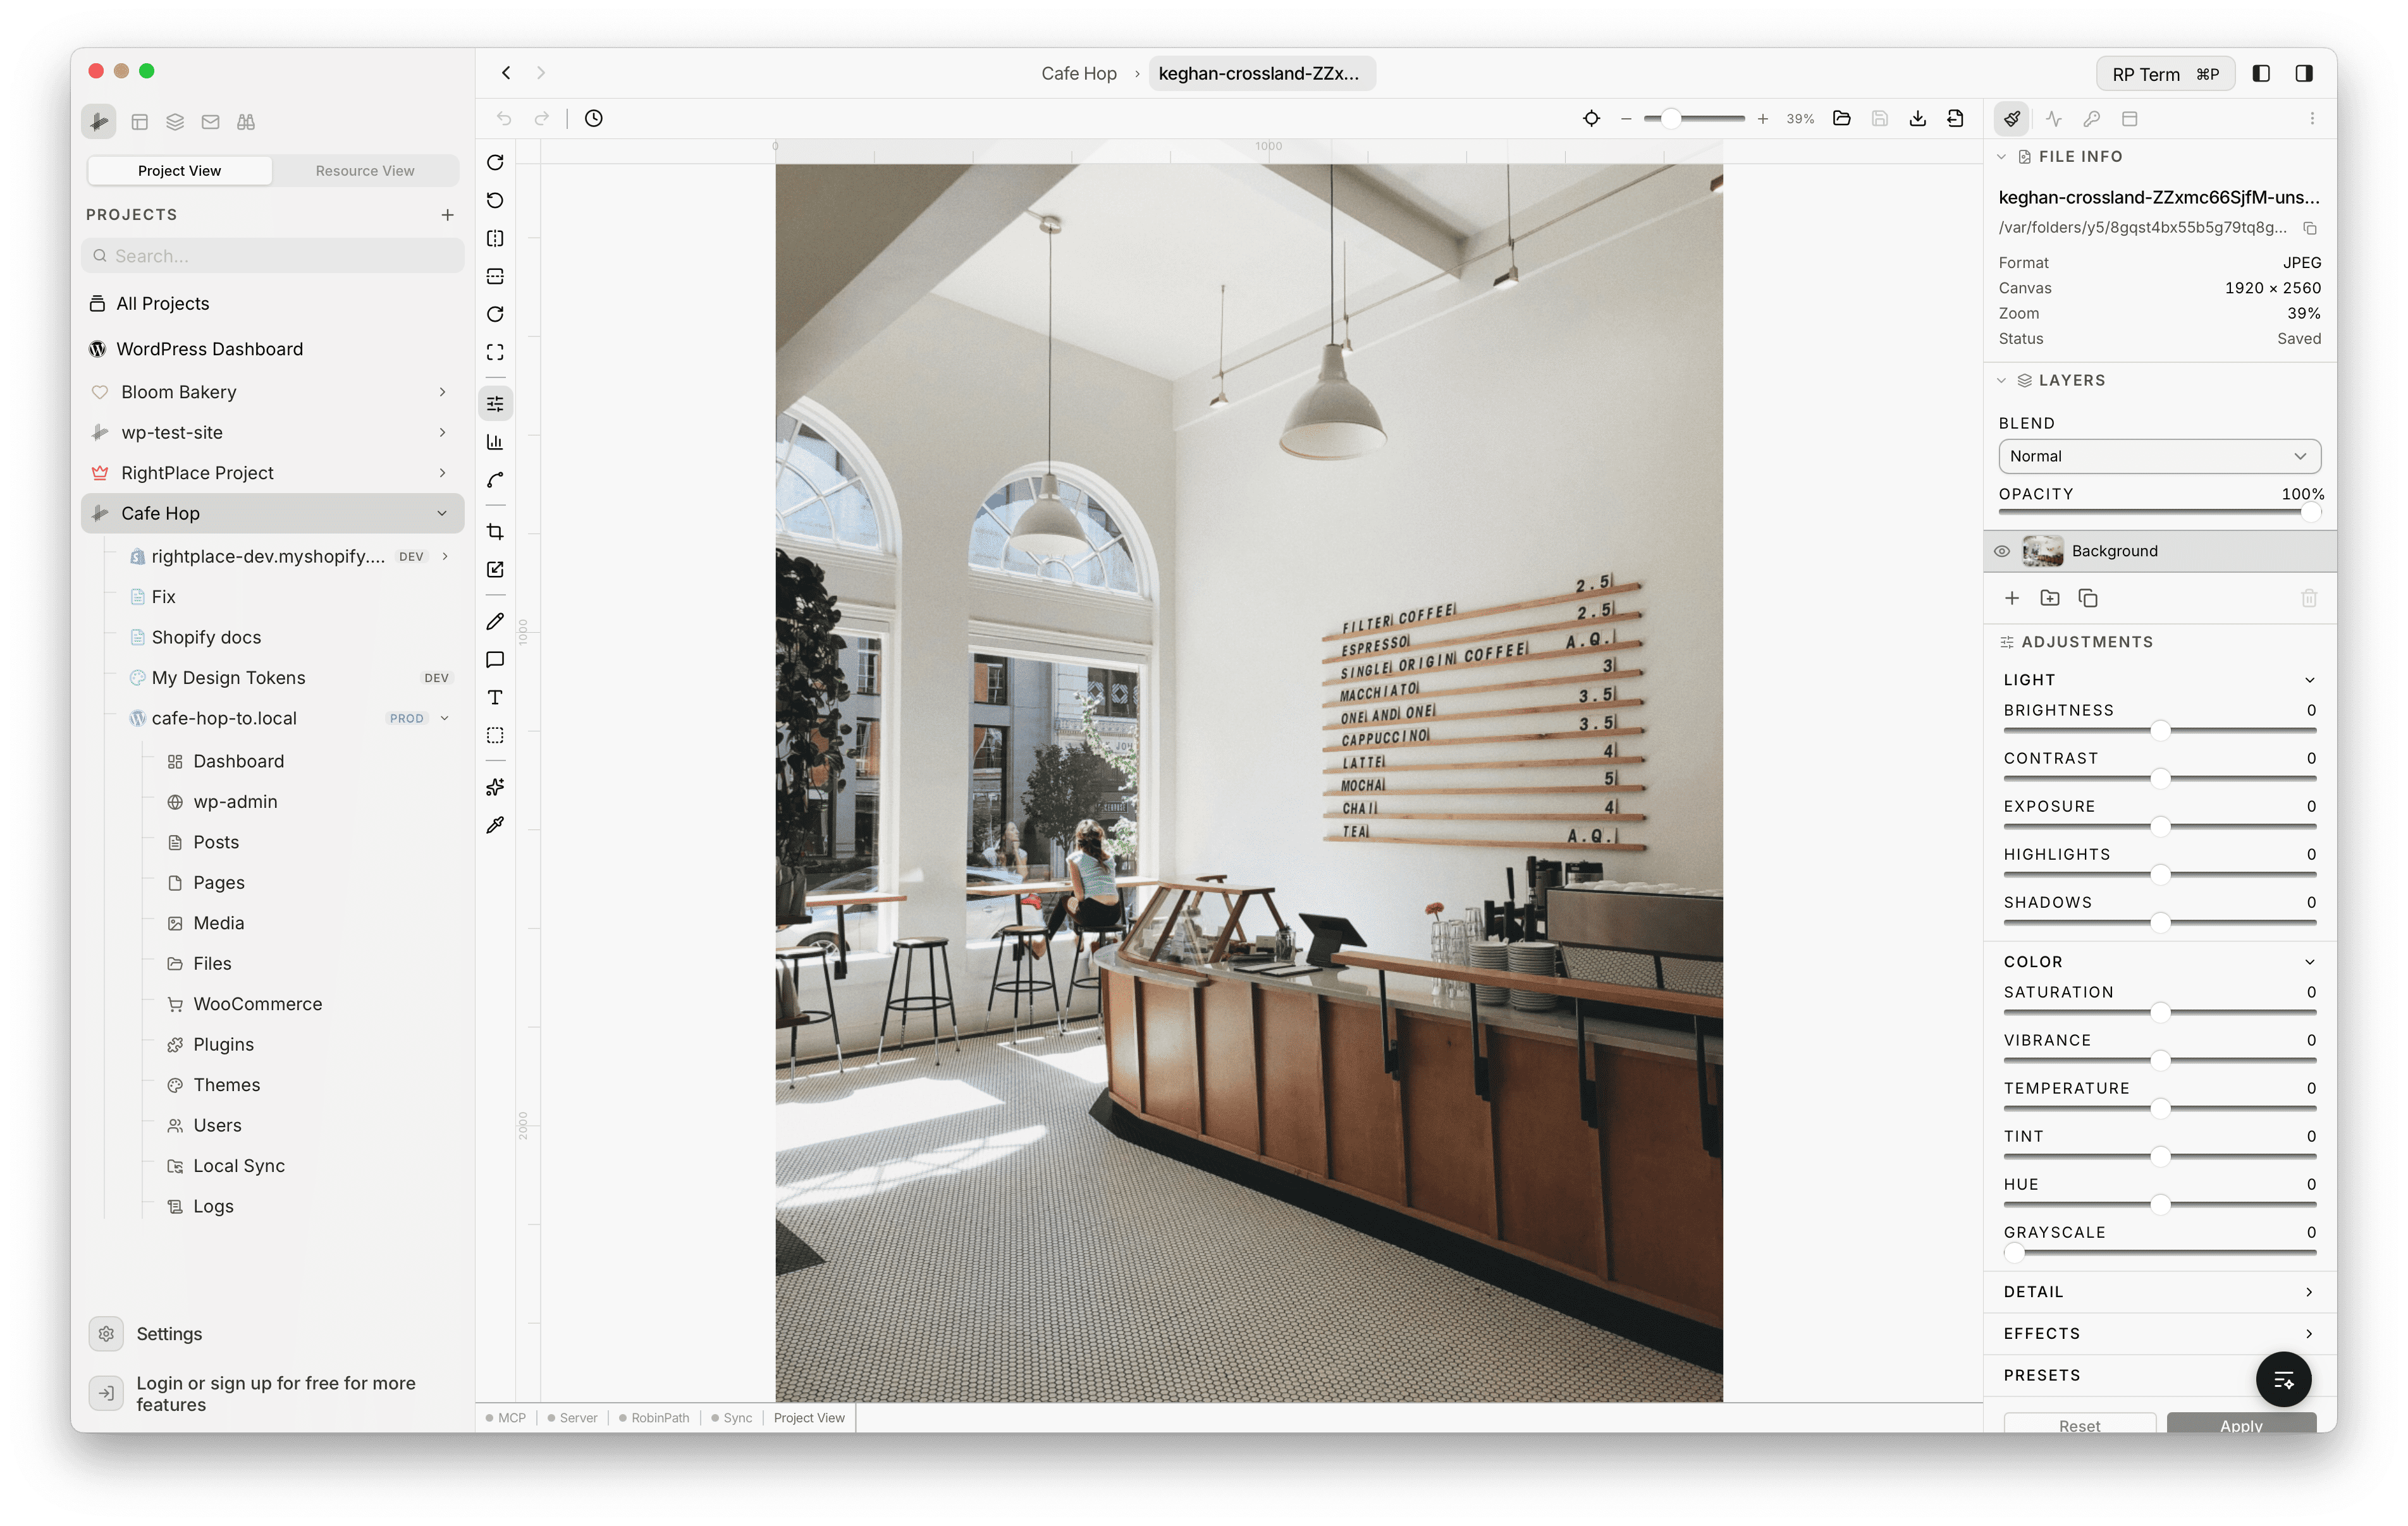
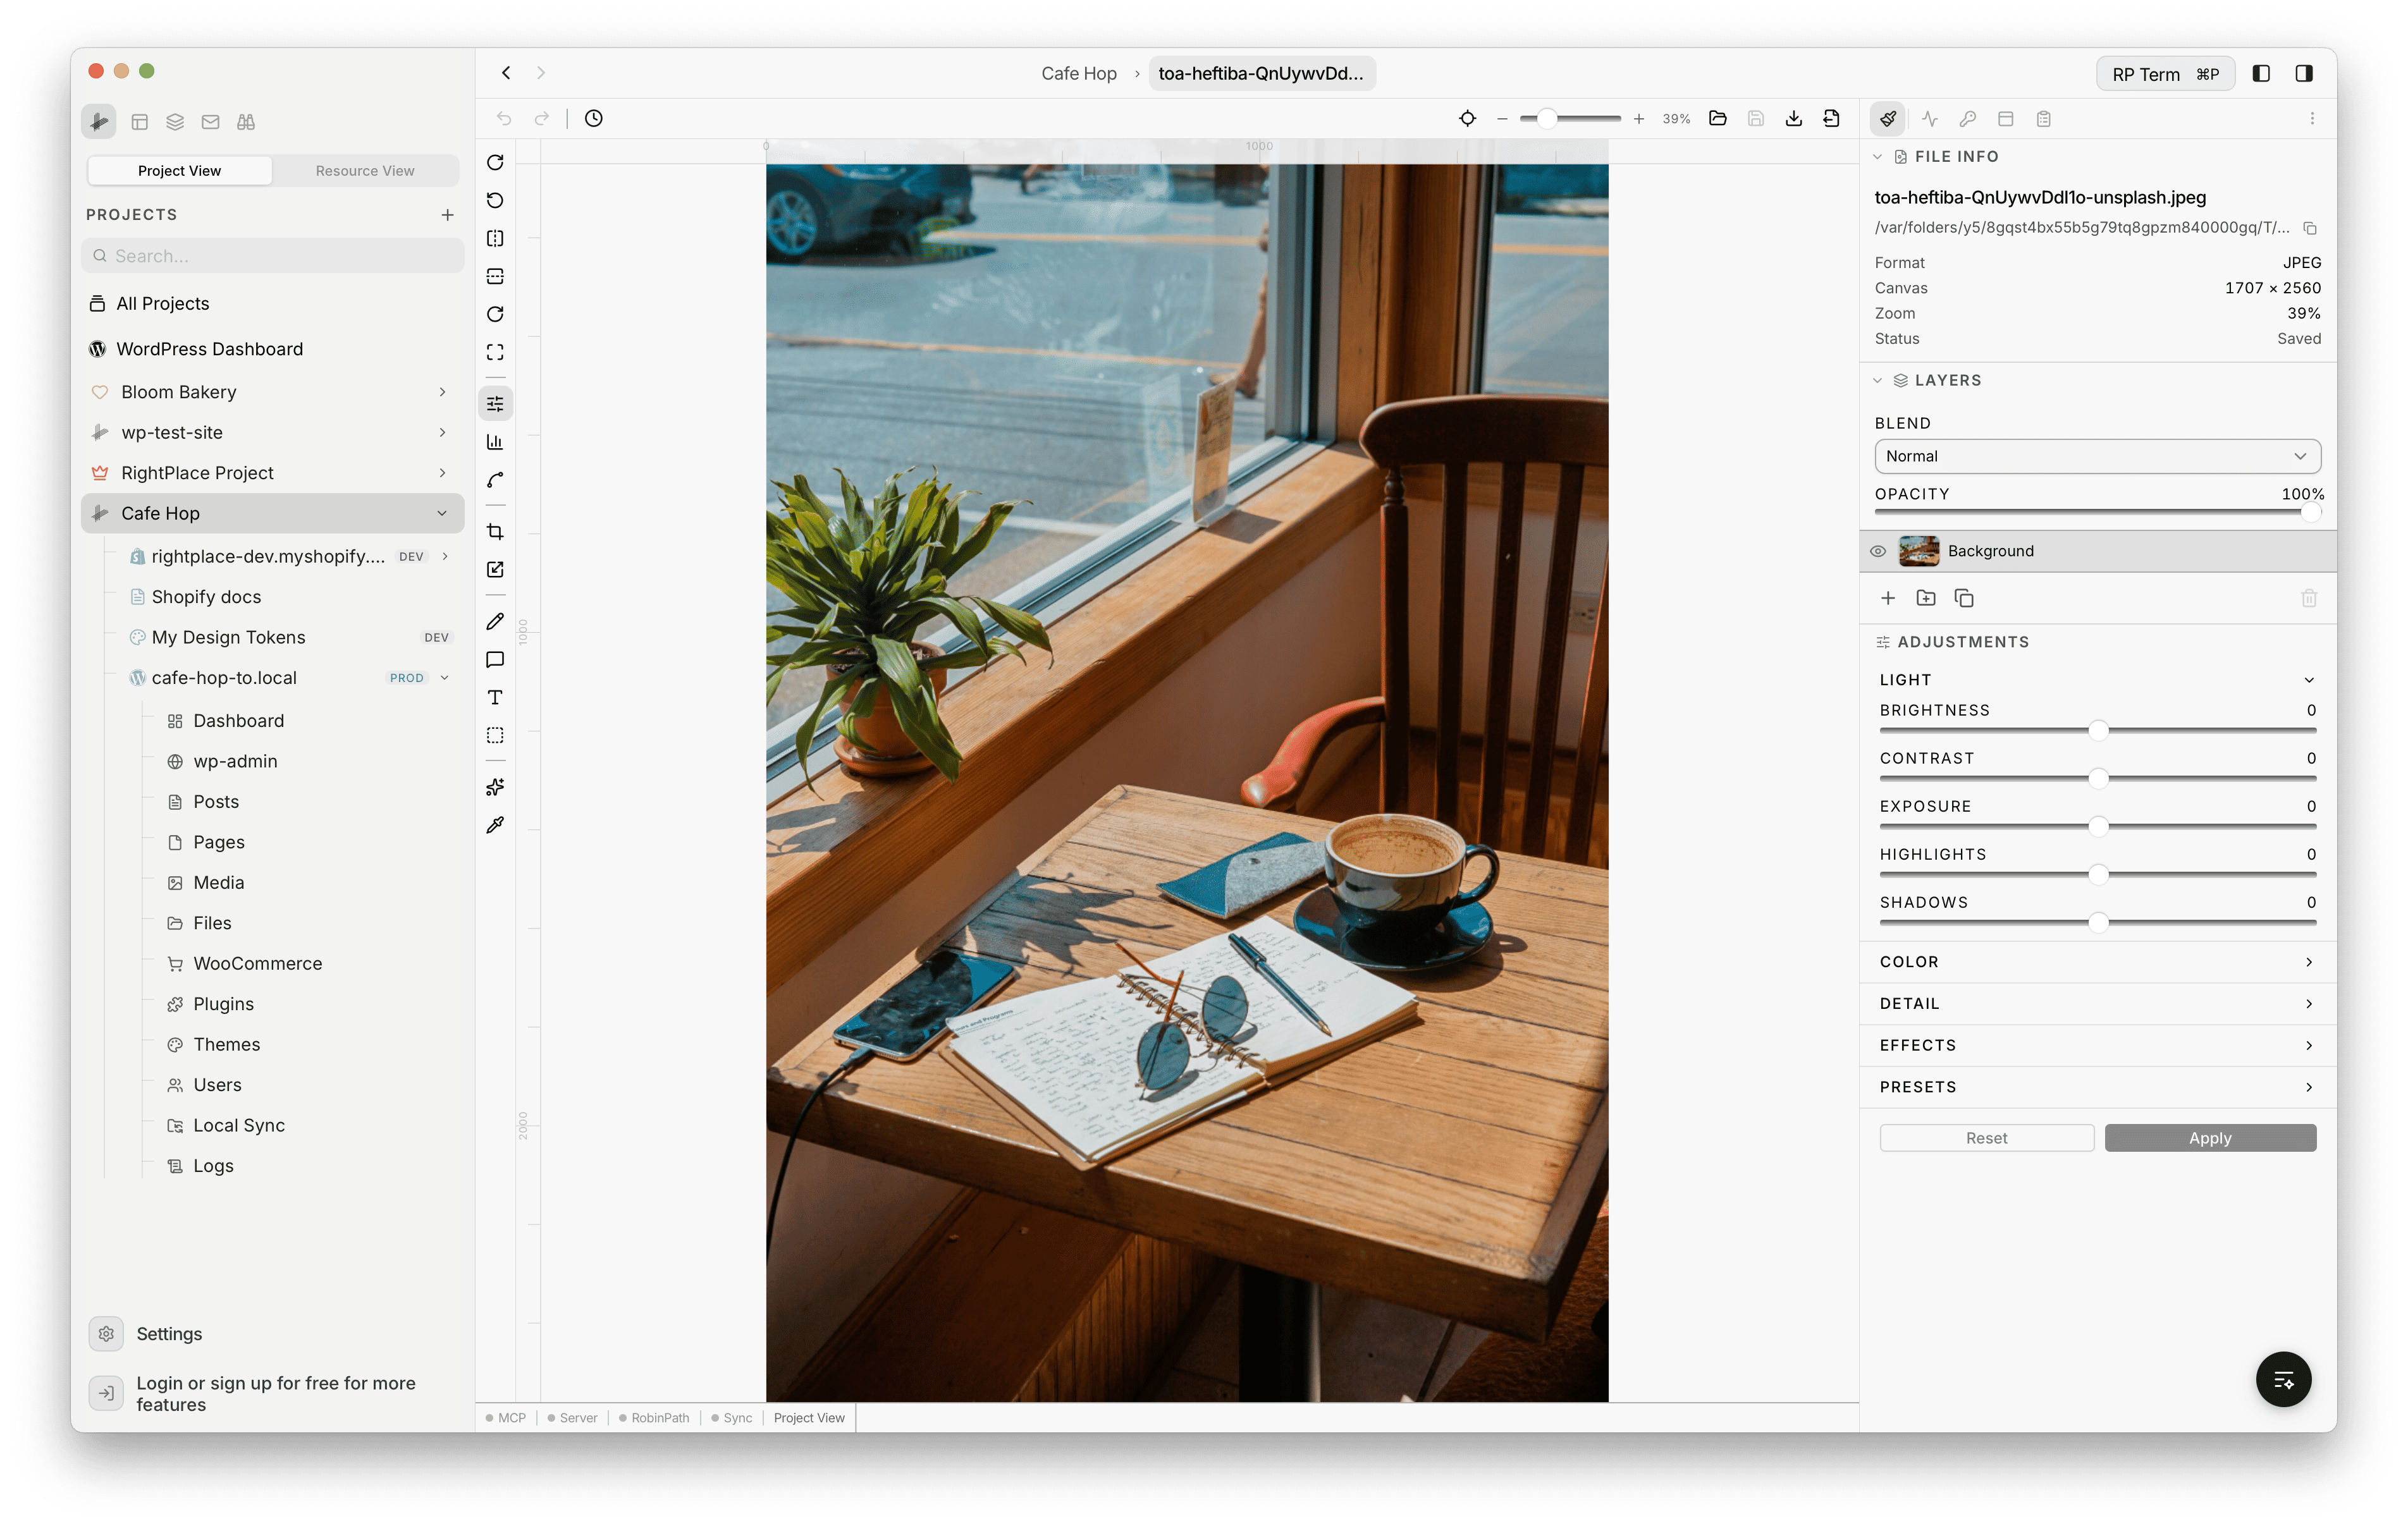
The editor layout consists of:
- Top toolbar: file operations (Open, Save, Save As, Export), undo/redo, history, zoom controls, and fit-to-view
- Left toolbar: all editing tools organized by category - transform, adjustments, crop, resize, draw, annotate, text, select, AI, and eyedropper
- Canvas area: the main editing surface with pixel rulers along the top and left edges
- Right panel: file info, layers, and the active tool’s options
File Operations
The top toolbar provides these file actions:
- Open Image: load an image from disk (supports PNG, JPEG, WebP, AVIF, GIF, BMP, SVG, ICO)
- Save (Cmd+S): overwrite the original file
- Save As (Cmd+Shift+S): save a copy to a new location
- Export (Cmd+Shift+E): export with format and quality controls
Export Options
The Export panel lets you choose the output format and settings:
- Formats: PNG (lossless), JPEG, WebP, AVIF
- Quality: slider from 1-100% (for lossy formats)
- Dimensions: width and height with aspect ratio lock
- File size estimate: shown in real time as you adjust settings
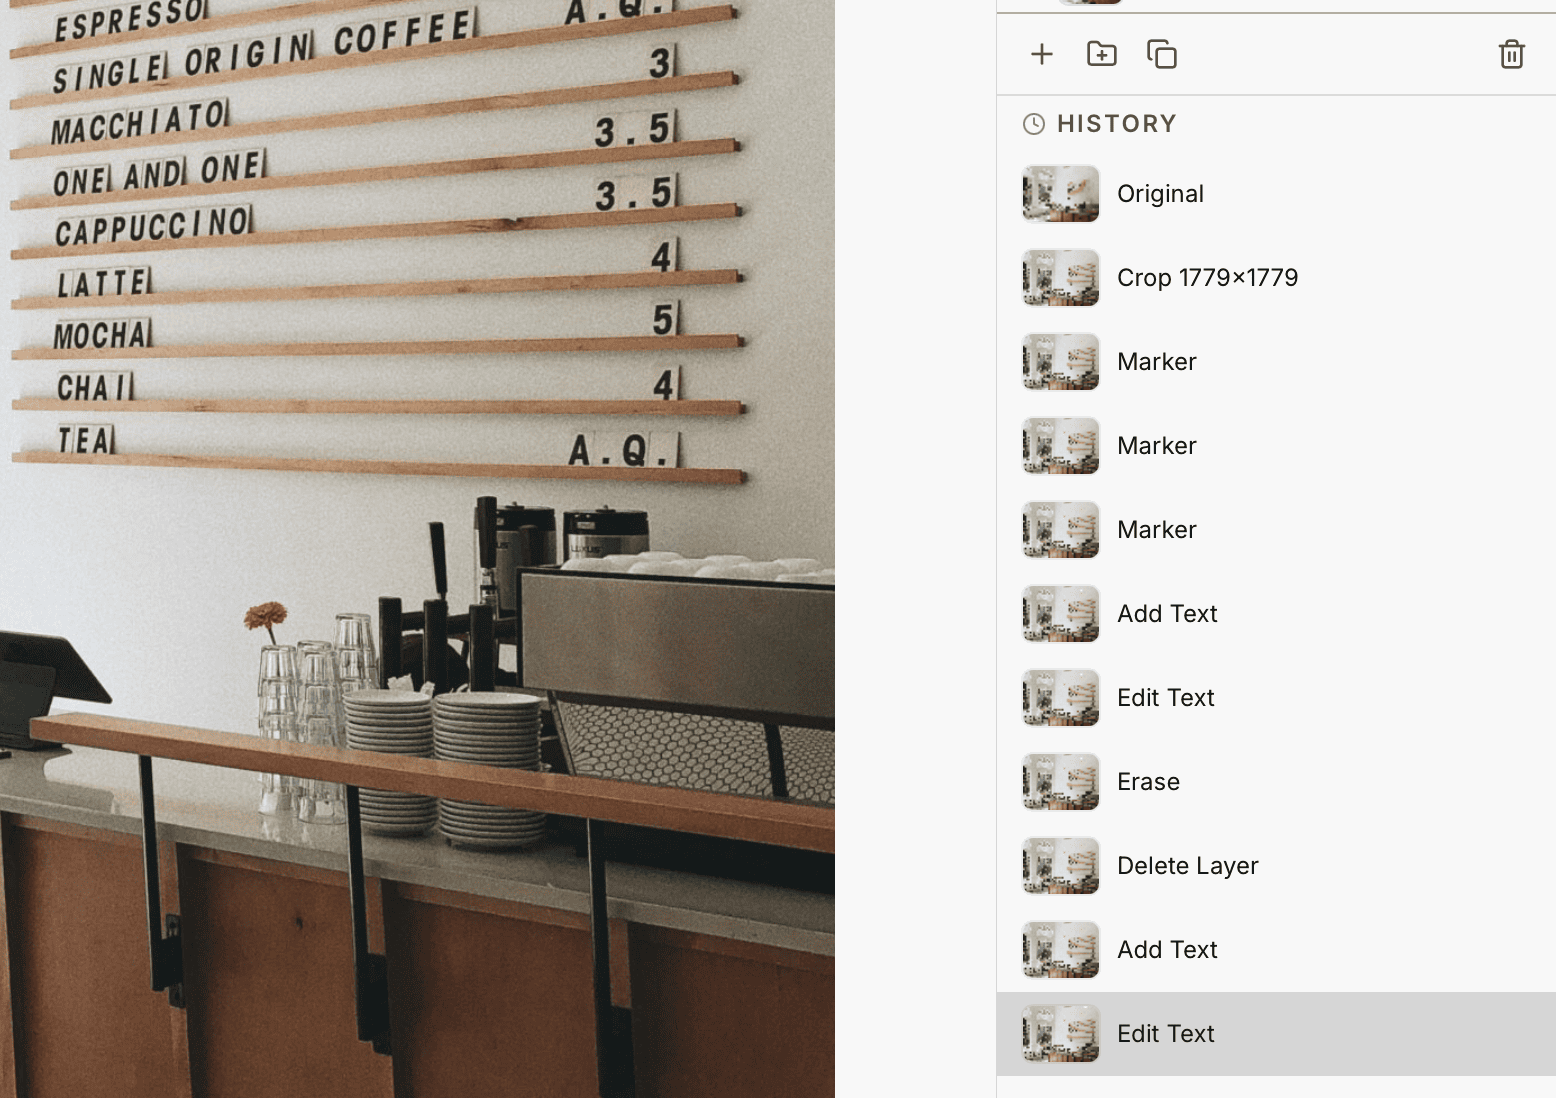
Undo, Redo, and History
Every action is recorded in an undo/redo stack:
- Undo: Cmd+Z
- Redo: Cmd+Shift+Z
- History panel (H): shows a visual timeline of all actions with thumbnails. Click any entry to jump to that state. Up to 30 states are stored.
Zoom and Navigation
- Zoom in/out: Cmd+Plus / Cmd+Minus, or scroll wheel
- Fit to view: Cmd+0
- Pan: click and drag on the canvas background, or hold Space and drag
- Pixel grid: automatically appears at 800%+ zoom for precise editing
- Rulers: pixel rulers along the top and left edges (toggle with the ruler button)
- Guides: drag from rulers to place horizontal or vertical guides
Layers
The Image Editor supports a full layer system for non-destructive editing. The right panel shows the layer stack with blend mode and opacity controls.

Layer Types
- Image: raster image data
- Text: editable text with fonts and styling
- Shape: vector shapes from the draw tools
- Annotation: arrows, callouts, markers, and highlights
- AI: layers generated by AI tools
Layer Operations
- Add / Delete / Duplicate layers using the buttons below the layer list
- Rename by double-clicking the layer name
- Toggle visibility with the eye icon
- Lock a layer to prevent accidental edits
- Reorder by dragging layers up or down
- Opacity: per-layer opacity from 0-100%
- Blend modes: Normal, Multiply, Screen, Overlay, Darken, Lighten, Color Dodge, Color Burn, Hard Light, Soft Light, Difference, Exclusion
- Group layers: organize layers into collapsible groups
Transform Tools
Rotate
Quick rotate buttons are on the left toolbar:
- Rotate 90 CW / CCW: one-click rotation
- Flip Horizontal / Vertical: mirror the image
- Free Rotate: open the rotate panel for precise angle control (-180 to +180 degrees) with presets at -90, -45, 0, 45, 90. Hold Shift for 15-degree snap increments.
Crop (C)
The crop tool places a draggable overlay on the image with corner and edge handles.
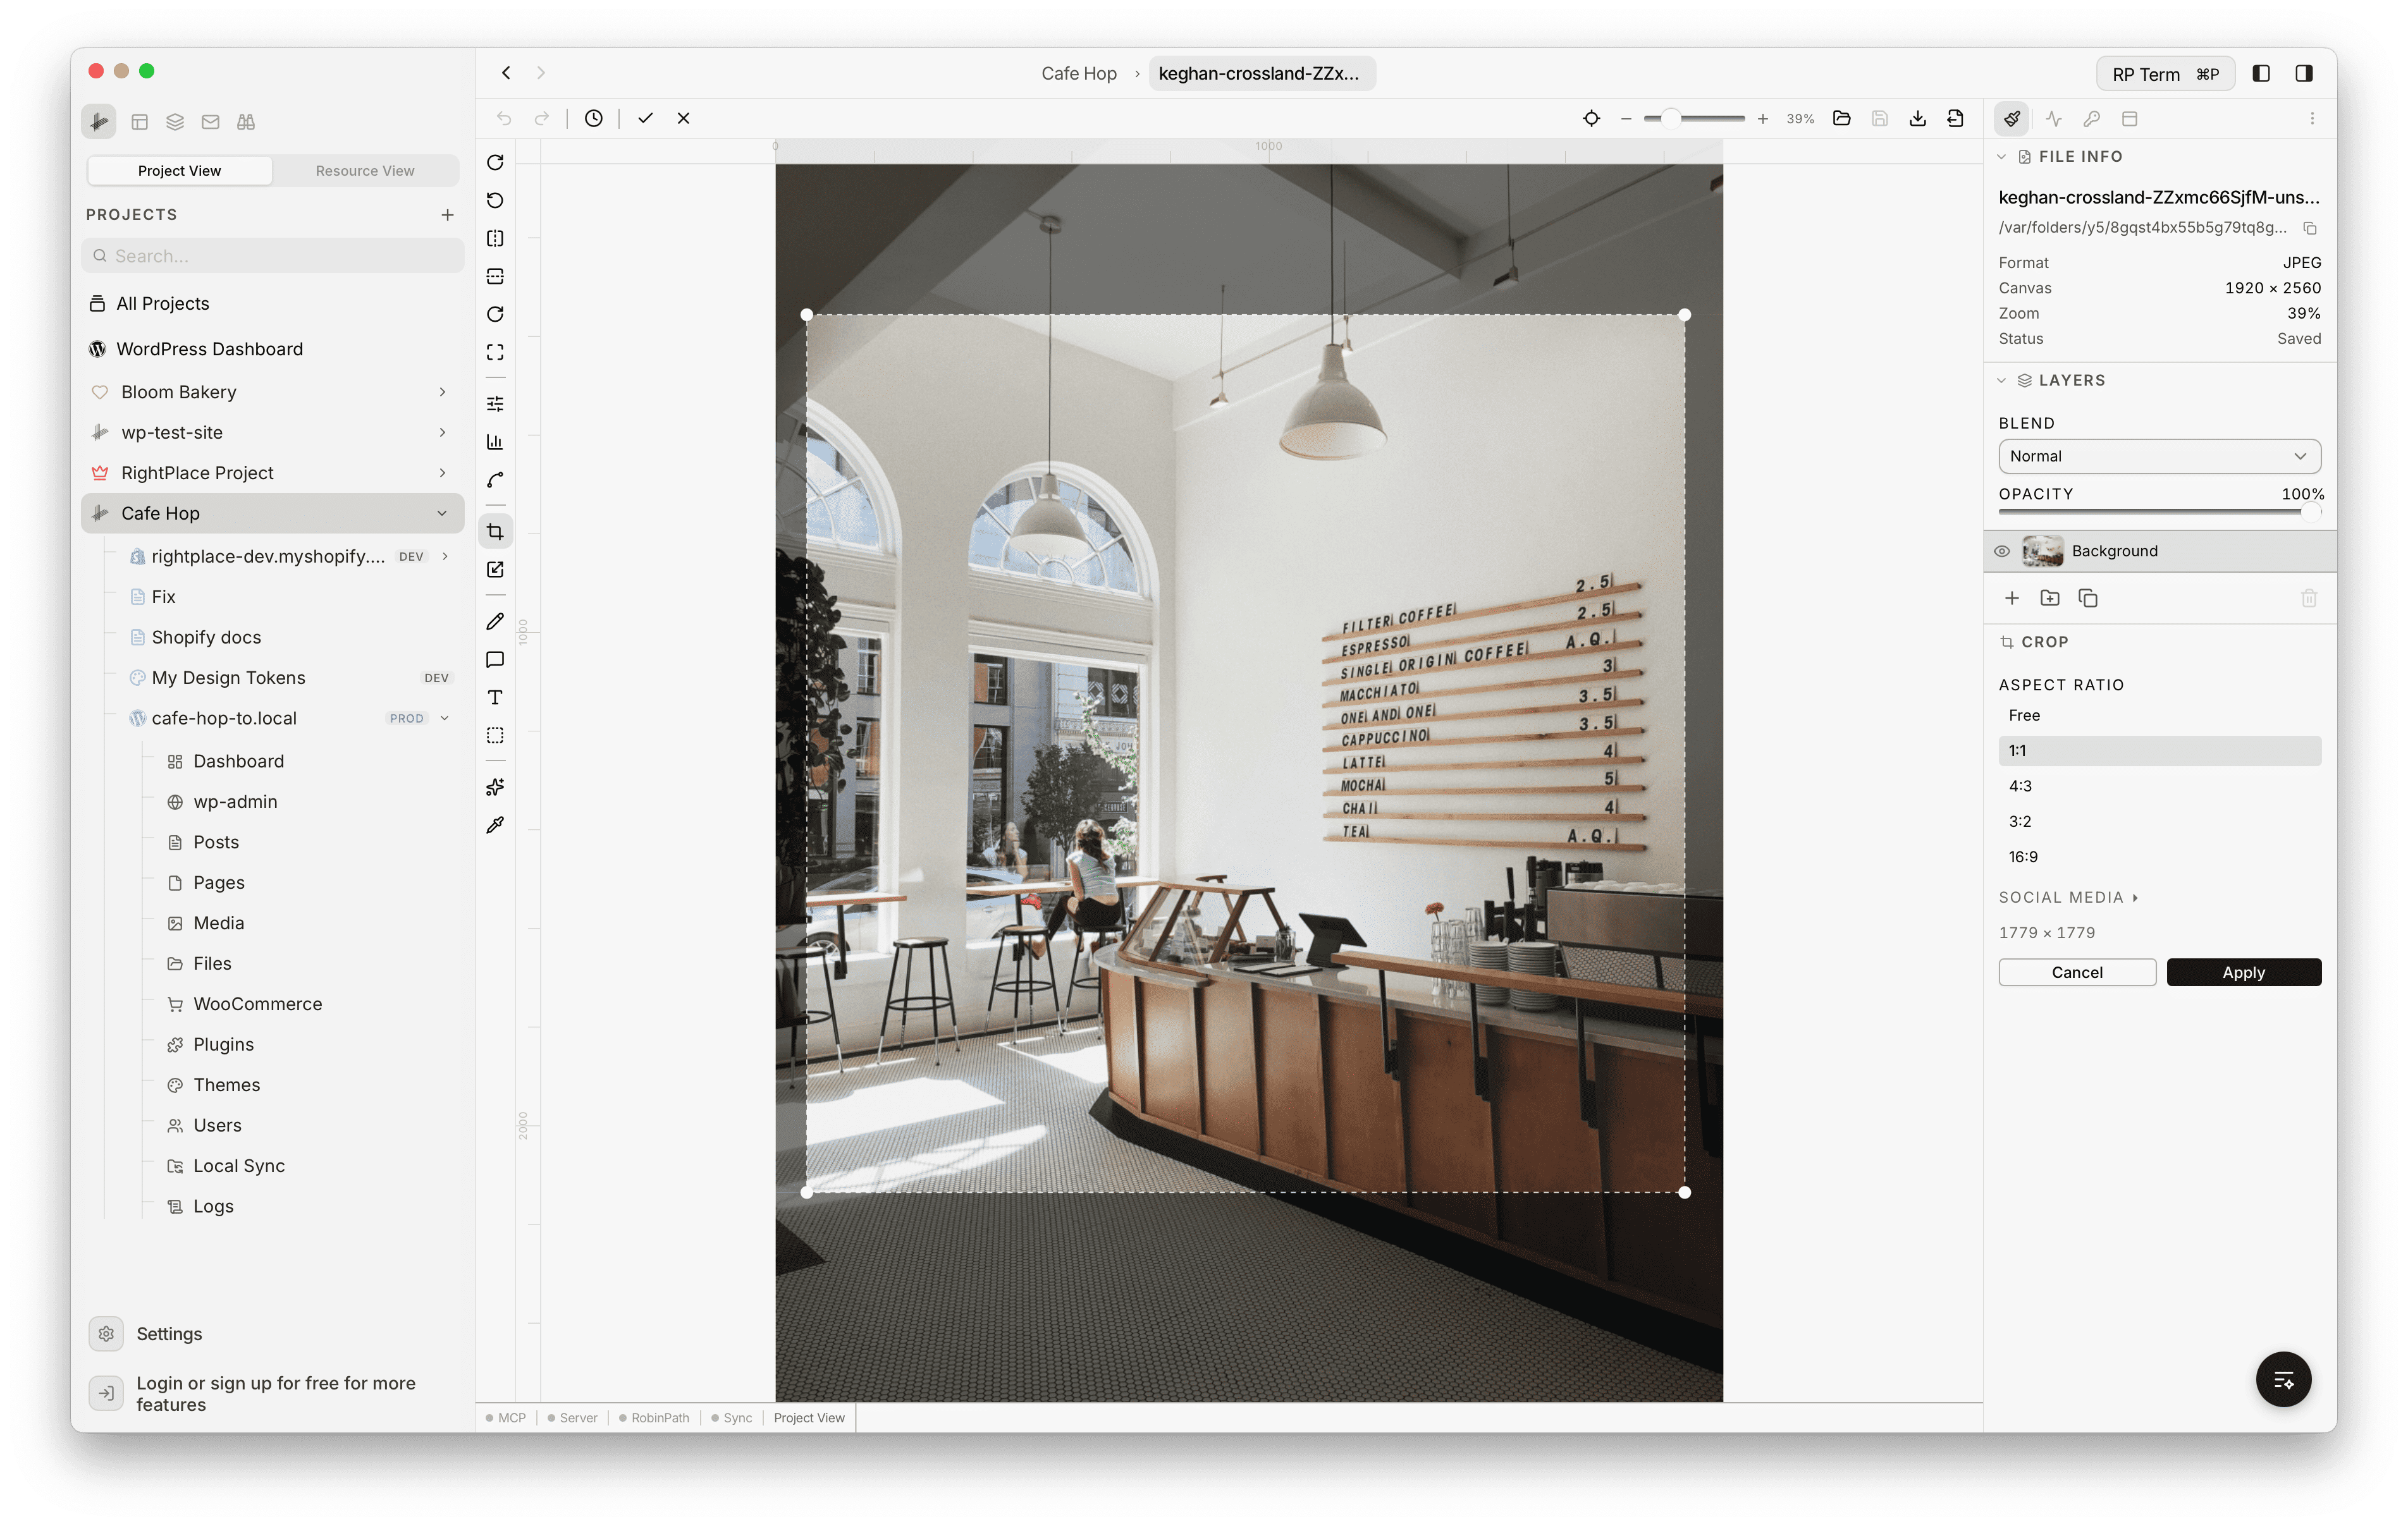
- Free crop: drag to define any region
- Aspect ratio lock: constrain to a specific ratio
- Standard presets: Free, 1:1, 4:3, 3:2, 16:9
- Social media presets: Instagram Post (1080x1080), Instagram Story (1080x1920), Twitter/X Header (1500x500), Facebook Cover (1200x630), YouTube Thumbnail (1280x720), LinkedIn Banner (1584x396)
- Swap: toggle between landscape and portrait orientation
- Click Apply to commit or Cancel to discard
Resize (R)

- Width and Height: enter exact pixel values with an aspect ratio lock toggle
- Scale presets: quickly scale to 25%, 50%, 75%, 100%, 150%, or 200% of the current size
- Size presets: HD (1280x720), Full HD (1920x1080), 2K (2560x1440), 4K (3840x2160)
- Social presets: Instagram Post/Story, Twitter/X, YouTube Thumbnail
- Original dimensions: displayed as a reference below the presets
Skew (W)
- Horizontal skew: -50 to 50%
- Vertical skew: -50 to 50%
- Perspective transformation with live preview
Adjustments (A)
The Adjustments panel provides collapsible sections with sliders for fine-tuning the active layer. Each section shows a blue indicator dot when any of its values have been changed from the default. Click Apply to commit changes or Reset to revert.
Light
- Brightness (-100 to 100)
- Contrast (-100 to 100)
- Exposure (-100 to 100)
- Highlights (-100 to 100)
- Shadows (-100 to 100)
Color
- Saturation (-100 to 100)
- Vibrance (-100 to 100)
- Temperature (-100 to 100)
- Tint (-100 to 100)
- Hue (-180 to 180 degrees)
- Grayscale (0 to 100)
Detail
- Sharpen (0 to 100)
- Blur (0 to 100)
- Box Blur (0 to 100)
- Denoise (0 to 100)
Effects
- Grain (0 to 100)
- Vignette (0 to 100)
- Fade (0 to 100)
- Sepia (0 to 100)
- Invert (0 to 100)
Filter Presets
Eight built-in presets apply a combination of adjustments in one click: Warm, Cool, Vintage, Noir, Vivid, Matte, High Contrast, Film. You can also save and load custom presets.
Levels (L)
The Levels tool gives you precise control over tonal range:
- Channel selector: All, Red, Green, Blue
- Histogram: real-time visualization of tonal distribution
- Black point (0-254): set the darkest value
- Gamma (1.0-3.0): adjust midtones
- White point (1-255): set the brightest value
Curves (U)
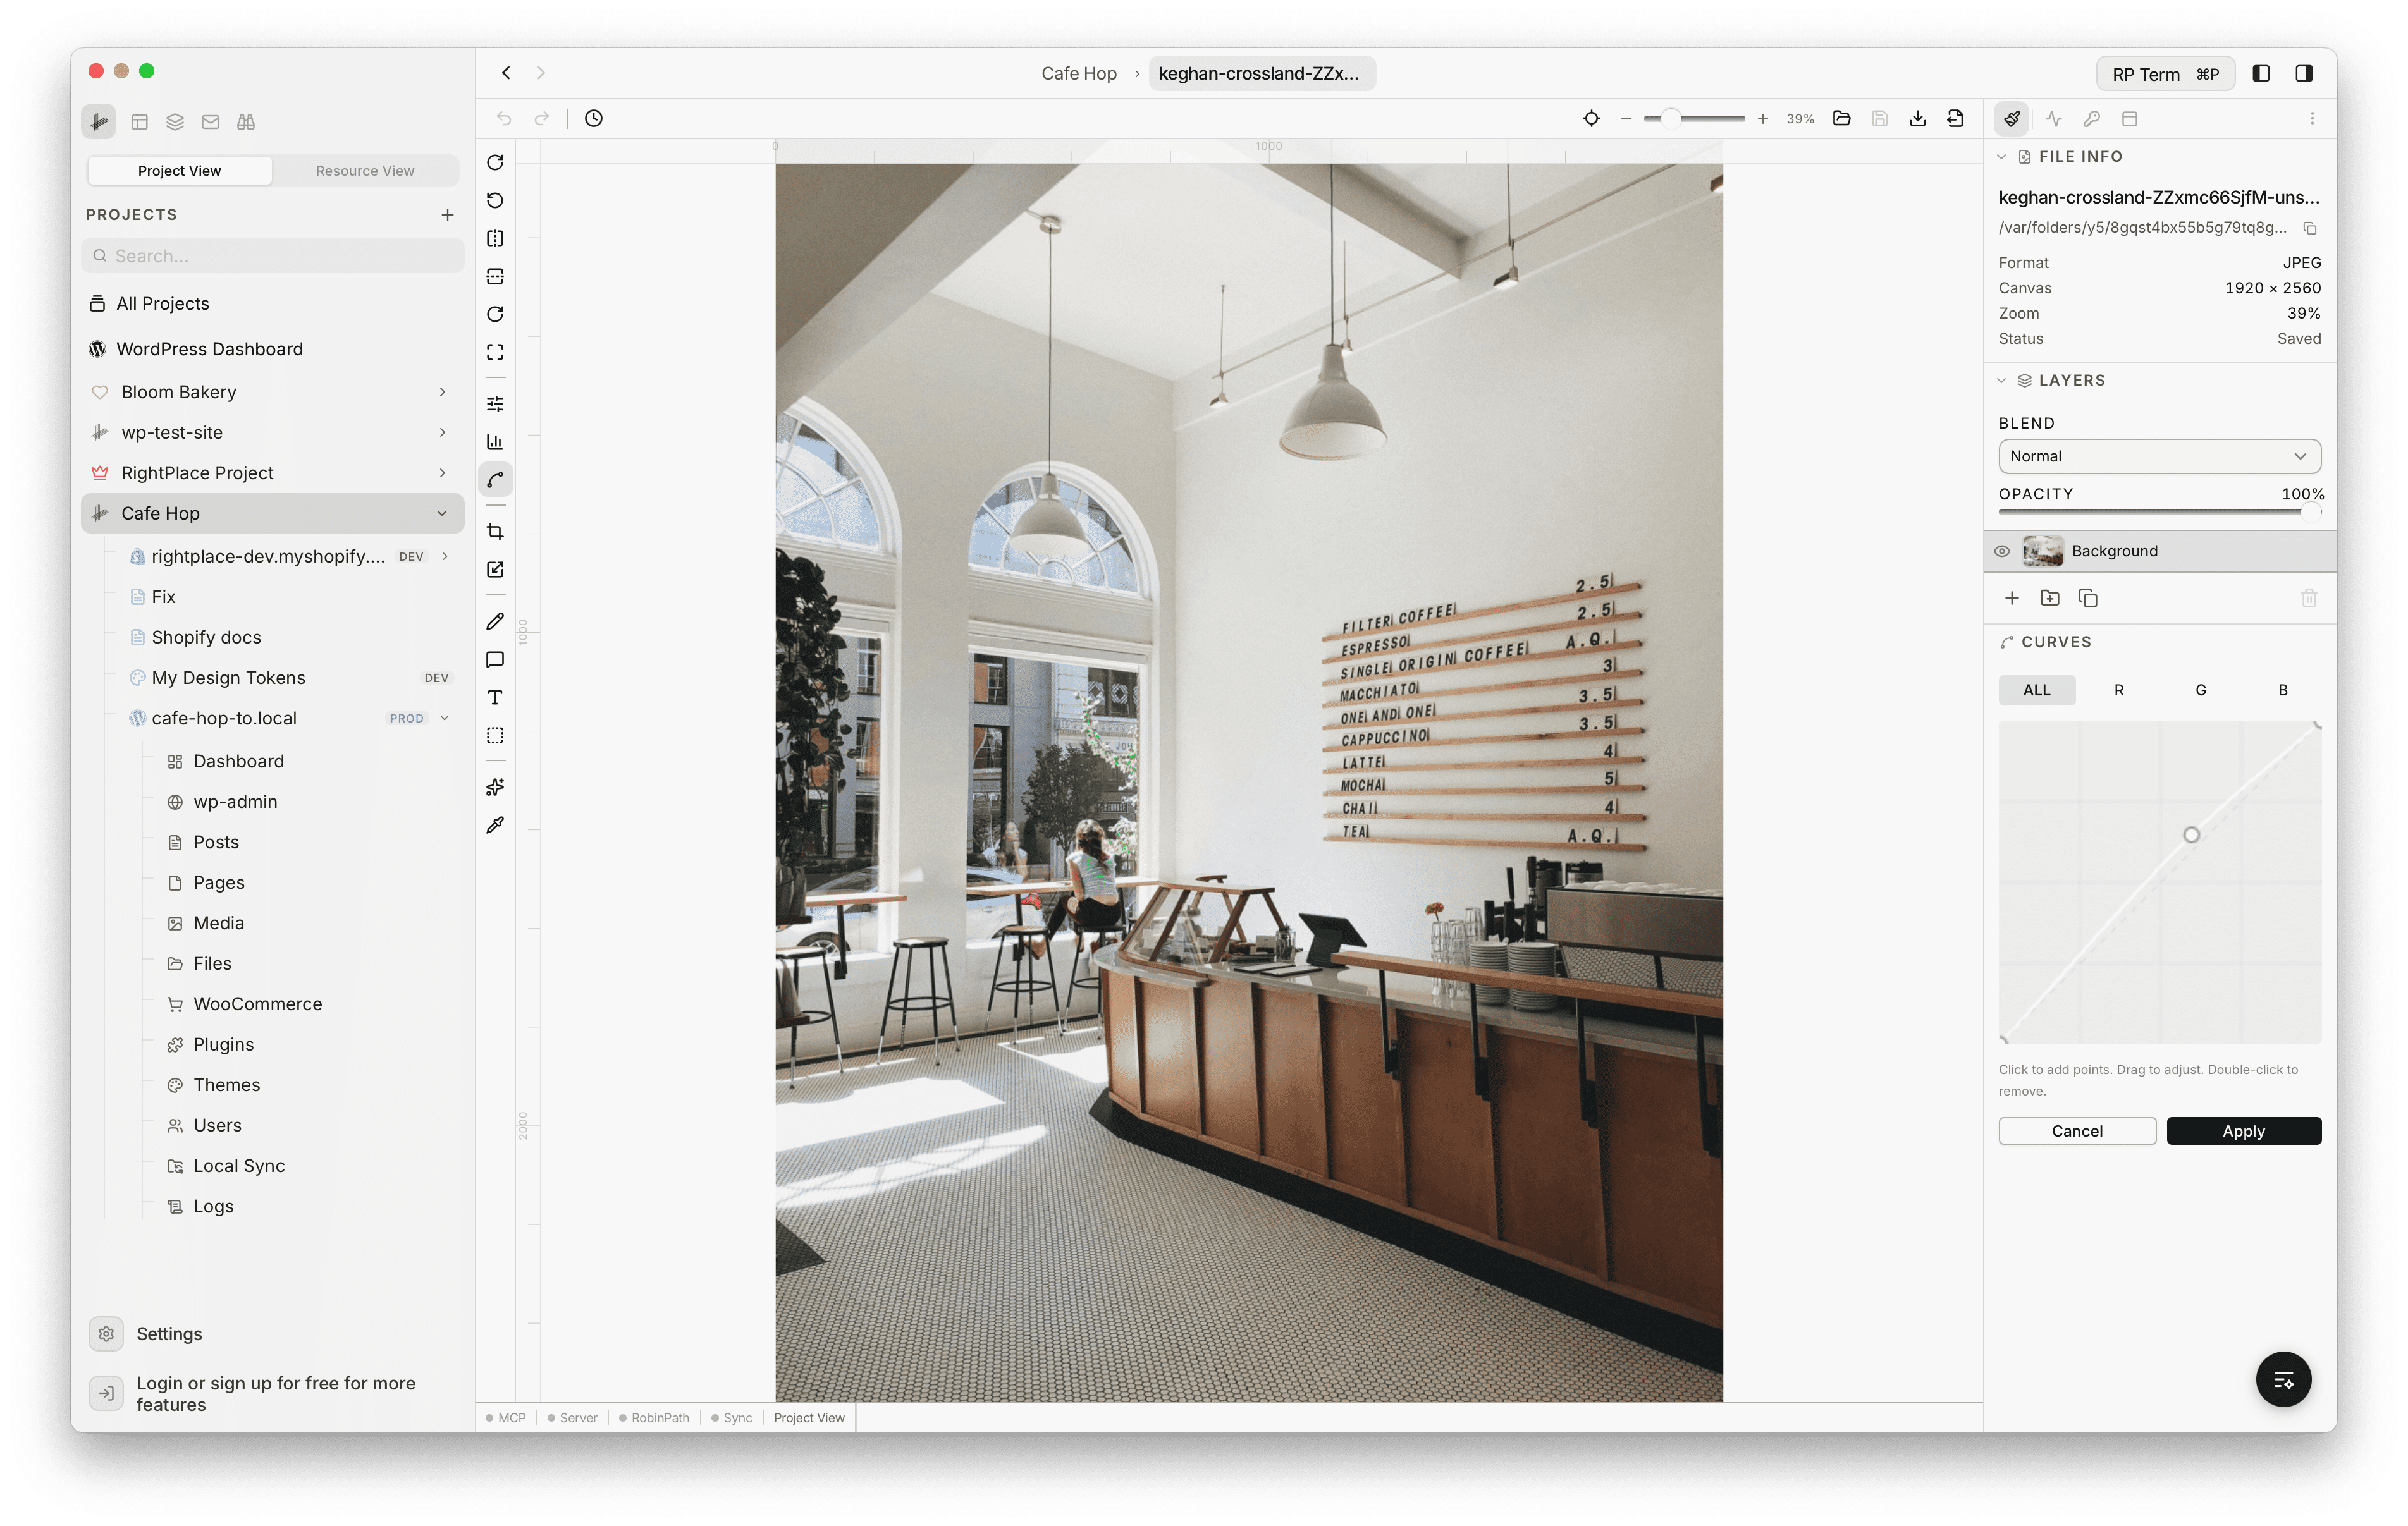
The Curves tool provides advanced tonal control:
- Channel selector: All, R, G, B (color-coded per channel)
- Interactive curve canvas: click to add control points (up to 10), drag to adjust, double-click to remove
- Smooth interpolation: monotone cubic Hermite (Fritsch-Carlson) algorithm
- Grid overlay and diagonal baseline for reference
Draw Tools (B)
The Draw panel offers ten sub-tools for painting and creating shapes:
- Brush: freehand painting with color picker and size control (1-100px)
- Eraser: remove content with adjustable size (1-100px)
- Rectangle: filled or stroked rectangles with corner radius (0-200px)
- Ellipse: filled or stroked ellipses/circles
- Line: straight lines with thickness (1-50px) and line cap options (round/butt)
- Polygon: regular polygons with configurable sides (3-64)
- Star: customizable stars with point count (3-32) and inner ratio (10-90%)
- Pen: click-to-add bezier curve points, drag for curves, close path with Enter
- Fill (Bucket): flood fill with color tolerance (0-255)
- Gradient: linear or radial gradient with start/end colors and opacity
All shape tools support fill color, stroke color, stroke width, and opacity controls.
Annotate Tools (N)
Ten annotation sub-tools designed for marking up images and creating visual documentation.
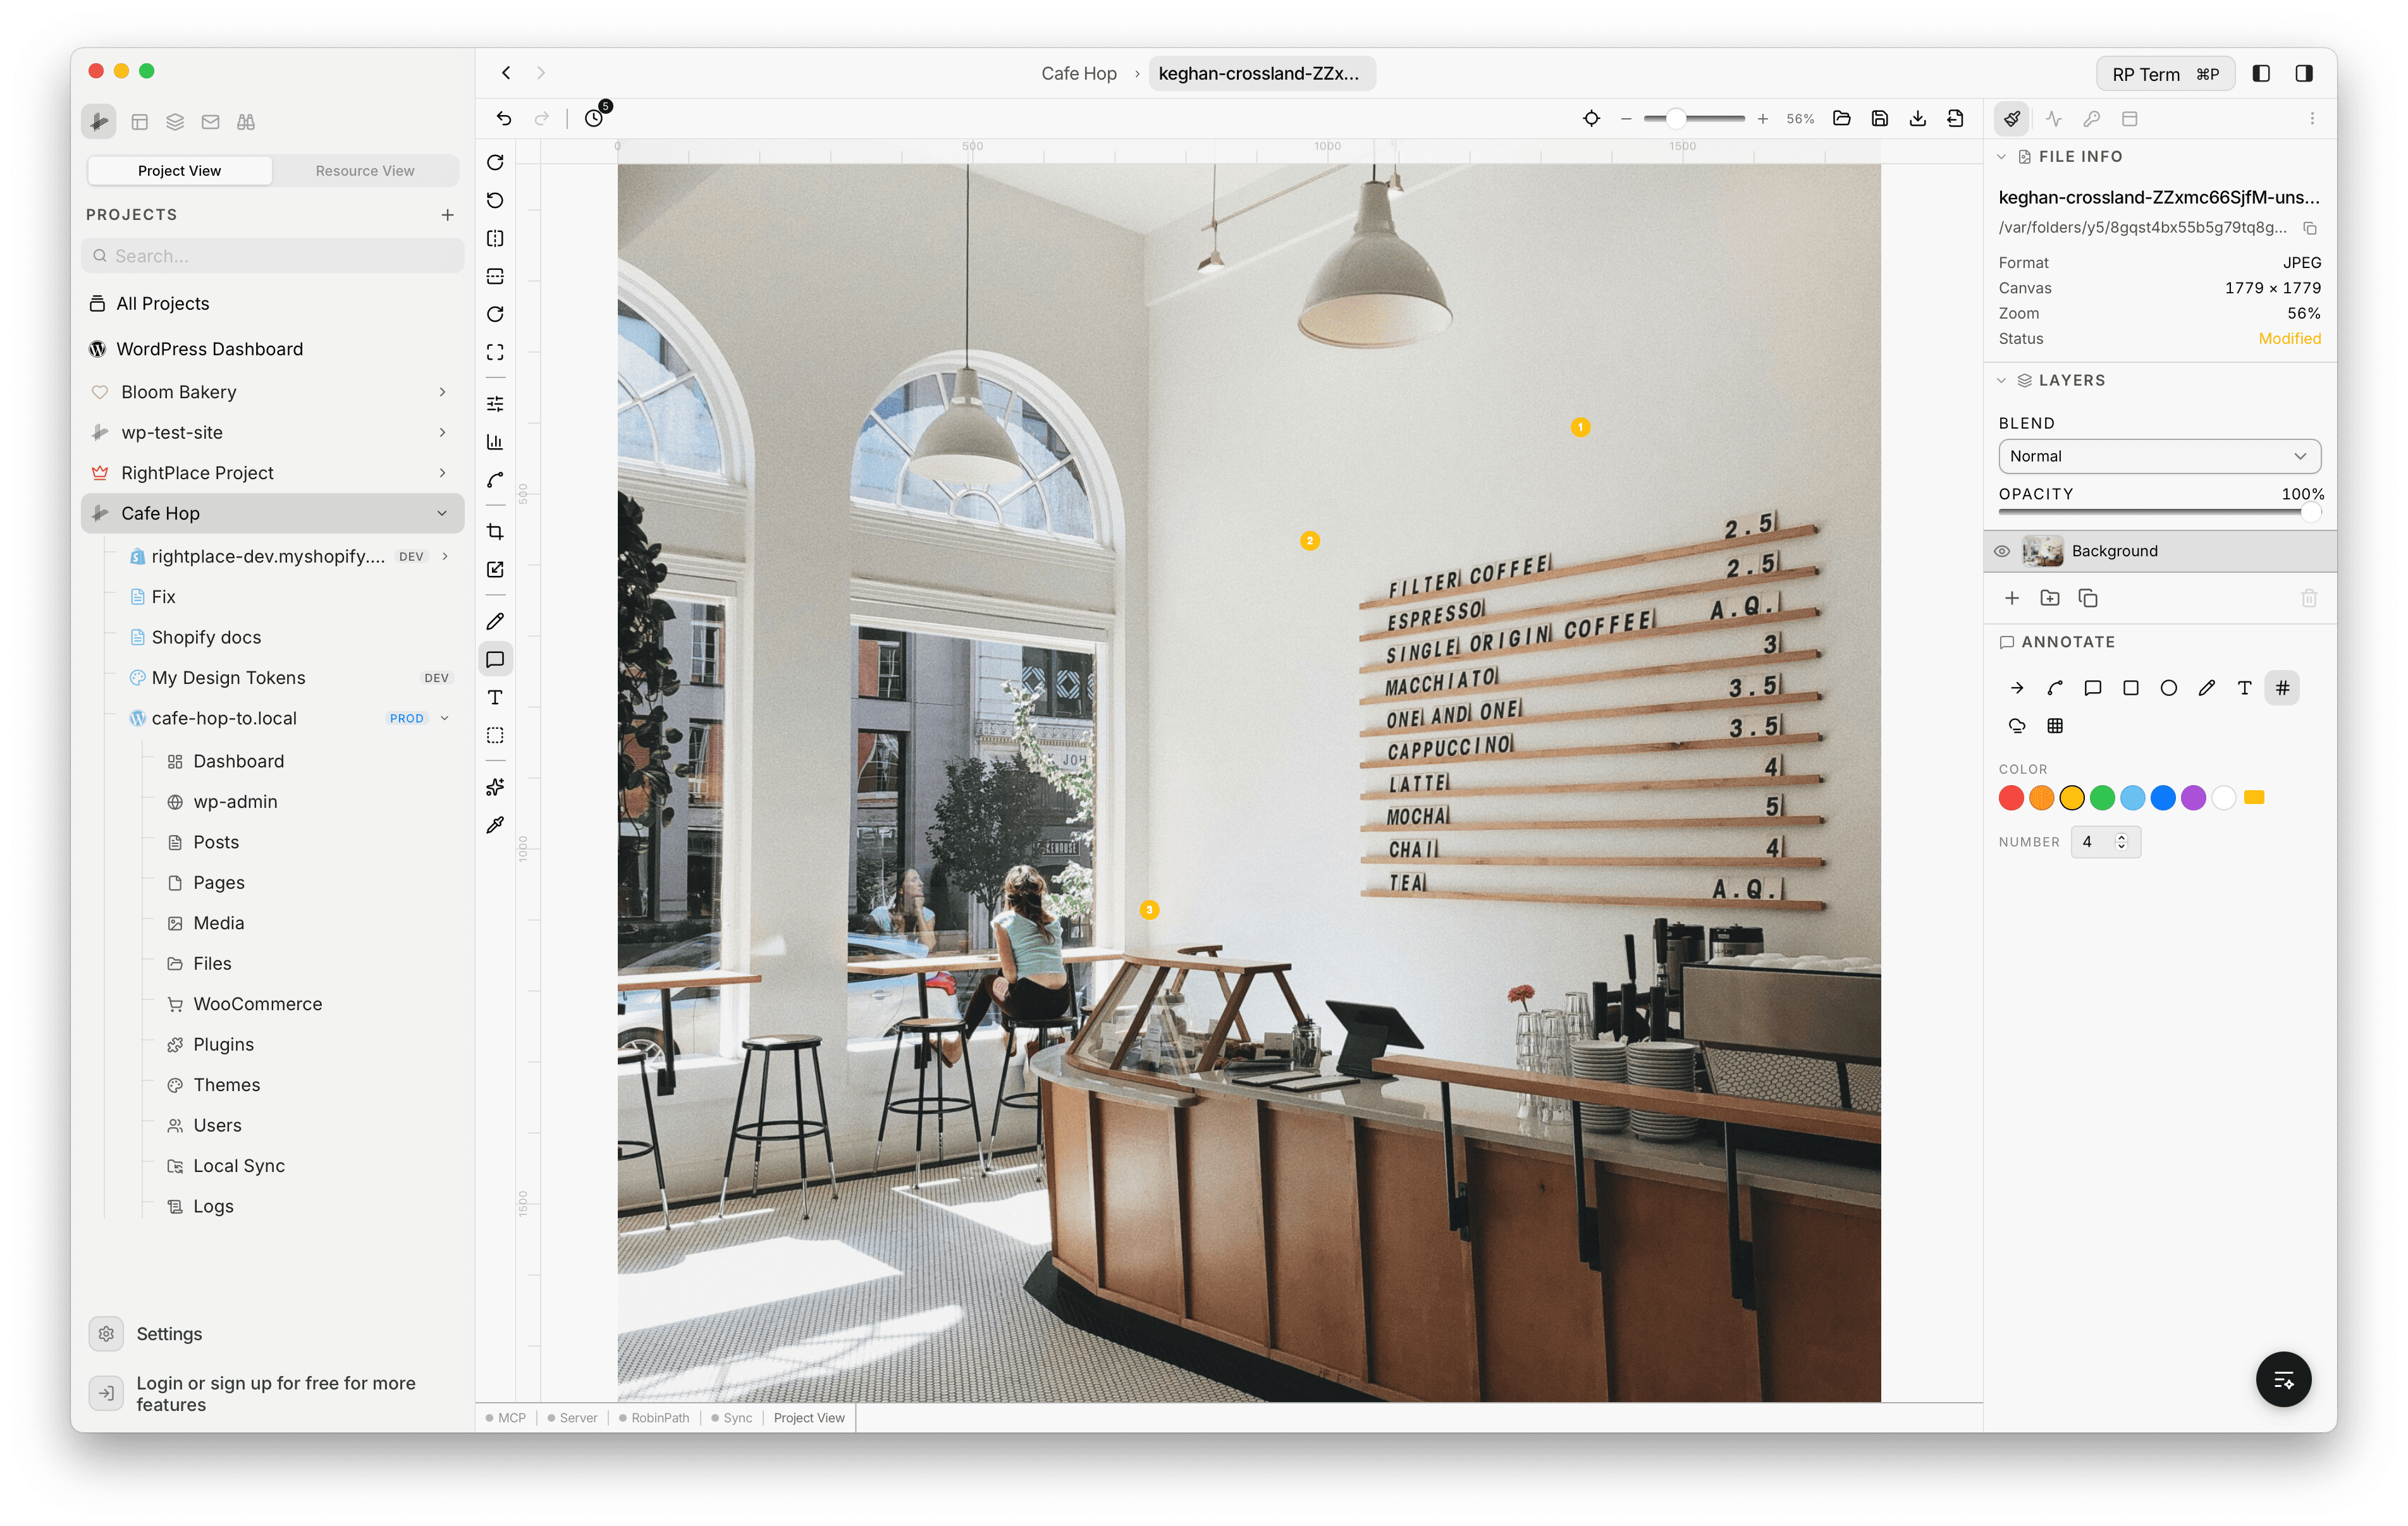
- Arrow: straight arrows with configurable thickness (1-20), head size (5-30), and opacity
- Curved Arrow: bezier curve arrows with the same controls
- Callout: text callout boxes with opacity control
- Rectangle Highlight: filled or outlined rectangular highlights
- Ellipse Highlight: filled or outlined elliptical highlights
- Freehand: pen-like annotation strokes with color and thickness
- Text Label: text annotations with color
- Numbered Marker: auto-incrementing numbered badges for step-by-step guides
- Blur Region: selectively blur areas with adjustable strength (0-100%)
- Pixelate Region: pixelate areas with adjustable block size
Text Tool (T)
Add and style text layers with full typography controls. Text appears as a draggable, resizable overlay on the canvas with Done and Cancel buttons for inline editing.
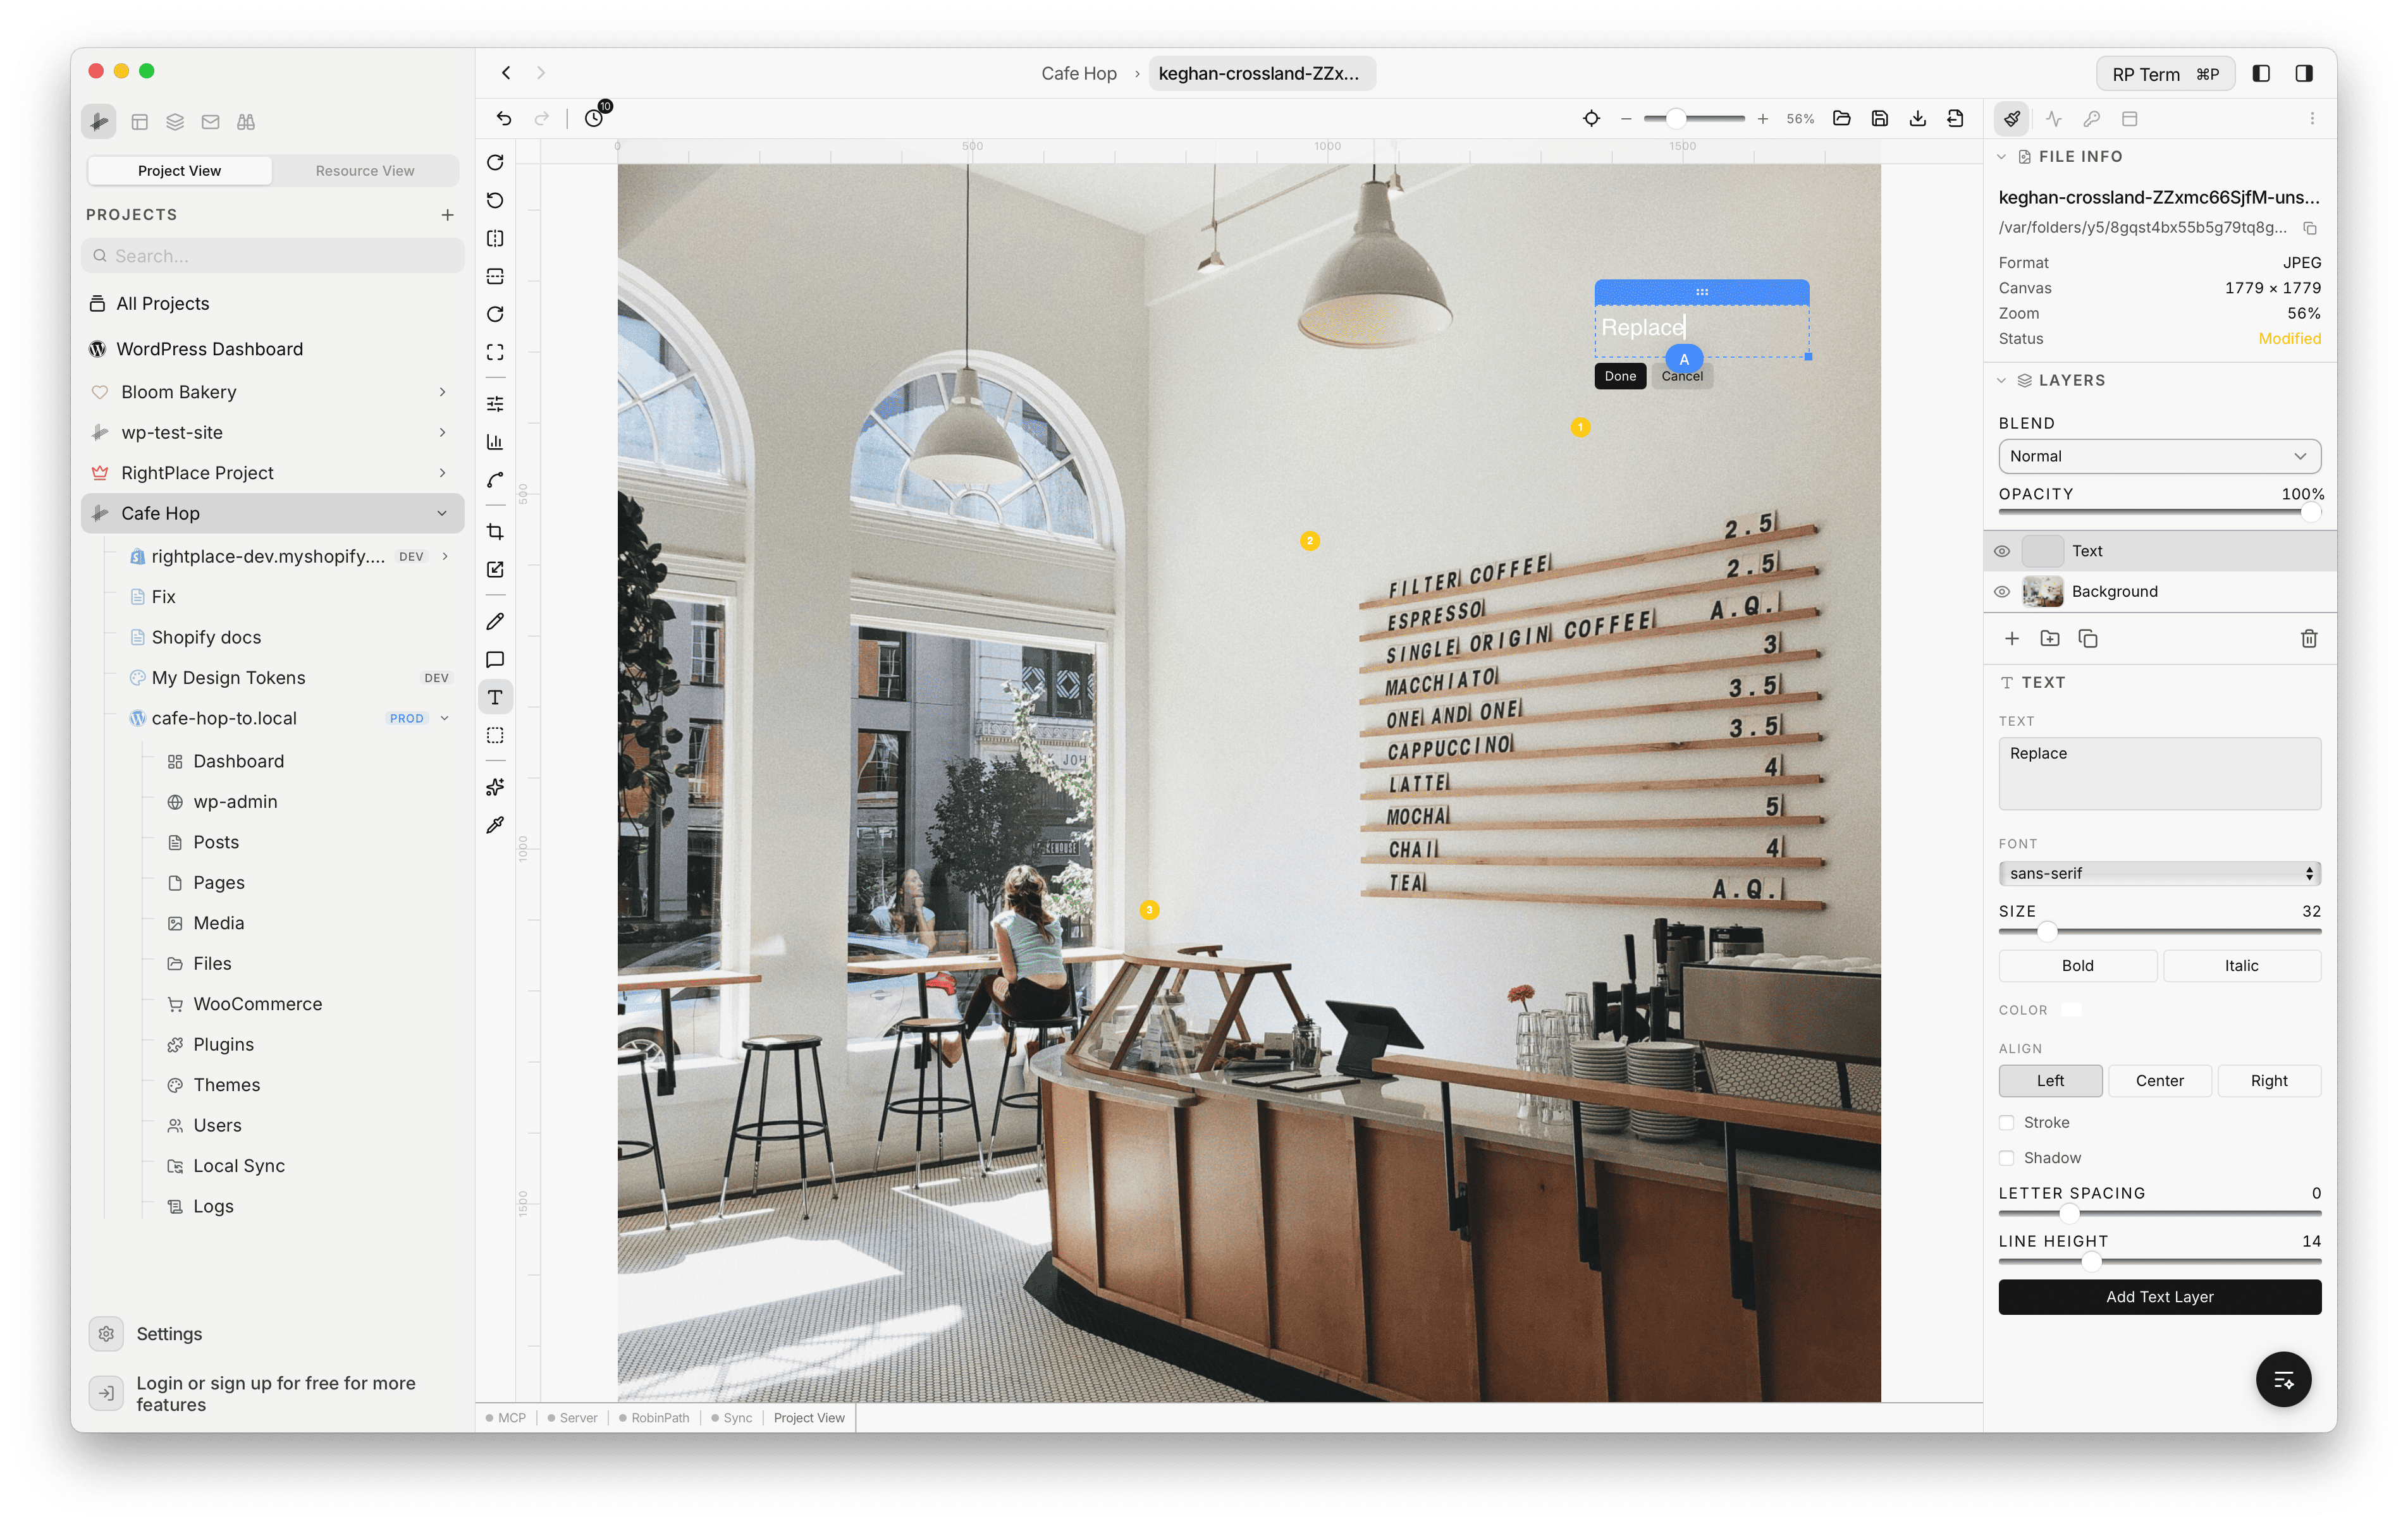
- Text input: multiline text area
- Font families: 5 bundled fonts (Inter, Playfair Display, JetBrains Mono, Caveat, Oswald) plus 9 system fonts
- Font size: 8-200px
- Weight: Normal (400) or Bold (700)
- Style: Normal or Italic
- Text color: full color picker
- Stroke: toggle on/off, color picker, width (0-10px)
- Shadow: toggle on/off, offset X/Y (-20 to 20), blur (0-30), color
- Alignment: Left, Center, Right
- Letter spacing: -5 to 20
- Line height: 0.8 to 3.0
Selection Tools (S)
Five selection sub-tools for isolating regions:
- Rectangular: drag to select a rectangular area
- Elliptical: drag to select an elliptical area
- Lasso: freehand selection path
- Polygonal: click-based polygon selection
- Magic Wand: color-based selection with tolerance (0-255)
Selection Modes
- Replace: new selection replaces the existing one
- Add: expands the current selection
- Subtract: removes from the current selection
- Intersect: keeps only the overlapping area
Selection Operations
- Feather: blur the selection edge (0-100 radius)
- Select All / Deselect / Invert
- Copy / Cut / Delete the selected region
- Fill Selection with a chosen color
Eyedropper (I)
Click anywhere on the canvas to sample a color. The sampled hex value is displayed and automatically copied to your clipboard. The sampled color can be used as the brush color.
Keyboard Shortcuts
Press ? to open the keyboard shortcut overlay. Key shortcuts include:
| Shortcut | Action |
|---|---|
| Cmd+Z | Undo |
| Cmd+Shift+Z | Redo |
| Cmd+S | Save |
| Cmd+Shift+S | Save As |
| Cmd+Shift+E | Export |
| Cmd+0 | Fit to view |
| Cmd+Plus/Minus | Zoom in/out |
| A | Adjustments |
| B | Draw |
| C | Crop |
| H | History |
| I | Eyedropper |
| L | Levels |
| N | Annotate |
| R | Resize |
| S | Select |
| T | Text |
| U | Curves |
| W | Skew |
Saving Edited WordPress Media
When you open an image from the WordPress media library, the editor tracks its origin. Saving writes the edited image back to WordPress, keeping the media attachment updated.
AI Tools - Coming Soon
AI-powered image editing features including text-to-image generation, inpainting, background removal, upscaling, style transfer, and vision analysis are currently in development.
Widget
Appears when an Image Editor tab is active. This is the main tool selection panel for the image editor.
File Info section:
- Filename and parent directory path with copy button
- File format, canvas dimensions, and current zoom level
- Modification status (Modified / Saved)
Tool selection: click any tool to activate its editing mode on the canvas. Each tool opens a dedicated settings area within the widget panel:
| Tool | Description |
|---|---|
| Adjustments | Brightness, contrast, and saturation sliders |
| Crop | Crop the canvas with aspect ratio presets |
| Resize | Change canvas dimensions |
| Rotate | Rotate the image by degrees |
| Skew | Apply horizontal or vertical skew |
| Draw | Freehand drawing with brush settings |
| Eyedropper | Pick a color from the image |
| Levels | Histogram-based tone adjustment |
| Curves | Advanced tone curve editor |
| Annotate | Add shapes and text overlays |
| Text | Place text layers on the image |
| Select | Selection tools for isolating regions |
| AI | AI-assisted editing tools |
| Export | Export the image in different formats |
| History | Visual undo/redo timeline |
When a tool is active, its specific settings and controls appear in the widget panel below the tool grid, replacing the file info section. For example, selecting Adjustments shows brightness, contrast, and saturation sliders; selecting Crop shows aspect ratio presets and crop handles.
Agent tools
Every action this applet exposes as a typed, permissioned tool that agents can discover and run over MCP, the same actions your team uses in the UI.